Unlimited Run Deluxe Tron Disc Retrofit Kits

...Ouch. Obviously, I was not made for this. I've destroyed one side of a deluxe disc already due to bad handing (I got a spare though!) and I haven't even gotten half way through cutting out the C-Ring holder on the top portion of the disc which has already taken about six cutting discs. I've got about 20 cutting discs left so here's hoping I'll make at least 10 more. If the motor doesn't over heat of course (sucker gets hot!).

Wish me luck! The Pink Utena Identity Disc will prevail!
 
how far are the week 6 orders? I really hope i get mine this week, but seeing as how i havent gotten my email confirmation or instructions yet im betting it'll be a while
 
Good luck on your mod Jeyl. You might try drilling tiny holes through the sides of the C-ring holder before cutting. That might make the process easier. I've received your order for a second C-ring for the back side as well.
 
how far are the week 6 orders? I really hope i get mine this week, but seeing as how i havent gotten my email confirmation or instructions yet im betting it'll be a while

I have 2 orders in front of yours masterpotty. Your kit will ship out very soon!

All week 5 orders finished!
 
Hey Soul brotha!

I know you're probably swamped with orders and emails all the time. Just wondering what your lead time is on the two extra 'C' rings I ordered last week. Let me know whenever you get a free moment. Thank you!!
 
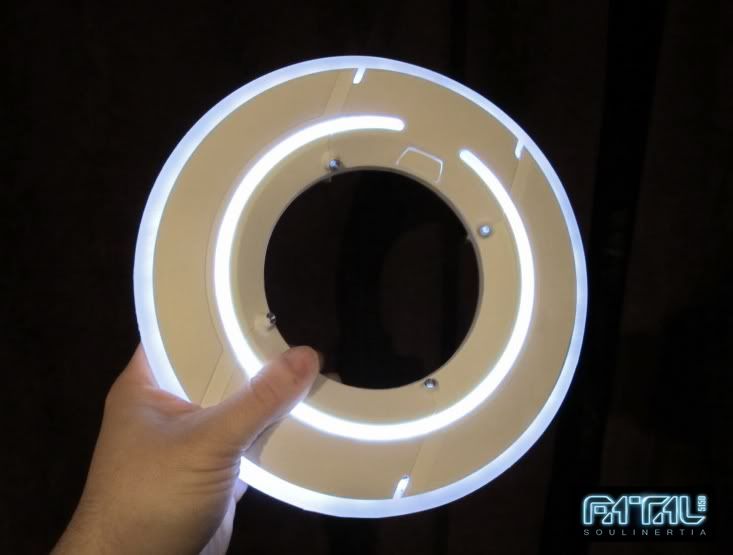
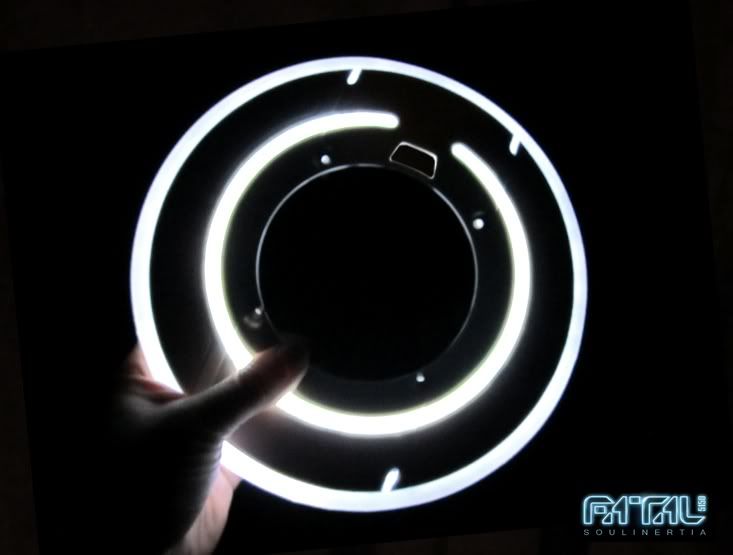
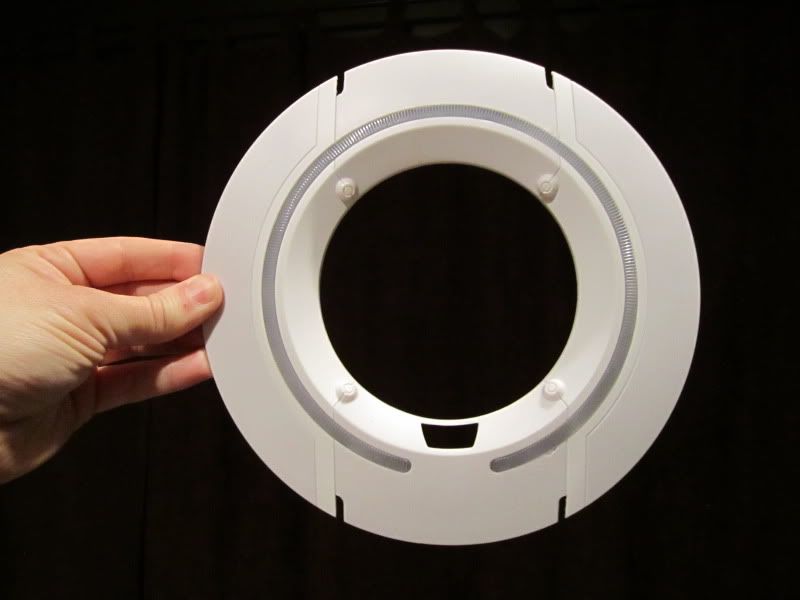
Alright! The top side of the disc is done! I'm very very pleased with how the metal bezel mounts turned out. I was so scared that drilling through the four nodes would cause disaster due to the fact I've hardly drilled through anything in my life. After testing on the bad disc, it was actually one of the easiest parts of the whole modification. The trick was going from the smallest drill size to the one needed that fit the bezels.

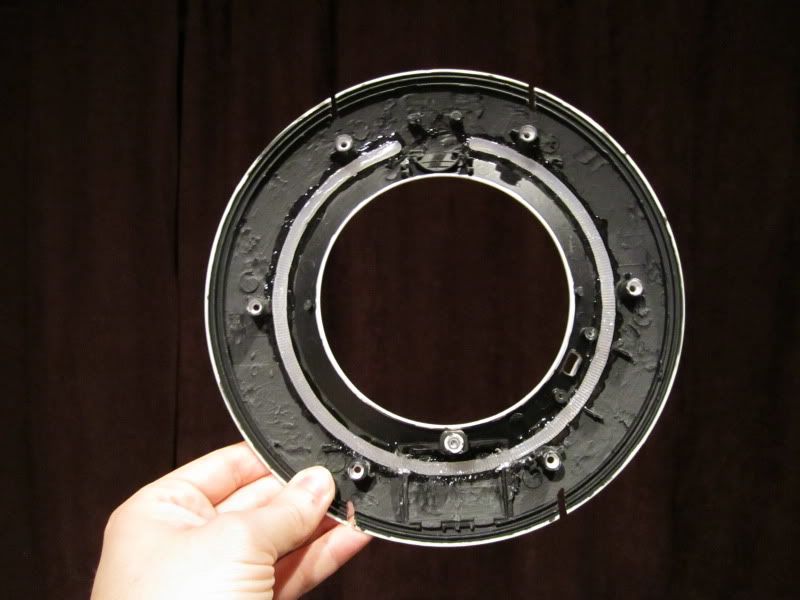
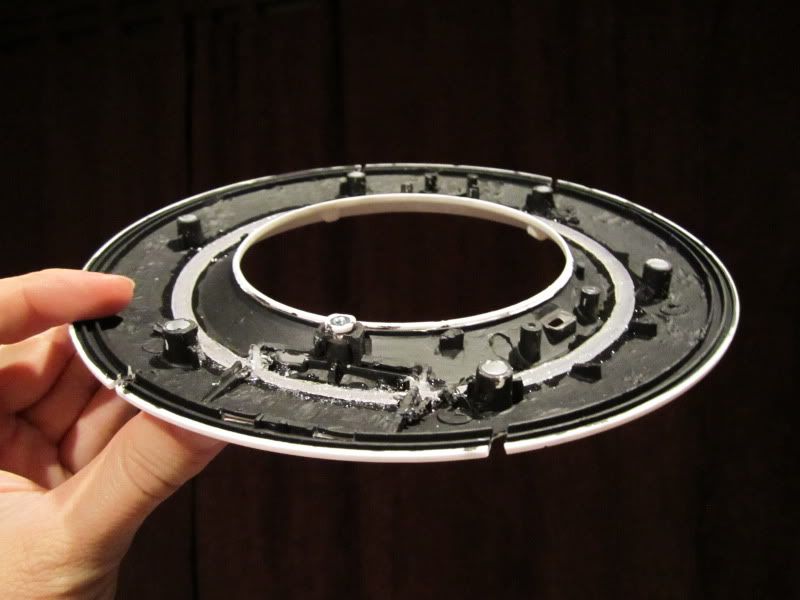
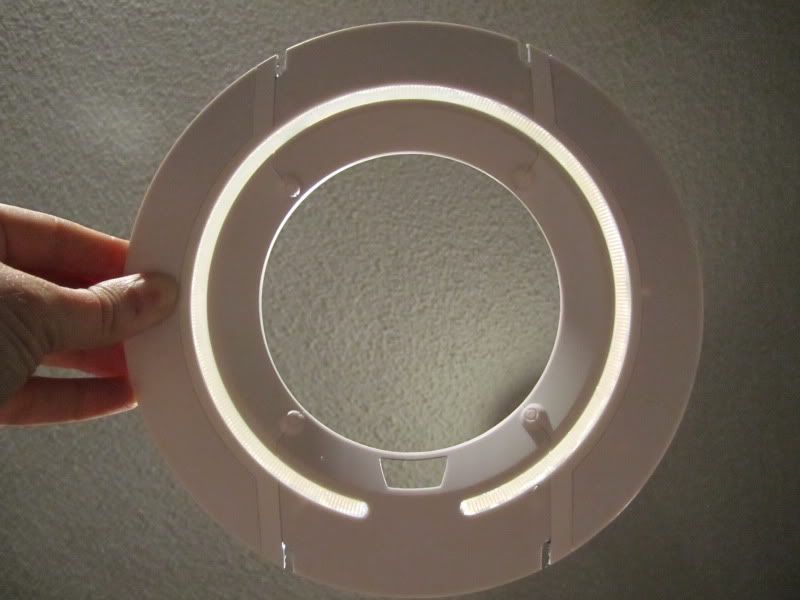
Also, I decided to paint the bezels black on the outside to make them look more screen accurate (as pointed out in the manual) but I didn't want to resort to hand painting since I'm so terrible at it. Instead, I went online to look up some sites for the best paint on metal materials that I could find. No luck. Finally I decided to give the good old Lacquer a try. SDstudios always chatted about how Lacquer was a very strong paint and my arts and crafts store had some black lacquer spray paint in stock. But there was another problem. How do I keep the inside clear but still coat the outside of the Bezel with the Lacquer? Unfortunately the manual provided no instructions or suggestions on how to do this. Shame on you Soulinertia! So I improvised.

What I ended up doing was taking four Q-tips, cutting off the bottom portion and putting it through the bezel so that the inner portion is completely filled with the cotton while still exposing the outside. I was worried that the Lacquer would seep through the cotton, but I know of no other alternative. So I took the bezels outside, applied the Q-tips and sprayed away. The results were fantastic. Not a single bit of paint got inside any of the bezels, and the Lacquer was incredibly strong with all the rubbing it endured when fitting them into the newly drilled disc.

I'll try and post pictures of it tomorrow when I start working on the bottom portion again.
 
Last edited:
Finished white KFlynn disc. (Took 6 coats of black paint on the interior to block out the light.)

whitediscon.jpg


whitediscoff.jpg
 
Hey Soul what type of paint did you use?

I just used standard black acrylic.

Here are some progress pics:

IMG_0135-1.jpg

Front Half

IMG_0136-1.jpg


IMG_0137-1.jpg

Back Half

IMG_0138-1.jpg


IMG_0140-1.jpg

Front

IMG_0139-1.jpg

Back *Note the full C-ring on the back side. I was able to glue the battery lid parts to the C-ring section and discovered it was structurally stable enough to hold! No more battery lid "window". Full C-ring on both sides! I'll be reworking the instructions to explain this in more detail.

IMG_0142-1.jpg

Front

IMG_0143-1.jpg

Back

IMG_0169-1.jpg

I forgot to paint the button. Oops!

IMG_0168-1.jpg

Still need some touch up paint around the battery compartment lid.

IMG_0167-1.jpg

Blade edge
 
So did you paint before or after the mods? When you say acrylic "Brush" or "Spray"?

I am gonna have to go this route with my White disc. Looks a lot better then the "X-Ray" look.
 
IMG_0181-1.jpg

Front w/Flash *Note: I spray painted the exterior of the bezel mounts white before installing them.

IMG_0182-1.jpg

Back w/Flash *Note: magnets installed, slider switch spray painted white. (I still need to paint the screws white as well.) You'll also notice there is no second slider switch. This is actually my new prototype disc which utilizes a push button switch that makes use of the existing button to turn on and off the outer ring. I'll post a video of it's operation soon!

IMG_0185-1.jpg

Inner ring lit only Front

IMG_0183-1.jpg

Inner ring lit only Back

IMG_0192-1.jpg

Both rings lit Front

IMG_0205-2.jpg

Note: I used the "tungsten" light setting on my camera for this shot. Gives it a more bluish hue.

IMG_0203-2.jpg


End of Line. :cool
 
Back
Top