You are using an out of date browser. It may not display this or other websites correctly.
You should upgrade or use an alternative browser.
You should upgrade or use an alternative browser.
1/9th Scale Jaws Orca (NECA Size)
- Thread starter DCN
- Start date
DCN
Sr Member
50 year anniversary, you know that place is going to be nuts. Let's do it! Might have to start looking for hotels or BnB's now. It's not a very big island.your on
DCN
Sr Member
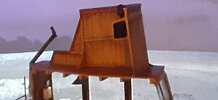
I wish I could wire the flying bridge and mast the way you did, but I'd run into a problem. The leds I'm using have resistors attached to them. That means I have to keep the polarity on each led correct as I lengthen the wire. The other problem stopping me from using your method, is I have to keep the radio channels separate. It's very doable, just not with the phone jack which would have kept things nice and neat. The mast, main cabin, flying bridge and stern nav light wiring are the easy ones. The wiring that keeps stopping me is the forward cabin and v-birth lighting. I just don't see in my head and on the boat where the wires are going to be routed and hooked up. I can see the location for the wires under the deck, it's when I have to traverse the wire through the forward cabin side wall that bugs me. I thought about using a quarter inch square channel tube to hide the wire on the side wall leading to the cabin roof. (Are you feeling my mind bending craziness yet with this wiring? lol) I'll figure it out. I really want to get going on the cabin back wall, and roof. Then I can get the mast and exhaust location cut on the deck. Once that's done I'll feel like another major hurtle on the boat is done. Are we having fun yet? YES we are! lol
DCN
Sr Member
Except for the base trim and ships wheel, the helm is done. The guage faces are next. Since the helm top opens I'm going to make all the guages with there electrical wires. I found and ordered the smallest zip ties I've ever seen, so I can bundle all the wire. I thought about lighting the guages, but you never see them lit in the movie,....I'm saved lol.


Left hand down a bit,I had a special request on Facebook asking if the figures fit in the hatches. They fit lol.
View attachment 1744730
DCN
Sr Member
The back wall of the cabin is almost done. The door is done, I have to get a piece of brass tomorrow for the kick plate. I found a picture of the real orca that I'm guessing Eric Hollander snapped that showed an aluminum kick plate on the outside part of the door. The plexiglass window is fitted until I paint and stain the door. The back window trim I still have to work on. That sliding double vent is going to be a bitch to fit. The porthole is done. The 3D printed porthole, inside, outside and inner plastic trim fit nicely. I'm up to the deck lights......more wiring....grrrrrrr.


srspicer
Sr Member
Yes, I have used them both on a Pennsylvania long rifle build. The Brass black is like a liver of sulfur. It will blacken the raw brass. You have to sand through the black finish to reveal the engraved detailing. All recessed/engraved lines will be black. You sand the high points down to the brass to create the contrast.Has anyone ever seen or used this product? I was told brass black ages brass and cooper beautifully, and perma blue will age steel and aluminium the same way.
View attachment 1746700View attachment 1746701
The Perma-blue is a chemical that will 'blue' finish. It is used to touch up blued steel surface as a repair to the finish on firearms. It is considered a cold treatment. Real 'bluing' is achieved with heat and chemicals. Both products should work well for scale modeling needs.
Hope this helps.
Last edited:
DCN
Sr Member
YES Thank you! Can't wait to try this stuff. I'm hoping to achieve a weathered look for the brass and aluminum pieces on the boat.Yes, I have used them both on a Pennsylvania long rifle build. The Brass black is like a liver of sulfur. It will blacken the raw brass. You have to sand through the black finish to reveal the engraved detailing. All recessed/engraved lines will be black. You sand the high points down to the brass to create the contrast.
The Perma-blue is a chemical that will 'blue' a finish. It is used to touch up a blued steel surface as a repair to the finish on firearms. It is considered a cold treatment. Real 'bluing' is achieved with heat and chemicals. Both should work well for scale modeling needs.
Hope this helps.
DCN
Sr Member
I'm thinking ahead of myself again. Paint and stain colors. I'm going with American chestnut stain for inside the main cabin. Filmzy, I'm using the 50GY66/111 PPG color you used as the main exterior color of the boat. (Sorry, it's a bad picture) The red trim and deck color I've chosen Aura CSP-1185. They call it Hairloom Quilt. To find that color, I matched up pictures of the real Orca, and 4 model builds of the Orca. Filmzy's, FlyingFishes, Uwe's Facebook Orca Project, and a guy in France who also built a 1/9th scale Orca. Believe it or not, they all agree, or very close to the real orca "Red".......or Oxide,......or whatever color that is, But, it's not red, don't use red, red is only going to be blood in this movie, so says Stephen Spielberg to Joe Alves. LoL


Similar threads
- Replies
- 3
- Views
- 670
- Replies
- 24
- Views
- 3,595

