Re: 1:1 Wall-E Build (WIP - Pic Heavy) - Now with a name plate.
Just came across this. Amazing build so far. I am blown away by the paint job. Spot on!!! Can't wait to see more.
Welcome to my build thread, I happy to have you. More is on the way...
this is incredible, that paint job! can't wait to see more of this guy.
Many thanks -I think the paint and weathering is the most fun part of the build. It's where the prop really comes to life. What's funny, is after awhile I start to believe my own paint job -I was actually avoiding a "oil stain" because I didn't want to get it on my hands
")
This is bloody fantastic. Are you eyeballing everything, or working of of plans?
I'm using plans found on the Wall-E Builders Group. I'm treating this like a speed build, I'm not as meticulous with my measurements as I am on some other builds (I'm trying to have Wall-E ready by Halloween).
Just getting better, love how it look now. Top-notch build!
Yodamann: he had some plans previously, at least for the arms or something.
Thanks mate! I'm really enjoying your build as well! (and thanks for the assist to Yodamann)
Thursday and Friday were a major push to get Wall-E ready for the Friday school carnival. I literally finished painting and installing the last piece 20 minutes before I started loading Wall-E into the car.
I posted all the build progress shots earlier, but thought I'd throw up some "beauty shots" -a significant amount of weathering has been added.
Here's the big guy in all his glory
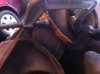
Final weathering on the eyes, neck and top panel
Audio control panel (panel and buttons are styrene and non-functional). At a later point I may redo and make the buttons functional to control the MP3 player that runs his sounds.
Added weathering and grime to Wall-E's name plate (and a close up of his chip -done using the mustard weathering method). I think the name plate is my favorite part of the build
Completed weathering on the back panel and pistons
Final weathering on the neck
This bolt is the only visible, functional bolt on Wall-E. It controls the tension required to tilt Wall-E's head/neck
Lower neck and paint chips on the top panel (again done with the mustard method)
Final weathering on the right arm
Final weathering on the right hand
Last but not least, me and the kids at the school event
Wall-E was a big hit during the event. I had him setup in the cafeteria, so when people came in to eat or cool off they'd see him. I think about 30 different families took pictures with him and lots of people wanted to know more about the build and what he was made of. I built a light box behind the control panel and had his front lit up and there was a MP3 player and speakers inside the body playing a loop of Wall-E sounds (the kids loved it).
Lessons learned? Quite a few:
1) Building the fingers from MDF was a mistake. The joints are too weak and tend to break; Wall-E had a finger snap off early in the event.
2) People, kids in particular, are pretty grabby and rough -buttons were pushed, arms and fingers moved, eyes poked and head grabbed. Wall-E fared pretty well, but I'll need to get him a little more reinforced before he's outside for Halloween. SK, when your MF cockpit goes display be prepared for damage -everyone wants to treat the prop like they saw it used in the movies.
3) I'd like to make Wall-E a little more interactive. Right now the buttons are static and non-functional -it'd be fun to have them hooked into either lights on the chest, or sounds.
I'm taking a break from the Wall-E build for a few days to build a permanent workbench in the garage - I'm tired of working off a couple of sawhorses. When I resume the build it will be time to attack the tank treads.
More to come...