My PKD Bladerunner pistol build.

This can be a bit of a rabbit whole. Budget, time,knowledge and ability are major factors in my progress.
You guys are so skilled, knowledgeable and experienced that I am apprehensive in my end result as I have a lot to live up to. I am also apprehensive in the painting of this pistol as I know it can either make or break this project.
Like robotprops says, just take your time and, wherever you can, work out what you're going to do before you do it... just as you're doing. In all the time I've been building and painting models and props (in my rather amateur way) the times it's gone really wrong is when my impatience has made me rush into doing stuff without double checking my references or fully thinking through what I'm doing. Still catches me out to this day! But I'm better at pausing and thinking than I was! You're doing all the right things so far.

As far as the painting goes, if you're at all unsure about colour or finish for a part, don't jump right into painting straight onto the part itself. As you say, that can 'make or break' (although there's not much that you can't recover from if you do 'break'... it's usually just the time and frustration to strip everything back and start again). I always keep scrap pieces of resin so that I can use them as test pieces for paint finishes - go through all the steps you're planning to go through on them rather than the actual kit part(s). That way, if something is going to go south it won't matter as it's on a thrwaway item anyway. And if it goes OK you've got the confidence to do it again for real!

Based on what you've posted so far, I'm really looking forward to seeing your progress!

As for your colour choices above, they look good, and pretty much match the preliminary colours I'd planned when I come to do mine. I'm going to use Alclad lacquers, I think - Stainless Steel for the Bulldog frame, trigger guard, triggers, barrel and the 'post', Gunmetal for the Bulldog 'inner' grip frame with heavy weathering back to stainless steel around the edges, Steel for the receiver and bolt handle assembly, Polished Aluminium for the butt plate and either Polished Aluminium or Stainless Steel for the inner bolt. The outer grip frame with be gloss black with weathering back to Stainless Steel. All the covers, the sight, clip housing etc. will be either gloss black or satin black.

I'm slowly prepping my kit parts for fit and pre-primer finish at the moment, but major work on this kit is waiting until I finish another (TipTop/Anders P) project that's intervened in the meantime. It's all but finished - just waiting for a replacement part from eBay. Teaser below! :)

6B197F86-2C15-4DD5-B9F7-79136D26D2C2_1_201_a.jpeg
 
This can be a bit of a rabbit whole. Budget, time,knowledge and ability are major factors in my progress.
You guys are so skilled, knowledgeable and experienced that I am apprehensive in my end result as I have a lot to live up to. I am also apprehensive in the painting of this pistol as I know it can either make or break this project.
You only have to live up to your own expectations. Everyone starts somewhere and the learning never ends. My last kit build had to be repainted 3 times due to some minor errors. I’ve been doing this as a hobby since I was a kid and professionally for almost 20 years and I still have a lot to learn so don’t pressure yourself too much.
And don’t forget, this is your thread. If you wanted you could tell us all to sod off and start our own. :)
 
Like robotprops says, just take your time and, wherever you can, work out what you're going to do before you do it... just as you're doing. In all the time I've been building and painting models and props (in my rather amateur way) the times it's gone really wrong is when my impatience has made me rush into doing stuff without double checking my references or fully thinking through what I'm doing. Still catches me out to this day! But I'm better at pausing and thinking than I was! You're doing all the right things so far.

As far as the painting goes, if you're at all unsure about colour or finish for a part, don't jump right into painting straight onto the part itself. As you say, that can 'make or break' (although there's not much that you can't recover from if you do 'break'... it's usually just the time and frustration to strip everything back and start again). I always keep scrap pieces of resin so that I can use them as test pieces for paint finishes - go through all the steps you're planning to go through on them rather than the actual kit part(s). That way, if something is going to go south it won't matter as it's on a thrwaway item anyway. And if it goes OK you've got the confidence to do it again for real!

Based on what you've posted so far, I'm really looking forward to seeing your progress!

As for your colour choices above, they look good, and pretty much match the preliminary colours I'd planned when I come to do mine. I'm going to use Alclad lacquers, I think - Stainless Steel for the Bulldog frame, trigger guard, triggers, barrel and the 'post', Gunmetal for the Bulldog 'inner' grip frame with heavy weathering back to stainless steel around the edges, Steel for the receiver and bolt handle assembly, Polished Aluminium for the butt plate and either Polished Aluminium or Stainless Steel for the inner bolt. The outer grip frame with be gloss black with weathering back to Stainless Steel. All the covers, the sight, clip housing etc. will be either gloss black or satin black.

I'm slowly prepping my kit parts for fit and pre-primer finish at the moment, but major work on this kit is waiting until I finish another (TipTop/Anders P) project that's intervened in the meantime. It's all but finished - just waiting for a replacement part from eBay. Teaser below! :)
View attachment 1465166
I’m looking forward to seeing that Samaritan build. I saw Dave’s original and it was outstanding. I did a 3-D kit last year that looks good, but that new Tip Top kit has more potential.
 
You only have to live up to your own expectations. Everyone starts somewhere and the learning never ends. My last kit build had to be repainted 3 times due to some minor errors. I’ve been doing this as a hobby since I was a kid and professionally for almost 20 years and I still have a lot to learn so don’t pressure yourself too much.
And don’t forget, this is your thread. If you wanted you could tell us all to sod off and start our own. :)
Not at all I enjoy seeing other members posts.
 
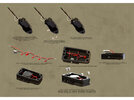
My build is gonna slow up a bit as I wait for replacement/upgrade parts to come in from TipTop. Meanwhile, I can still focus on finishing and painting the parts I have.

The clip needs some more work. Also, I’ve checked and resoldered the LED connections, but fitting everything into the clip (and it’s a tight fit) seems have caused a short or loose connection, somewhere. Seems to be working since I resoldered the connections. We’ll see.

Once I fine-tune the switch hole and the half-moon cutouts in front of the LED bezels, I can light-block with a coat of silver, then more primer, then gloss black.

E969B3DF-F5CF-4F2B-B4E8-27974B04BD54.jpeg
 
My build is gonna slow up a bit as I wait for replacement/upgrade parts to come in from TipTop. Meanwhile, I can still focus on finishing and painting the parts I have.

The clip needs some more work. Also, I’ve checked and resoldered the LED connections, but fitting everything into the clip (and it’s a tight fit) seems have caused a short or loose connection, somewhere. Seems to be working since I resoldered the connections. We’ll see.

Once I fine-tune the switch hole and the half-moon cutouts in front of the LED bezels, I can light-block with a coat of silver, then more primer, then gloss black.

View attachment 1465589

One thing that might be worth double-checking... In the pictures of the original I've seen the LEDs themselves are recessed within their 'holders' (or at most flush with them) rather than protruding through them, both the 3mm ones on the sides and the larger 5mm one on the bottom.

DSC05735.jpg

DSC05790.jpg
 
One thing that might be worth double-checking... In the pictures of the original I've seen the LEDs themselves are recessed within their 'holders' (or at most flush with them) rather than protruding through them, both the 3mm ones on the sides and the larger 5mm one on the bottom.

View attachment 1465593
View attachment 1465594

Yes, I noticed the recessed LEDs, and that will be part of the fine-tuning.

Meanwhile, the LEDs have suddenly stopped working again, and I am baffled. A short? A weak solder joint? A problem with the switch? I dunno.
 
Yes, I noticed the recessed LEDs, and that will be part of the fine-tuning.

Meanwhile, the LEDs have suddenly stopped working again, and I am baffled. A short? A weak solder joint? A problem with the switch? I dunno.
Oh, I hate it when that happens. :confused:

Are the LEDs wired in series or in parallel? If the former, and they're all dead the fault could be anywhere in the circuit. If the latter and they're all out the fault will almost definitely be in the power supply or the switch.

Can you bypass the switch to see if the LEDs work when power is going to them directly? That would at least narrow the possibilities.
 
…and now it works again. Completely at random. This is a simple, 3V circuit, and so shouldn’t need resistors or anything, right? It can’t be, like, overloading and then not working for stretches, right?

Maybe I should disassemble the whole thing, and use magnet wire, for less wire stress/tension/risk of shorts/breaks when it’s all bent and cramped into the clip.
Certainly not overloading. If it was the LEDs would have burned out... and they only do that once! :lol: If it's an intermittent fault, as you describe, and if all either all the LEDs work or all of them don't (rather than single ones not working) my money is on a short, a dodgy solder joint or a broken wire somewhere between the battery and the LEDs, or the switch and the LEDs, or the battery and the switch. That's why if you can remove the switch from the circuit you can narrow down the location of the fault.
 
Gotta be a dodgy solder joint or something. Probably gonna have to disassemble the whole thing and rebuild it from the ground up. I could futz around checking connections with a multimeter, but the cramped space of the clip requires wires which can bend and flex without breaking the circuit.
 
I would bet it’s a short. It’s so cramped in there that something probably touches the wrong thing intermittently.
Also, I see you’ve used socket head bolts at the front of your barrel and upper receiver. I was doing the same and then realized my Tomenosuke, which I’m using as a reference, uses button heads. I went back to look at pics of the Hero and sure enough socket heads are the correct bolt so back to those I go. I’m not going for SA, but I like to get the hardware right.
 
…okay, I just spent the past two hours disassembling everything, then resoldering it all back together with brand-new wires, and making sure all connections were properly tinned before joining them.

So far, so good.
 
…also, I just rewatched BR 2049 for the first time since seeing it in the theater (I bought the Blu-Ray when it came out, but never got around to cracking it open), and was amused to see that the green LEDs on the sight rod were never lit up. Accuracy!
 
May I ask where you got the Johnny Walker bottle from the original? :)
I got it from a run over on Propsummit back in 2016. The maker is in Italy and goes by Sarednab. He’s here on the RPF too.
It’s a really nice rendition. Handmade glass with no cracks.
 
Last edited:
Have you tried some hot glue on the solders to seal everything and prevent shorts?

Electrical tape wrapped over the joints. Shrink-tubing would be a little too tricky, given that there are two wires attached to each LED leg, and that they’re all wired in series.

A little tweaking, and it works again. We’ll see how it goes.
 

Your message may be considered spam for the following reasons:

If you wish to reply despite these issues, check the box below before replying.
Be aware that malicious compliance may result in more severe penalties.
Back
Top