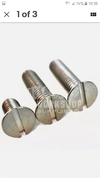
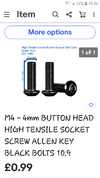
My PKD Bladerunner pistol build.

Crisis averted. Or repaired, I suppose. On the bolt handle I let the epoxy cure and drilled in from the back to epoxy a 1.5mm pin for added strength.
I should be back on course tomorrow, if I have some time, and get started on the grip frame and butt plate.
42BC6FA9-FED2-4252-9588-7381B642B841.jpeg
 
Really disappointed with myself. I am getting to a stage where I can't put off my most dreaded stage of this build.... painting.
I have been feeling really anxious about this part but there is only a few things left to do.
I have had some m3 countersunk slotted bolts for the top of the receiver and replaced the button head hex bolt acting as a front sight for larger m4 size which seems a better look.
I haven't tackled wiring the LED,s yet but that after that I have tackle the painting.
I think the reason I am anxious is because I am going to try and use graphite powder to the gun metal and black satin paints to achieve the finish I am looking for.
 

Attachments

  • Screenshot_20210615-103531.png
    Screenshot_20210615-103531.png
    582 KB · Views: 84
  • Screenshot_20210615-103408.png
    Screenshot_20210615-103408.png
    366.9 KB · Views: 90
  • 20210615_102336.jpg
    20210615_102336.jpg
    5.1 MB · Views: 79
  • Screenshot_20210606-203556.png
    Screenshot_20210606-203556.png
    1.4 MB · Views: 94
  • new_cs&t_final_015.jpg
    new_cs&t_final_015.jpg
    76.5 KB · Views: 105
Really disappointed with myself. I am getting to a stage where I can't put off my most dreaded stage of this build.... painting.
I have been feeling really anxious about this part but there is only a few things left to do.
I have had some m3 countersunk slotted bolts for the top of the receiver and replaced the button head hex bolt acting as a front sight for larger m4 size which seems a better look.
I haven't tackled wiring the LED,s yet but that after that I have tackle the painting.
I think the reason I am anxious is because I am going to try and use graphite powder to the gun metal and black satin paints to achieve the finish I am looking for.
The key thing I've found with the graphite technique is that the graphite has no real texture of its own. It takes on the texture, glossiness and 'finish' (even colour, to an extent) of the underlying surface. So the key is getting the base layer(s) as good as you can possibly get them before adding the final graphite finish.

It sometimes takes a couple of layers to get a nice even application, so don't be too disheartened if it doesn't look perfect after the first pass. Less is more... you can always build up, but it's much harder to take off! And I've personally found (though others may differ) that it works better if you apply it with bare fingertips rather than gloved, or any kind of applicator... maybe the natural oils of the skin help it adhere a bit better? I don't know. Try an experiment on some scrap first, and see what works best for you.

But, having said that, watch out for fingerprints! It takes them very easily! They can be rubbed / buffed out to an extent, but best to try and not get them there in the first place! ;)

It's not as hard or as daunting as it feels, believe me. Once you've got the knack, it'll be easy. And very satisfying! You'll be fine. (y)
 
Thanks guy's.
I am a little concerned about the actual painting process. I can't paint outside, that's not an option so I have to paint inside. I have a spare room but after previous experiences of spraying with cans I was going to try and turn an old cheap wardrobe into a spray booth but it seems like so much trouble and expense so I am debating what to do. I had contemplated buy an airbrush but it all boils down to which option is most cost effective.
 
Something I've been mulling is one of those cheap air brushes that uses compressed air they have at the craft store. You'll definitely still need something to handle overspray, but there's less danger of having your whole living space be un-breatheable.
 
Thanks guy's.
I am a little concerned about the actual painting process. I can't paint outside, that's not an option so I have to paint inside. I have a spare room but after previous experiences of spraying with cans I was going to try and turn an old cheap wardrobe into a spray booth but it seems like so much trouble and expense so I am debating what to do. I had contemplated buy an airbrush but it all boils down to which option is most cost effective.

I shouldn't worry too much! This is my current highly sophisticated painting setup! :D

3403FADB-5A5F-4442-BFB6-B4571DA4E6C5.jpeg. CCF91D0E-98EB-4244-B172-87AD85DC1D73.jpeg

It works fine for both airbrush and rattle cans. Old wardrobe? Luxury!! :lol:
 
I shouldn't worry too much! This is my current highly sophisticated painting setup! :D

View attachment 1467458. View attachment 1467457

It works fine for both airbrush and rattle cans. Old wardrobe? Luxury!! :lol:
I was going to either use an extractor fan with an oven filter or even my vacuum cleaner with an oven filter with a cutout in the back of the wardrobe. I have taped the edges to seal them.
 

Attachments

  • 16237673217171678779188.jpg
    16237673217171678779188.jpg
    1.1 MB · Views: 78
  • 16237674160561633059639.jpg
    16237674160561633059639.jpg
    1.3 MB · Views: 63
Sounds like you’ve got an idea that should work. Keep that window open and create lots of airflow.
I don’t know if you have a lot of experience with paint, but one thing that always bites people is not waiting for a layer to dry properly. This can be crucial.
If you’re worried about the paint and graphite process, get a cheap item from a dollar store as a test piece. And no matter what happens, you can always take paint off and start over.
 
I made some headway on the grip frame using some 1/2” aluminum plate I had on the metal rack.
The more holes you drill, the less you have to cut. Here’s the start:
D1B08300-085E-47B3-9D76-170AEC868D0C.jpeg


Then many holes later and some time on the bandsaw:
AE0118A1-6F7B-4B3B-A344-EDB28AE61B30.jpeg


Over to the dremel and the belt grinder to get it closer to shape. Then I got the holes drilled and tapped to secure it to the Bulldog frame.
2447D1C3-21D6-48BD-8DBD-24324B42A1A0.jpeg

Some more shaping needed to fit it to the grips just right. I cut the notch into the rear top, then I’ll drill and tap the holes to mount the grips before final shaping.
 
Really disappointed with myself. I am getting to a stage where I can't put off my most dreaded stage of this build.... painting.
I have been feeling really anxious about this part but there is only a few things left to do.
I have had some m3 countersunk slotted bolts for the top of the receiver and replaced the button head hex bolt acting as a front sight for larger m4 size which seems a better look.
I haven't tackled wiring the LED,s yet but that after that I have tackle the painting.
I think the reason I am anxious is because I am going to try and use graphite powder to the gun metal and black satin paints to achieve the finish I am looking for.
Birdy, those M3 countersunk bolts will do the trick, but if it’s screen accuracy you’re going for, a slotted set screw (or grub screw to some) would be the way to go. That’s what they used to fill the holes of the scope mounts on the Steyr receiver.
A0A9F4B4-FFC5-48C1-81A2-192C3E59650C.jpeg
 
I made some headway on the grip frame using some 1/2” aluminum plate I had on the metal rack.
The more holes you drill, the less you have to cut. Here’s the start:
View attachment 1467593


Then many holes later and some time on the bandsaw:
View attachment 1467594

Over to the dremel and the belt grinder to get it closer to shape. Then I got the holes drilled and tapped to secure it to the Bulldog frame.
View attachment 1467595
Some more shaping needed to fit it to the grips just right. I cut the notch into the rear top, then I’ll drill and tap the holes to mount the grips before final shaping.
Excellent work...it`ll make a big diff in the end!!
 
Gorgeous.

Meanwhile, I received the replacement cylinder switch and cylinder cover from TipTop. Still waiting on the other upgrade parts.

I need to plan a bit more carefully in terms of the slotted screw before I make any mods to this new cylinder cover. Still looking for an accurate screw.
 
Gorgeous.

Meanwhile, I received the replacement cylinder switch and cylinder cover from TipTop. Still waiting on the other upgrade parts.

I need to plan a bit more carefully in terms of the slotted screw before I make any mods to this new cylinder cover. Still looking for an accurate screw.
I found these in my collection. The top is too flat but I gave it a bit of a curve (the painted one) and it looks good to me.
if you can read what was written on the bag , it might help you.
I think the consensus on the original is that it likely came from the Steyr (or possibly from a Weaver scope) and would therefore not be something readily available.

5CF493A0-1CBC-4494-B903-F73A616D1A16.jpeg

D37B83F6-78A6-45C1-ABB4-C4D05064E624.jpeg
 
Last edited:
On Phil Steinshnieiders page, he’s got the Steyr Mannlicher Model SL manual and there’s an exploded parts diagram. Our little friend is number 92 and is described as a windage base screw.
1A035CD4-6B58-4DCC-8C5B-249362388DFF.png

738A6146-CF7A-4C66-98D7-C65C51770201.png
 
Last edited:

Your message may be considered spam for the following reasons:

If you wish to reply despite these issues, check the box below before replying.
Be aware that malicious compliance may result in more severe penalties.
Back
Top