Shaved down the front of the clip housing, as well as the height of the cylinder cover’s slotted screw platform, so that the screw will be recessed. The inner wall blew out, so I packed the whole thing with putty. Once it’s cured, I’ll redrill and re-tap the hole for the screw’s threading.
You are using an out of date browser. It may not display this or other websites correctly.
You should upgrade or use an alternative browser.
You should upgrade or use an alternative browser.
My PKD Bladerunner pistol build.
- Thread starter B1RDY
- Start date
robotprops
Well-Known Member
I’ll dig out my Coyle and see what’s in it. Was his post pre-2006? After the hero was found he went over it with a fine toothed comb.
robotprops
Well-Known Member
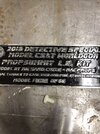
The binding screw should be arriving in a few days. The LED kit should be, as well. I need to wait for it before I can remove the molded-in LED switch box from the resin clip. And the metal sight/binding post and display stand should also be arriving soon. Also still waiting on the replacement cylinder release switch from TipTop.
Once these parts are in-hand, and I can make final adjustments/clean- up, then I can seriously begin looking into painting.
Also, the pin system used to hold the grip and frame together is a bit flimsy and inaccurate. I’m thinking of tapping the holes and using flathead screws.
Once these parts are in-hand, and I can make final adjustments/clean- up, then I can seriously begin looking into painting.
Also, the pin system used to hold the grip and frame together is a bit flimsy and inaccurate. I’m thinking of tapping the holes and using flathead screws.
My friend and I are reaching the end stages of our PKD-2019 build. All parts printed from my Mars 2 Pro except the grips which we purchased separately. One thing that's holding us up is the on/off switch. Do you folks have a line of sourcing one of the switches meant for this build? Thanks much.
robotprops
Well-Known Member
Which version is that? It looks good. Wondering where you got the files...
Last edited:
B1RDY
Active Member
Pictures?Received some goodies in the mail, today—the button head replacement screw for the trigger guard, the LED kit, and a replica of Deckard’s police ID badge for the display.
Thingiverse. PKD-2019 by AndersFP.Which version is that? It looks good. Wondering where you got the files...
Pictures?
Not just yet. Need to wire up the LEDs. And I’ll show off the ID with the final display. But it was made by a member here, who offered a run of them (and also sells them on a website), some time back.
Meanwhile, the binding screws arrived. They look close to the Coyle version. I’m building the screw platform on the cylinder cover back up with Apoxie Sculpt. Need to let that cure, then shape, prime, and drill/tap it.
Also, comparison with reference photos indicates that the clip’s resin on/off switch box is oversized, and that the version I just received is correct. I’ll have to Dremel out the kit’s resin box, then build up putty around the new box to make it fit properly. Also, it appears that the kit’s clip is missing the half-moon cutouts in front of the LED housings.
robotprops
Well-Known Member
My kit arrived today. It looks great. Some interesting subtle differences from the kits I’ve seen in the past. Anders really went to town getting the scale and details just right. And Tip Top workshop did a lovely job bringing it to life.
I should be able to get started on it tomorrow. It’s a great kit to incorporate a lot of the bits and pieces I’ve been gathering for a few years.
I should be able to get started on it tomorrow. It’s a great kit to incorporate a lot of the bits and pieces I’ve been gathering for a few years.
BPayne
New Member
I'm the roommate of MShorey. My paints were standard grey primer, Alclad gloss black, and Vallejo Gunmetal grey. The only thing I wished I knew beforehand on this build was to use FINE primer, as the clearances and tolerances are so exact that the primer I used was too thick and had to be sanded down. As for advice, make sure to use a nice glossy black foundation on all the metal parts you'll be painting. I covered every piece in that Alclad and it came out beautifully. Also, DEEP clean your prints between each coat. It's amazing what shows up when painting.
Hey Gregatron! Would you happen to have a link for that switch? I can't find the one listed and it's killing me. Other than that, my blaster is pretty much done
Hey Gregatron! Would you happen to have a link for that switch? I can't find the one listed and it's killing me. Other than that, my blaster is pretty much done
B1RDY
Active Member
RedrumGood job on that propLove the ``Shining``hotel background
Redrum
Redrum
Similar threads
- Replies
- 0
- Views
- 254
- Replies
- 2
- Views
- 386
- Replies
- 3
- Views
- 1,132