madeandmark
New Member
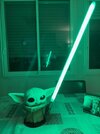
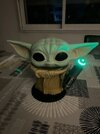
Okay so I used Vallejo’s basic USA set for the eyes. The head has 3-4 coats of filler primer, 3M air dry green putty, tamiya fine primer then Montana rattle can (forgetting the pink salmon and light green color names) because I don’t have an airbrush and Montana has different caps so you can get more control of the paint placement. Then I used the Vallejo set for the details, highlights etc.I have a few I’ll dig up tmr and post them.
The eyes I penciled in the iris and pupil outline. The eye was painted by hand with a brush. Laid in the white of the eye with pure white then the pupil with pure black. Then blacked in the iris and faded out the black as I approached the pupil. Then I used a combo of the Vallejo buff, brown, orange, white and ‘flesh’ for the iris along with Vallejo medium thinner and water. I approached painting with a glazing technique and multiple light coats layered. Mixing colors by eye (bah dum chsssssh) as I went. Then I used an old tattoo flash technique of spit shading a black wash from the outer rim of the iris in towards the pupil to knock the color down until the eyes looked normal and not creepy.
I used a very light black and white grey mix thinned way down to knock the white of the eyes down, then a pink salmon I made with the red, orange and white to lay in the veins and the rim of the eyelids. It was all topped off with a thin coat of smooth-on’s 3D print smoothing resin (it’s good but chips easily I’m finding and will probably switch to their more flexible resin if I end up doing a run of these as I also coated the nails on the hand and feet with it as well).
Last edited:


