Mr Mold Maker
Master Member
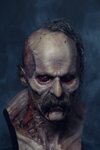
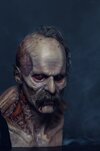
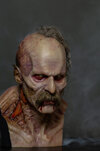
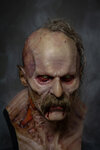
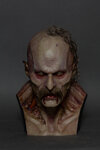
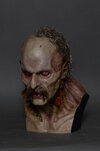
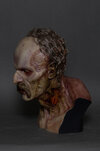
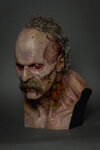
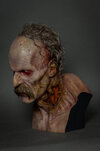
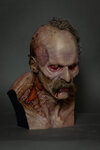
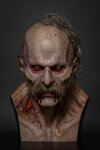
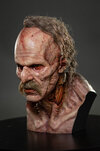
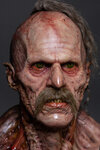
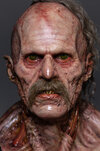
Hey folks, been a little while since I’ve shared anything that wasn’t Star Wars/Marvel helmets. My work has led me down a different path than expected, but at the end of the day I’m still very much a monster kid. I really enjoyed Nosferatu and especially loved the design for Bill’s Orlok, so I decided to replicate it with a life-sized bust.
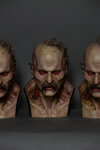
This was sculpted in Zbrush, printed on an industrial resin printer, and then finished with paint and hair. I am actually in the process of printing another to be waste molded and clay pressed so I can hand sculpt a bunch of fine skin texture. I could have done all that texture work in Zbrush but unfortunately the printers have a file size limit I have to work within. In any case I don’t mind getting my hands in the clay every now and then. I would be happy to document some of that process of going from 3D print, to waste mold, to finished translucent resin casts if there is interest in that sort of thing.
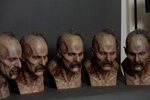
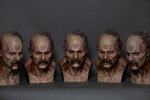
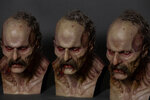
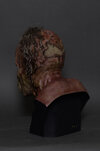
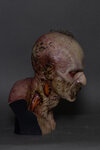
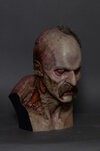
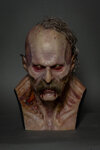
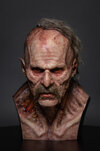
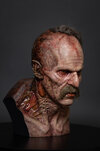
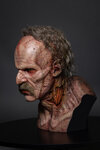
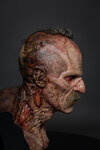
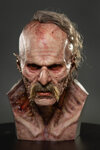
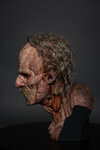
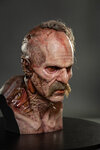
There are a few paint jobs he has in the film but for this one I went with “pooled blood look,” with lots of reds and blacks. I will do the more pale and ghostly finish as well once I’ve got him in translucent resin. The only thing I’m not very happy with is the hair on his head. Gluing hair to a bust is always challenging for me, sometimes you can do a “fold over” which looks a little more natural, but in this case the fibers were a little too firm for my liking. On the future copies I will just carefully try to glue them “root down” and finish with sparse hair and Prosaide for the hairline. Of course it’s all a learning experience and the hope is to always do better than yesterday. But without further ado, here are some photos of my Orlok prototype.
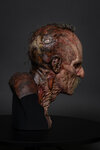
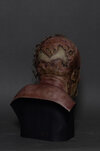
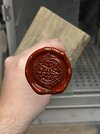
When printing in resin you need to add “drain holes” for the excess material to flow out. Usually I try to put these on the bottom where they don’t need to be filled, but on this I needed to put one on the back as my software didn’t want to punch through the geometry of the bottom. Instead of filling and sanding it, I quickly sculpted a wax seal with his sigil impression to cover it. I think I will carry this detail on to the translucent resin busts. Here it is with a quick “faux wax” paint job.
This was sculpted in Zbrush, printed on an industrial resin printer, and then finished with paint and hair. I am actually in the process of printing another to be waste molded and clay pressed so I can hand sculpt a bunch of fine skin texture. I could have done all that texture work in Zbrush but unfortunately the printers have a file size limit I have to work within. In any case I don’t mind getting my hands in the clay every now and then. I would be happy to document some of that process of going from 3D print, to waste mold, to finished translucent resin casts if there is interest in that sort of thing.
There are a few paint jobs he has in the film but for this one I went with “pooled blood look,” with lots of reds and blacks. I will do the more pale and ghostly finish as well once I’ve got him in translucent resin. The only thing I’m not very happy with is the hair on his head. Gluing hair to a bust is always challenging for me, sometimes you can do a “fold over” which looks a little more natural, but in this case the fibers were a little too firm for my liking. On the future copies I will just carefully try to glue them “root down” and finish with sparse hair and Prosaide for the hairline. Of course it’s all a learning experience and the hope is to always do better than yesterday. But without further ado, here are some photos of my Orlok prototype.


When printing in resin you need to add “drain holes” for the excess material to flow out. Usually I try to put these on the bottom where they don’t need to be filled, but on this I needed to put one on the back as my software didn’t want to punch through the geometry of the bottom. Instead of filling and sanding it, I quickly sculpted a wax seal with his sigil impression to cover it. I think I will carry this detail on to the translucent resin busts. Here it is with a quick “faux wax” paint job.


