Weathered and covertec-ed my cut Maul:
View attachment 1022904
And because I couldn't resist I converted it to a Clone Wars version!
")
The animated show prop's model looks very faithful to the movie prop, overall, with the exception of a black screw in the covertec wheel and a smaller emitter. As a half-hilt, the smaller emitter makes the prop look better balanced overall IMO (maybe the original reason for the change?).
For the modified emitter, I just needed to pick up a few smaller washers. It has two "large" fins/washers versus the TPM version's three. I picked a 5/8 flat washer (Lowe's part 63310) for this which has an outer diameter of just over 1.75" instead of the TPM kit's 2". It's just a bit smaller than the machined emitter plate, matching the show reference. Also printed up a couple adapter rings to help center the new washers on the kit's machined emitter (the inner diameter is larger than the old washers'). The space between the emitter fins looked like it needed to be a little smaller so I replaced the two 1/2" kit washers with some thinner 1/2" flat washers, and used only one 1.5" washer between the larger fins. Because the washer stack is shorter now than the machined emitter plate, I had to drill out the end of the resin hilt to recess the threaded section into the resin.
View attachment 1022908
View attachment 1022905
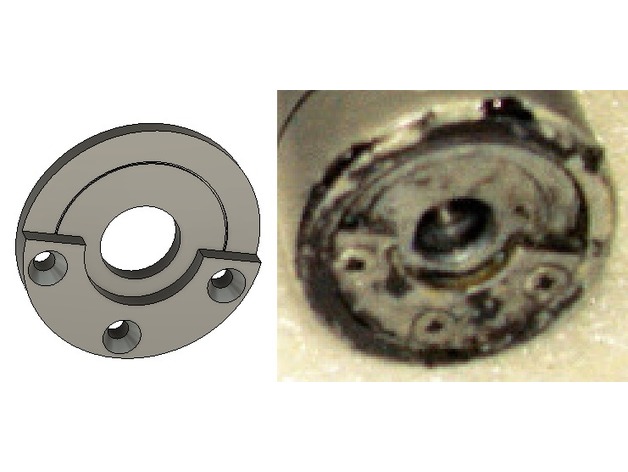
I modeled up some guesses at what the cut end detail looks like from the few good shots of it that I could find on the show. It appears to be something of a very simplified version of the Master Replicas cut end detail. A stick-on gem from Michael's, silver paint, and a grungy black paint wash and that part is done.
View attachment 1022906
And finished!
View attachment 1022907
Cut end detail pieces and washer adapters are all up on the same Thingiverse entry:
A model of the cut end detail from Darth Maul's lightsaber from TPM.Needs #2 flat Phillips head screws.The second file is for a drilling guide to help hollow out the end of your resin saber hilt. You'll need a 1-1/8 inch Forstner bit. Be very careful when drilling the resin. It's dense and...

www.thingiverse.com