You are using an out of date browser. It may not display this or other websites correctly.
You should upgrade or use an alternative browser.
You should upgrade or use an alternative browser.
Tom's Real Parts Obi Wan Saber
- Thread starter thd9791
- Start date
Huh..that is a completely different kind of screw hole than mine. There are different models of sink knob!
Uh oh, another mystery. How many kinds are there? LOL!
Thank you! The thing in the bearing is a nut with two different threads on each end. It's called a "reducer" here in the US. I wish I could say that I made them myself but I bought a bag from China...I now have a good handful I don't need
View attachment 563073
3/8 16 on one side (Roman Emitter threading) and 1/4 20 on the other (good size for real sink knob hold)
Hey Tom... just sent you a PM regarding
Sym-Cha
Master Member
4
Chaim
Nice! Thanks Chaim!
Haha yea, we didn't know these existed and redbutton here suggested threaded adapters and we went searching for them. Took three days.
- - - Updated - - -
There are the modern ones from the 1980s
Correct ones with flat endcap
Correct with yellow cubes and flat endcap
Correct with yellow cubes and domed black/silver endcap (mine!) that also have a raised, small screw hole
right?
- - - Updated - - -
There are the modern ones from the 1980s
Correct ones with flat endcap
Correct with yellow cubes and flat endcap
Correct with yellow cubes and domed black/silver endcap (mine!) that also have a raised, small screw hole
right?
4
Chaim
Sym-Cha
Master Member
I don't know about the last one you mentioned ... if that is considered another version (any picture?) ... however there is a distinct version between a correct handwheel with straight written text under the 'C' or 'H' and Armitage Shanks written in an arc over the 'C' or 'H' which is also a metal endcap, not plastic. Than there is indeed the modern 1980's version and the one with yellow/golden translucent cubes = 4
Chaim
Chaim
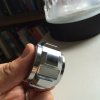
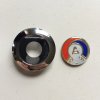
Bathtub tap... where everything is correct, but the square hole is bigger in the metal piece and which also has deeper threads so that it isn't possible to flip the cubes...
...which is a variant that I have with one of my tap handles....
The metal threaded section is also too deep on my bidet wheel. The cubed ring from that pictured wheel is interchangeable with the correct AS wheels too.
It turns out I don't have to cut my threaded rod down. It wasn't screwed all the way into the Reducer nut. The allen bolt was screwed too far in, pushing the rod out. I fixed this by removing the emitter and grenade and unscrewing the pommel....


Then I screwed the threaded rod all the way in, and put it back together, leaving the right amount of threads (4 or 5) above the grenade neck.
So..get the rod down tight first before anything else!


Then I screwed the threaded rod all the way in, and put it back together, leaving the right amount of threads (4 or 5) above the grenade neck.
So..get the rod down tight first before anything else!


Thats hilarious and kind halliwax
I swear it's a never ending story with this thing. The clamps position was bothering me, it was too high.

What I needed was extra meat on the spacer. The space between the rings just goes inside, it doesn't brace against the rim.
Cutting at the first ring would have been too high, pushing the grenade out of the graflex clamp area.

So I needed....half that height?
I decided to use the firing cap or back plate on my grenade. First, I had to smooth out the sides of the firing cap to fit inside the Flash Hider. The flash hider is steel and this iss brass, which is much softer. Didn't take much, 20 minutes of filing and a very small pile of brass dust.


Now, the Grenade can sit slightly sunken into the Graflex clamp. There's still a gap...

But screwed together, I think it looks much better.
 (click for larger size)
I swear it's a never ending story with this thing. The clamps position was bothering me, it was too high.

What I needed was extra meat on the spacer. The space between the rings just goes inside, it doesn't brace against the rim.
Cutting at the first ring would have been too high, pushing the grenade out of the graflex clamp area.

So I needed....half that height?
I decided to use the firing cap or back plate on my grenade. First, I had to smooth out the sides of the firing cap to fit inside the Flash Hider. The flash hider is steel and this iss brass, which is much softer. Didn't take much, 20 minutes of filing and a very small pile of brass dust.


Now, the Grenade can sit slightly sunken into the Graflex clamp. There's still a gap...

But screwed together, I think it looks much better.
My dad and I also came up with a solution to my corroded Grenade being a tad too skinny.
I cut a piece of 1.5 inch sink pipe about 1/4 or 1/2 inch...the distance between the top edge of the clamp and the first hole in the side. Slid it right over the end of my grenade, and it's tighter than ever.
I cut a piece of 1.5 inch sink pipe about 1/4 or 1/2 inch...the distance between the top edge of the clamp and the first hole in the side. Slid it right over the end of my grenade, and it's tighter than ever.
So, here's where I stand today.
The Grenade rim sleeve.

It's just regular old sink pipe, and it only extends to the first cut out. Very, very rock solid now.
Of which, I'll have to either cut down the screws I used for Roman's transistors/spacer and put a nut in there, or just glue them on. Not sure yet. Any ideas guys?

I installed a Left-over D ring from Blast Tech. It was a bit smaller than Roy's, and I mean a hair smaller, but it suffices (Thank you @RomansEmpire for the D ring installation tips)


Notice, I used cheap painters tape to keep the clear coat off the pommel and it took up a few pieces of new chrome! Grr, be careful guys)
I'm thinking I may hit the emitter and cone with some clear coat too...The emitter's gotten darker over the years and now there's rust forming on the cone?!

Anyways, here it is before the transistors!

The Grenade rim sleeve.

It's just regular old sink pipe, and it only extends to the first cut out. Very, very rock solid now.
Of which, I'll have to either cut down the screws I used for Roman's transistors/spacer and put a nut in there, or just glue them on. Not sure yet. Any ideas guys?

I installed a Left-over D ring from Blast Tech. It was a bit smaller than Roy's, and I mean a hair smaller, but it suffices


Notice, I used cheap painters tape to keep the clear coat off the pommel and it took up a few pieces of new chrome! Grr, be careful guys)
I'm thinking I may hit the emitter and cone with some clear coat too...The emitter's gotten darker over the years and now there's rust forming on the cone?!

Anyways, here it is before the transistors!

Similar threads
- Replies
- 94
- Views
- 11,135
- Replies
- 2
- Views
- 1,649
- Replies
- 13
- Views
- 532
- Replies
- 63
- Views
- 5,564


