My Early Disasters pt 2 - A Biker Scout Helmet - How hard can it be?

If you've been following any/either of my threads for a while, you'll know my work often goes in waves. I get excited about a project and sneak off to add to it whenever I can, then get dispirited and find excuses to avoid the workshop for weeks. This project has reached the latter stage. Despite 3d printing gauntlets, and buying magnets, I can't escape the realisation that :
My chestpiece is too small.
The codpiece attachments don't hold and it keeps falling off.
I can't attach the shin pieces at all.
I don't have any idea how to attach the backpack.

And then I start following this guy on Instagram, and he shows HIS Hunter rig:
Screenshot_20201211-090251_Instagram.jpg

Now it's not that I'm jealous. He's clearly spent a lot of time and money on this and rightly so. It's a fantastic rig (as are his other suits!)
The thing is, I pass my shabby armour hanging off the jury-rigged mannequin in the sports storage area of the basement and I think of these pictures. It's not a great comparison.
So, I'm going to do the smart thing and start over, at least with the armour. The shin pieces might be saved, but everything else except the helmet will be redone. I'm pissed because I actually did the clingwrap/duct tape thing, but have still mucked up the measurements. I ignored the reference pictures when printing the gauntlets from the movie clones, not the animated Bad Batch (which are almost cylindrical, not flared towards the elbows.)
Right now I have three small flooring tiles and low levels of enthusiasm. I don't get any actual Christmas vacation, but in the quiet moments at work (everyone ELSE will be on vacation) I might try and work out a plan of attack. Maybe focus on one piece at a time and actually get it right.
 
Hey, it's been less than six months since my last post! You would have thought the continuing pandemic would have allowed LOTS of time for working on armour, but no, I got to go back to work (Yes, I know how lucky I am!)

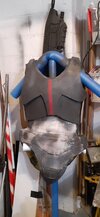
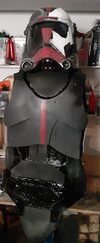
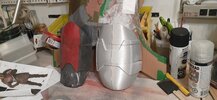
In the intervening time I've done a bit of this, a bit of that - made a Mando Armourer's helmet for Mrs Dim, though that's not FINISHED, finished. 3D printing is not the boon I had hoped for when your print bed is so small. Anyway, the armour. Here's where I was when I started today:

20210417_153529.jpg
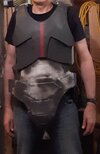
Doesn't look too bad?Well, it does when I try it on:

20210417_154955.jpg
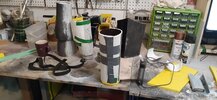
I needed to add some length to the shoulders so the chest piece sits lower, then define the midsection more. I need another shoulder piece, need to decide which of the four sets of gauntlets I'm going with, and figure out a rig to hold it together. Naturally, I started by sorting my greebly boxes, then vacuuming the workshop. Then I made ANOTHER gauntlet, bringing me to a grand total of five, even though I only have two arms. Oh, and they all look terrible.

20210417_153527.jpg

May have to find some 3d files for Hunter Gaunts and print them off in sections. When I can get another roll of PLA.

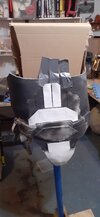
I did get the shoulder extending done. It's ugly, but it's done. I started adding detail to the codpiece and midsection (all one piece now, because I'm going to be putting this on myself and less is more.)

20210417_163923.jpg
I corrected some errors on the thigh pieces, and didn't even look at the shin pieces because A: They look great and B: I know I can't actually put them on, which makes me frustrated.
I'd love to know where JaigEyehunter got his kit. How is it so smooth? WHy doesn't it fall off like mine does? Wait, I think I AM a little jealous after all....
 
Yes, I have standards, and it's not hard to live up to them, because they are LOW standards!
Today's issue is a new and exciting one. Having no experience with electronics at all (as I have proved with the dalek lights), I decided it was time to rewire the mic/amplifier unit I bought ages ago to use as a helmet com. There were a couple of problems with it. The first was that it was almost impossible to use without INSANE feedback. As in, as soon as you start to speak, even with the mic at full stretch from the speaker unit, there would be unearthly shrieks and howls fit to wake the dead. Not good.

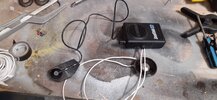
Second was that the speaker was built into the case that held the volume control and the battery, so fixing it inside the front of the helmet would be uncomfortably bulky. Here's my elegant solution:
20210419_102438.jpg

I have soldered (Americans, please note that I am pronouncing that "L", since I grew up in the UK) longer wires to the speaker. This should allow me to put the speaker in the grill under the chin, and have the battery and volume control in the back of the helmet. I'll fit it upside down, so that the on/off volume knob is just reachable in under the neck. Switch on, place helmet on head, and talk!

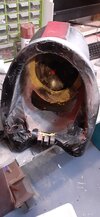
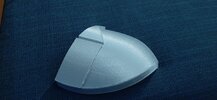
This is the helmet in question:

20210419_102440.jpg
Don't worry, it's much less comfortable than it looks! Just after this picture I fitted the speaker in place. It's neat, almost exactly the right size, and it's audible. Certainly more audible than my unamplified voice would be. Unfortunately, when I put the mic in place and do a test....FEEDBAAAAAAACK!

I am assuming this is because of science. Having only limited intellectual resources, I checked Google. I can reduce the chances of feedback by using a different mic (not an option) moving my speaker further out into the room (not an option), soundproofing my room (an option, but not very helpful in the long term), or muting my mic when I'm not using it. Since the feedback starts when I DO use it, and then won't bloody stop until the unit is switched off or the mic is removed, this is also help of the chocolate kettle variety.

Anyone got any suggestions? The speaker is facing out, away from the mic. There's one layer of flooring foam between the two, though the mic has a plastic guard around it too. Would tin foil help? More foam? A Faraday Cage?
 
Move the speaker down behind the chest plate. That should be plenty far away.
Ok, this is definitely a good suggestion, and something I've considered. There are just two issues with it. First is that this speaker/mic unit is so cheap and badly made that with the mic at my mouth and the speaker clipped to my BELT, I still got feedback. Second is that I want (me, me, me, I want, I want!) to have the whole thing installed in the helmet, so there's no wires to connect. Again, may be being unrealistic based on my level of ability with tech (somewhere just below zero) but I want to be able to say I tried!
 
Two big steps forward today. Well, maybe not forward. Two big steps today.

One: The Ring Modulator kit for the Dalek Speech unit arrived. Now all I have to do is solder the right bits into the right holes on the PCB, and figure out what I have to plug into the three sockets to make Dalek noises (I'm guessing at least one mic and one speaker, but the third? Who knows?)

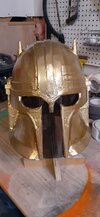
Second, I broke down and bought the 3d files for the Hunter Armour from the Galactic Armoury. I went cheap, not getting the helmet files, because the helmet I've built is moderately ok. (Mrs Dim says I should use more positive language in everyday life.) Since I was spending money anyway, I ordered another roll of PLA and set to work printing the first half of one of the bicep pieces (which I've not been able to satisfactorily build from scratch anyway.) With my tiny print bed, I can't imagine the fun and games I'm going to have trying to print a chest plate. Mrs Dim's Armourer helmet was done in twelve sections, and that barely went together. Eh, whatever, that's a problem for Future Dim to solve. Tough luck for him!20210328_120336.jpg
The armourer helmet in question. Some detail work still needed, but isn't there always?
 
I don't have my new roll of PLA yet, but I tried printing off one of the smaller pieces of the new armor files last night. Since my print bed is so small, I could only print half of the piece at a time. The roll ran out halfway through printing, so what's shown here is the bottom half of the bottom half of the right bicep piece. New roll should arrive tomorrow, and then I can begin again. 26 pieces of armor, and none of them - none - can be printed in one piece. Sheesh.
Mrs Dim was asking if she and the kids could buy me some vac-formed pieces for my birthday, and yeah, they could , but from where? Rolling round the internet and all over the RPF, and I can't find a source. What am I doing wrong?
20210420_200549.jpg
 
That is a small bed!

I would try the forums that are more specific to building that type of armor. For mando stuff that would be the mando merc forums.

Oh if this is for the clone hunter armor -
If you want that are more clone related then The 501st Clone Trooper Detachment – Clone Troopers… a Better Class of Soldier


There are also some good stuff in making armor out of foam in this forum. That clone trooper one should give you some good body armor pieces if you aren't looking to be 100%
There's some fabulous details there! Thanks for the links, much appreciated!
 
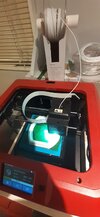
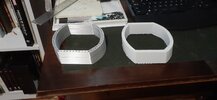
Third time lucky! I'm not ducking Karmajay's advice about making the suit from foam, but I've tried that for my mark 1 and the results were underwhelming, even for one of my builds. So, I've pressed on with trying to print the armour. First piece was the bottom half of one of the bicep pieces. The first two prints failed, and I have no idea why. They just stopped, claiming to be done, but actually just being these unimpressive arm-rings:
20210423_071416.jpg
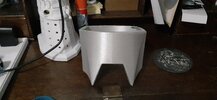
This was the first piece from the new armour files that I had tried slicing and printing, so I switched to the OTHER bicep piece. I sliced it exactly the same way, and printed the bottom half of THAT piece, and got this:
20210424_223453.jpg
Well, ok! That's more like it! Tomorrow I'll try and run the second half of this piece, and after a total of twenty four hours of printing, I may have one piece of the armour!
Don't imagine I'm getting depressed about this. That one piece will look wayyyy better than the pieces I have fudged together up to this point. And with just another full day of printing, I could have TWO pieces! I'm not even going to think about the chest piece right now. Something magical may happen between now and then. Who knows?
 
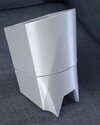
Ok. Last night I finally completed printing the top half of the left bicep piece. I'm a little concerned, because the printer didn't show the "Print completed" screen, it was still saying there was three hours to go, and making a kinda buzzing noise. Ah well. Here's the final thing glued together:
20210425_213032.jpg20210425_213028.jpg Yes, I need to do a lot of surfacing to clean up those print lines and that huge gap, but it's better than my "made from scratch" effort:
20210425_223447.jpg20210425_223442.jpg

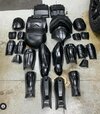
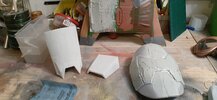
Making this one piece took ages, and a LOT of the reel of PLA. I have a domestic project to print next (a bee box for Mrs Dim's Mason Bees) but then I have to pick the next armour piece. A shoulder bell? I'm guessing that'll be four sections at least. Maybe I'll do as much of the left hand side as I can - Shoulder bell, bicep, gauntlet, glove plate, and then decide where to go next. It's going to take a long time, but I've found my original estimate of the number of pieces was off - I had forgotten that the illustration I was working from showed most of the pieces in two halves. Look:
20210421_100458.jpg

That's from a picture by jaig_eye_hunter on instagram of his Hunter armour (vac formed) being delivered. Recalculating, I think I'm looking at 16 pieces, one of which is done. It's still a lot, and some of them will be made from many pieces. I hope my poor little Flash Forge Finder is up to it!
 
Today I had a minor breakthrough . My next piece for printing was a quarter of one of the shoulder bells. Having sliced it for printing, the file said it would take nineteen hours and require a third of a reel of PLA. Something was hinky, to quote Shakespeare. When I got to my lunchbreak, I re-ran the slice, but this time with the "Low-res" setting ticked. I'm guessing this will mean more surfacing work, but my projects ALWAYS mean more surfacing work. At least this one will be the right shape to start with. Anyway, with that setting ticked, the time drops to TWO hours and correspondingly less PLA. I can now visualise actually printing many pieces of this armour at that setting, and maybe not needing more than three or four reels.
 
Second quarter is printing now. The first looks pretty good. I took a picture, but it hasn't backed up to the cloud yet, so I don't have it handy.
Can't tell you how relieved I am that this might actually be feasible.
Well, the smaller parts of the armour at least. Still dunno about the chest and cod.
 
Ok, even with the minor print error to correct, the new shoulder bell looks way better (read "accurate") than my scratch build version. Of course, printing just two armour pieces of the 16 has nearly run me out of the latest roll of PLA, but I might get the two hand plates done as well. That will leave 12 pieces to print, although the chest and cod and lumbar thing will probably run to a roll each. Right now I'm pretty upbeat about even that - the UK may be opening up again soon, which means theatre groups will start up production again, and my plays will start selling again. If I'm earning a little extra, I don't feel guilty about spending a bit on my stuff.
20210430_212724.jpg
My next job today (once the printer is at work on the first hand plate) is soldering a voice modulator for my dalek. I know that's a whole other thread, but I'm too excited about it to go find that one!
 
Gonna try this revolutionary idea of a THIN coat of Bondo. It's crazy, but it might just work better than my usual method of podging the stuff on with a shovel....

20210501_154637.jpg
 

Your message may be considered spam for the following reasons:

If you wish to reply despite these issues, check the box below before replying.
Be aware that malicious compliance may result in more severe penalties.
Back
Top