indiefilmgeek
Sr Member
Ironman Costume for 5yr old - MODDING THIS FOR MY DAUGHTER!
This build thread is over 26 pages long, so I wanted to show you what the finished suit looked like before you go hunting for it through all those pages!

2013 UPDATE: For anyone starting an EVA foam costume, I wanted to point out a couple of newer techniques that have been developed after I made Mikey's armor. I used a rubberizing sealing technique involving Plasti-dip. Here are three newer options you should consider.
1. XRobot's plastic-coating method is worth looking into. He uses PVA glue to seal the foam and then coats it with Smoothcast. Here is his video on that.
2. docholiday78's heat sealing technique. Doc uses a heat gun to close-up the foam cells and then PVA glue. No need for Plasti-dip. HERE is his post.
3. Worbla. While more expensive, this is thermal plastic can produce some amazing armor pieces when used over EVA. A good source for more info and techniques would be Kamui's BOOK on the subject.
Regarding my build, I've provided below some helpful navigation for this thread (cause it's stupid long now):
HELMET WORK (just scroll down - it's in the first post)
PAINTING METHOD
WHERE TO GET EVA FOAM
CONSTRUCTION WITH EVA FOAM
VOICE CHANGER FOR HELMET
ELBOW JOINT EXPLAINED
BUILDING THE HAND-PLATE TRIGGER FOR THE REPULSORS 1
BUILDING THE HAND-PLATE TRIGGER FOR THE REPULSORS 2
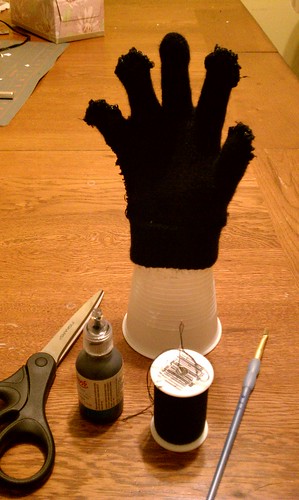
GLOVE WORK 1
GLOVE WORK 2
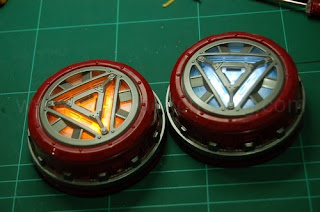
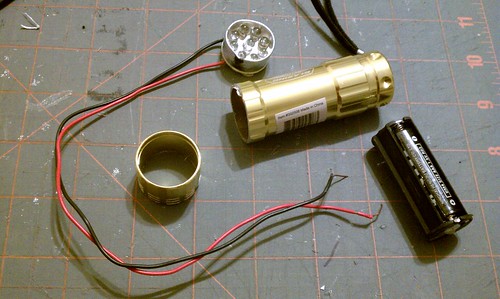
BUILDING THE ARC REACTOR 1
BUILDING THE ARC REACTOR 2
BUILDING THE ARC REACTOR 3
BUILDING THE CHEST/BACK PIECE 1
BUILDING THE CHEST/BACK PIECE 2
FABRIC UNDER ARMOR
BUILDING THE BOOTS 1
BUILDING THE BOOTS 2
LEG ASSEMBLY AND FINAL PICS OF THE BOOTS
SIMPLE VELCRO LEG TO HIP CONNECTION
FINISHED PICTURES - DAYTIME
FINISHED PICTURES - EVENING
FINISHED PICTURE - NIGHT
HELMET MAGNETS AND EYE LIGHTS EXPLAINED - IN DETAIL
------------------------------
Original First Post on 11-24-11:
------------------------------
I am working on constructing a Halloween costume for my 5 year old son, Michael. He would like to be Ironman, so I hit your forums (and 405th) and began working on some pep armor for his costume. I began with the helmet and only started this thread as I was finishing it up.
To be begin with, I'll mention that I'm using Robo's Ironman Mark IV files for most of this build (notable exception is this helmet, for example, is based on the Samuray did on dungbeetles helmet that had a smaller chin). They are clean and simple and perfect for this scale model version of the suit. A huge 'thank you' to Robo and all the guys/gals out there that help us all out by supplying these GREAT pep files!
To start the build I began with the helmet and here's some pics of that process...

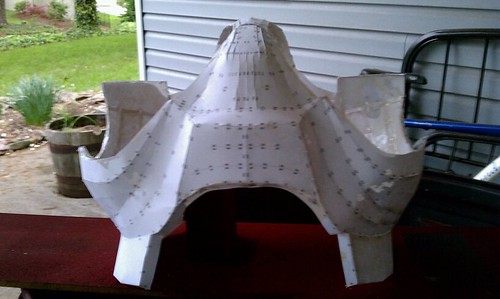
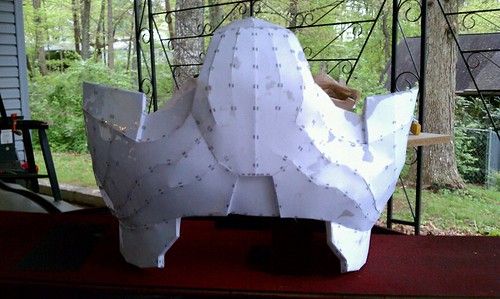
The larger was my very first pep construction, but I scaled it too big and had to go smaller. The second (smaller one) is the pep that became Mikey's helmet. On that piece, you will notice I also cheated and made the eye holes slightly larger.

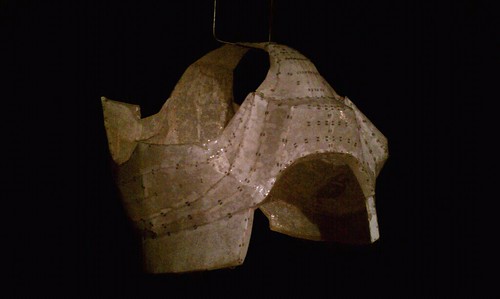
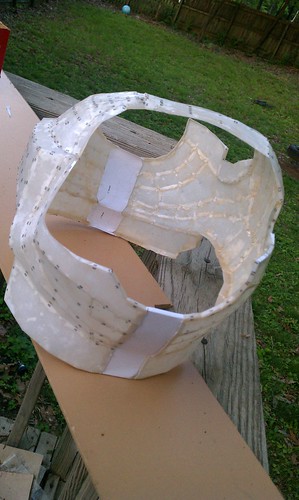
Big (test) helmet done... Final helmet, let to go! Since it was deep winter when I started this project, I borrowed my friends garage to fiberglass the two helmets I had pepped. I had decided to keep all the pieces together through the hardening process, so their edges would line up easier.


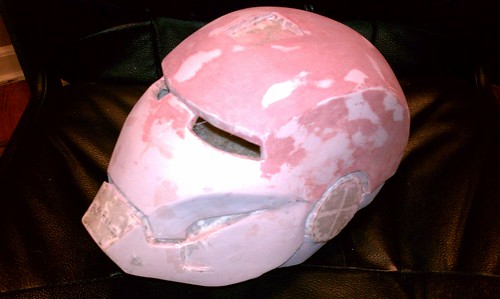
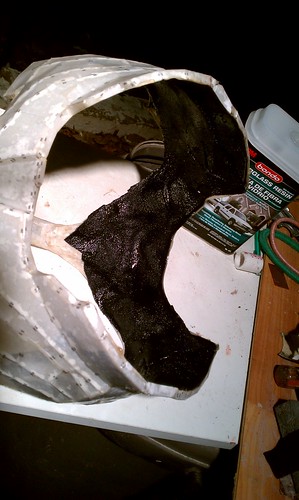
Scary first application of bondo... I truly thought I'd ruined the piece! lol


...but after sanding, it looked a bit better.


More bondo... more sanding.


So, after LOTS of applications of bondo and glazing putty, I was ready to prime the helmet.

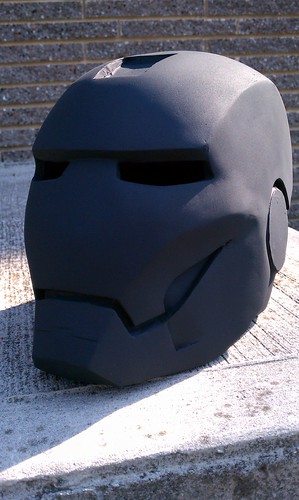
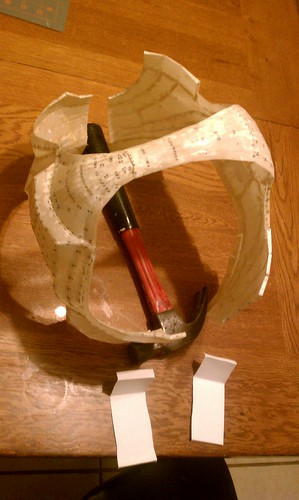
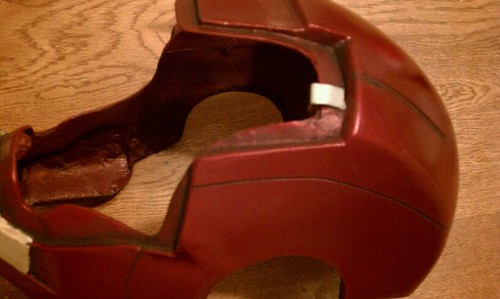
Primed and ready to be cut into three parts: Faceplate, back piece and the main helmet body.

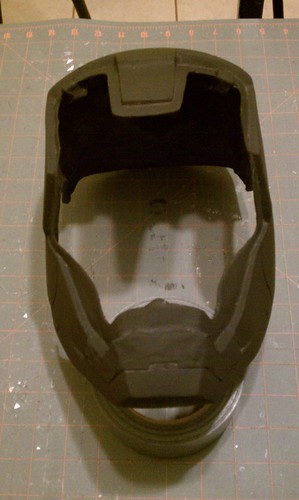
Cut into three pieces... showing the faceplate open!


Test Fitting with Mikey.
And then in early April we created a manikin so I could start working on some of the body armor pieces. Here's a little time-lapse video for ya!

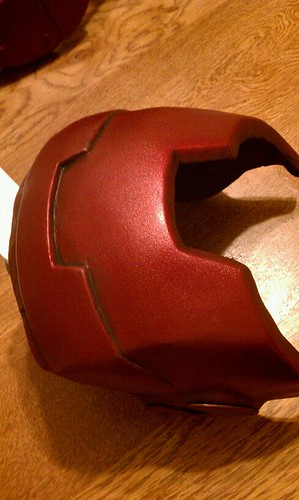
Here are a few update photos now that the main section of the helmet has been painted. The test fitting pictures (below) show both Mikey and I holding the helmet in place. This is because I still don't have padding added inside the helmet yet (probably won't until we're closer to Halloween and I know his head isn't going to get any bigger!)


And finally... Here is a little video explaining the magnetic faceplate connectors (as well as the electrical connectors for the LED eye lights).
Next up is adding a bit of weathering and a final clear coat. I've also finished pepping his Cod Piece and started work on pep pieces for his gloves. More picture on those later this weekend (hopefully).
Lastly, I just wanted to give a huge THANK YOU to all the folks that posted pictures, tutorials and videos of their projects on this site (and others). I've never worked with any of these materials before, and I couldn't have come this far without all the experience and time you've put into fostering this community of awesomely create people!
NOTE: Further info on the magnetic/electrical alternative to building a hinge for the faceplate can be found HERE.
This build thread is over 26 pages long, so I wanted to show you what the finished suit looked like before you go hunting for it through all those pages!
2013 UPDATE: For anyone starting an EVA foam costume, I wanted to point out a couple of newer techniques that have been developed after I made Mikey's armor. I used a rubberizing sealing technique involving Plasti-dip. Here are three newer options you should consider.
1. XRobot's plastic-coating method is worth looking into. He uses PVA glue to seal the foam and then coats it with Smoothcast. Here is his video on that.
2. docholiday78's heat sealing technique. Doc uses a heat gun to close-up the foam cells and then PVA glue. No need for Plasti-dip. HERE is his post.
3. Worbla. While more expensive, this is thermal plastic can produce some amazing armor pieces when used over EVA. A good source for more info and techniques would be Kamui's BOOK on the subject.
Regarding my build, I've provided below some helpful navigation for this thread (cause it's stupid long now):
HELMET WORK (just scroll down - it's in the first post)
PAINTING METHOD
WHERE TO GET EVA FOAM
CONSTRUCTION WITH EVA FOAM
VOICE CHANGER FOR HELMET
ELBOW JOINT EXPLAINED
BUILDING THE HAND-PLATE TRIGGER FOR THE REPULSORS 1
BUILDING THE HAND-PLATE TRIGGER FOR THE REPULSORS 2
GLOVE WORK 1
GLOVE WORK 2
BUILDING THE ARC REACTOR 1
BUILDING THE ARC REACTOR 2
BUILDING THE ARC REACTOR 3
BUILDING THE CHEST/BACK PIECE 1
BUILDING THE CHEST/BACK PIECE 2
FABRIC UNDER ARMOR
BUILDING THE BOOTS 1
BUILDING THE BOOTS 2
LEG ASSEMBLY AND FINAL PICS OF THE BOOTS
SIMPLE VELCRO LEG TO HIP CONNECTION
FINISHED PICTURES - DAYTIME
FINISHED PICTURES - EVENING
FINISHED PICTURE - NIGHT
HELMET MAGNETS AND EYE LIGHTS EXPLAINED - IN DETAIL
------------------------------
Original First Post on 11-24-11:
------------------------------
I am working on constructing a Halloween costume for my 5 year old son, Michael. He would like to be Ironman, so I hit your forums (and 405th) and began working on some pep armor for his costume. I began with the helmet and only started this thread as I was finishing it up.
To be begin with, I'll mention that I'm using Robo's Ironman Mark IV files for most of this build (notable exception is this helmet, for example, is based on the Samuray did on dungbeetles helmet that had a smaller chin). They are clean and simple and perfect for this scale model version of the suit. A huge 'thank you' to Robo and all the guys/gals out there that help us all out by supplying these GREAT pep files!
To start the build I began with the helmet and here's some pics of that process...
The larger was my very first pep construction, but I scaled it too big and had to go smaller. The second (smaller one) is the pep that became Mikey's helmet. On that piece, you will notice I also cheated and made the eye holes slightly larger.
Big (test) helmet done... Final helmet, let to go! Since it was deep winter when I started this project, I borrowed my friends garage to fiberglass the two helmets I had pepped. I had decided to keep all the pieces together through the hardening process, so their edges would line up easier.
Scary first application of bondo... I truly thought I'd ruined the piece! lol
...but after sanding, it looked a bit better.
More bondo... more sanding.
So, after LOTS of applications of bondo and glazing putty, I was ready to prime the helmet.
Primed and ready to be cut into three parts: Faceplate, back piece and the main helmet body.
Cut into three pieces... showing the faceplate open!
Test Fitting with Mikey.
And then in early April we created a manikin so I could start working on some of the body armor pieces. Here's a little time-lapse video for ya!
Here are a few update photos now that the main section of the helmet has been painted. The test fitting pictures (below) show both Mikey and I holding the helmet in place. This is because I still don't have padding added inside the helmet yet (probably won't until we're closer to Halloween and I know his head isn't going to get any bigger!)
And finally... Here is a little video explaining the magnetic faceplate connectors (as well as the electrical connectors for the LED eye lights).
Next up is adding a bit of weathering and a final clear coat. I've also finished pepping his Cod Piece and started work on pep pieces for his gloves. More picture on those later this weekend (hopefully).
Lastly, I just wanted to give a huge THANK YOU to all the folks that posted pictures, tutorials and videos of their projects on this site (and others). I've never worked with any of these materials before, and I couldn't have come this far without all the experience and time you've put into fostering this community of awesomely create people!
NOTE: Further info on the magnetic/electrical alternative to building a hinge for the faceplate can be found HERE.
Last edited by a moderator:
")