Ironman Costume for 5yr old - LINKS on PAGE 1 - tips & important bits

Re: WIP Ironman Costume for 5yr old - Arc Reactor work pics

thx a lot.. wow that looks amazing!!, what do u use to remove excess glue that hardened on the front? foam and hot glue don't mix well with a crappy glue gun haha.. i just did the COD piece in foam utilizing your tips and tutorial.. =D

First off, for the obligatory warning... be careful, hot glue is hot. :lol

I say this cause I tend to get my fingers into the glue all the time when I'm working with this stuff (i.e. I wipe away excess while it's still very warm from the finished side). But I don't recommend doing this as even a low-temp gun can end up burning you.

I'll admit that I ended up with my first second degree burn from hot glue on this project. I have a hi-temp gun (most folks use a low-temp gun), and while I've had my fingers in hot glue for over a decade, and fancy myself hardened against the heat... I still burned the crap out of my finger tip wiping up an ugly seam two weeks ago! :$

The best tip I can provide regarding avoiding extra glue pushing out of your seam is to just take it slow (maybe 2"-3" sections at a time) and then pushing into the seam from both sides gently to make sure they bond and are even.

It helps if you practice applying different amounts of glue and placement of that glue until you get a result you like. For example, I cheat my bead of glue toward the inside (non-facing) side of the seam. That way when I push the pieces together the glue pushes out the BACK side of the seam rather than the front (which you then have to either wipe away while still warm or cut off. The hazard of this method is the risk of not sealing the facing side of the edge firmly which can result a gap (if the pieces is pushed or pulled the right way). I run that risk, as the plasti-dip will seal the darn seam forever when I get to that step and I'd rather not go back and try to repair a bunch of ugly facing-side seams. :)

If you end up with glue burs or globs on your facing-side the best tool to have in your arsenal is a pair of Cuticle Scissors. Get the curved blades version so you really get close to the seam.

For angle seams, you might want to consider a Matte Cutter. GraphicJordan swears by his (these are mostly used to cut those angled bevels on frame mattes). He just sets his cutter to 45 degrees and slides the cutter along his metal straight edge. I, on the other hand, shoot more from the hip. I just use household scissors and bevel edges by eyeballing it. I'm sort of a sloppy builder that leans heavily on my 'finishing' skills to make the pieces look good.
 
Re: WIP Ironman Costume for 5yr old - Arc Reactor work pics

Mad props man! Crazy amount of detail. I started making a costume for my son a week ago (and im still stuck with the helmet). Thank god I found this thread, by grabbing all your tips I got my hopes that I can finish it for halloween too (fingers crossed, first pep). Thats great advice on the glue, never thought of that :)
ironman.png
 
Re: WIP Ironman Costume for 5yr old - Arc Reactor work pics

This is going to be hilariously adorable!! I so can't wait to see it finished!
 
Re: WIP Ironman Costume for 5yr old - Arc Reactor work pics

my 4 year old brother was looking at the pictures of the armor earlier and is sooo jealous! by the way, do you know of a good online store that sells white plastidip?
 
Re: WIP Ironman Costume for 5yr old - Arc Reactor work pics

I'll bet Mikey thinks you're the BESTEST DADDY on the PLANET!!!! I think this is the most technical ironman build I've seen with all the gadgets you've created and the enginuity... Simply AMAZING and BEAUTIFUL.. I take my hat off to you sir...
 
Re: WIP Ironman Costume for 5yr old - Arc Reactor work pics

Lad, your helmet is looking good! That faceplate is excellent!!! :thumbsup


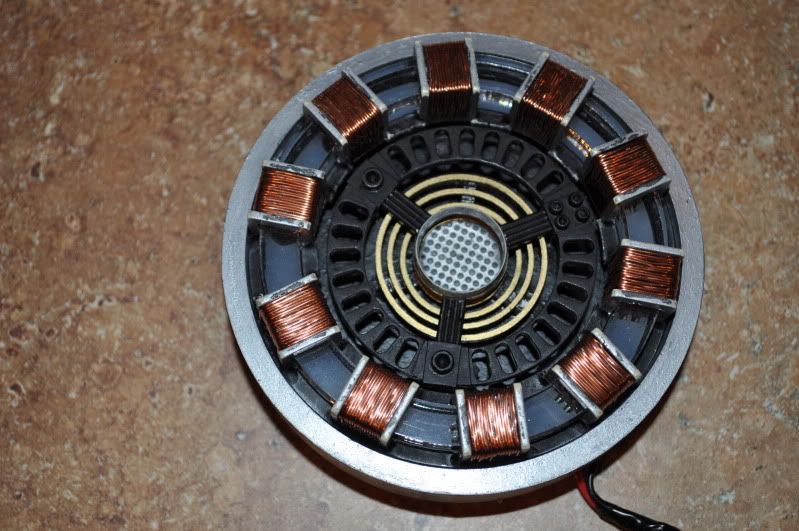
KevinG, your Arc Reactor is stunning! It's one of the best references I could find. You did an AWESOME job on your rig!
DSC_0344.jpg

Picture is from KevinG's Flight Stabilizer and Arc Reactor build - CHECK IT OUT!


E3Thousand, Amazon has it listed for $8.99 HERE. I buy mine at Ace Hardware - which stocks several colors.


And, thank you, Bilious and Judge Spartan. All this encouragement truly helps me stay motivated! :):thumbsup
 
Re: WIP Ironman Costume for 5yr old - Arc Reactor work pics

That gloss will CERTAINLY work for the helmet and any hardened pieces (but so would any clear gloss enamel.

As for your foam pieces, I'd hold off on using the gloss coat I've been using. It's workable, but still will be prone to minor cracking. GraphicJordan is in the process of testing some paint that is normally used on rubber latex Halloween masks. It's very high-gloss and TOTALLY flexible! If that works like we think it will, it will become hands-down the BEST option out there for getting glossy metal look while retaining the flexibility of the foam armor builds! :):thumbsup

Great, please keep us posted on your findings luckiy this can of gloss won't go to waste then.

First off, for the obligatory warning... be careful, hot glue is hot. :lol

I say this cause I tend to get my fingers into the glue all the time when I'm working with this stuff (i.e. I wipe away excess while it's still very warm from the finished side). But I don't recommend doing this as even a low-temp gun can end up burning you.

I'll admit that I ended up with my first second degree burn from hot glue on this project. I have a hi-temp gun (most folks use a low-temp gun), and while I've had my fingers in hot glue for over a decade, and fancy myself hardened against the heat... I still burned the crap out of my finger tip wiping up an ugly seam two weeks ago! :$

The best tip I can provide regarding avoiding extra glue pushing out of your seam is to just take it slow (maybe 2"-3" sections at a time) and then pushing into the seam from both sides gently to make sure they bond and are even.

It helps if you practice applying different amounts of glue and placement of that glue until you get a result you like. For example, I cheat my bead of glue toward the inside (non-facing) side of the seam. That way when I push the pieces together the glue pushes out the BACK side of the seam rather than the front (which you then have to either wipe away while still warm or cut off. The hazard of this method is the risk of not sealing the facing side of the edge firmly which can result a gap (if the pieces is pushed or pulled the right way). I run that risk, as the plasti-dip will seal the darn seam forever when I get to that step and I'd rather not go back and try to repair a bunch of ugly facing-side seams. :)

If you end up with glue burs or globs on your facing-side the best tool to have in your arsenal is a pair of Cuticle Scissors. Get the curved blades version so you really get close to the seam.

For angle seams, you might want to consider a Matte Cutter. GraphicJordan swears by his (these are mostly used to cut those angled bevels on frame mattes). He just sets his cutter to 45 degrees and slides the cutter along his metal straight edge. I, on the other hand, shoot more from the hip. I just use household scissors and bevel edges by eyeballing it. I'm sort of a sloppy builder that leans heavily on my 'finishing' skills to make the pieces look good.

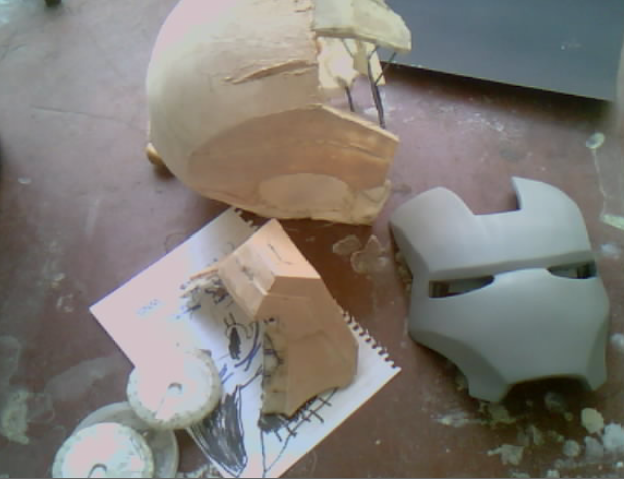
yeah i experience that exact issue i try beading it in the back and tend to have gaps in the front so i started kinda pushing it forward then pulling it back, it sorta works but sometimes i still get the smears and globs. I guess the best bet is to just recut the piece and try again, just very time consuming and annoying but better that then sanding and bondo'ing fiberglass, i guess theres a tradeoff between working with foam than fiberglass.
 
Re: WIP Ironman Costume for 5yr old - Arc Reactor work pics

I would recommend using the vinyl fabric or even find sorta the same color more rigid vinyl placemats from TARGET or Wallmart. I only use this type of stuff because sometime the chest and ab armor rub in spots from movement. If this is going happen, using a red material underneath will not show the paint rub-off areas as much if the material is already red.

What a great build you have going!

Paul
 
Re: WIP Ironman Costume for 5yr old - Arc Reactor work pics

Friday update...

I took the day off and in addition to completing some chores and making some appointments, I still managed to get a bit done on Mikey's armor.

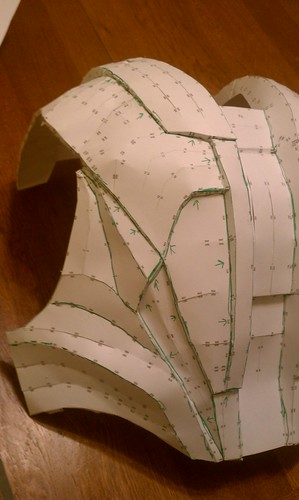
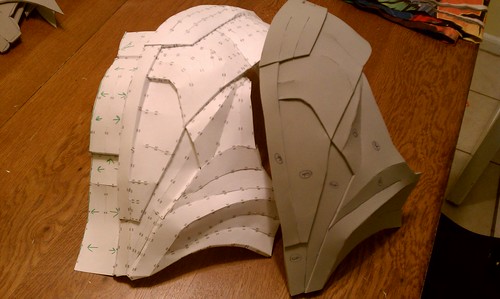
I started with the paper pep of the back armor and marked out how I wanted to cut it into foam templates. Sometimes these cuts match the paper pep lines and/or seams, but there are several cases where I deviate from them quite a bit. Here is the piece marked up ready to be cut up into foam templates. You'll also note that I've marked pieces that I want to add additional material to in order to assist me in overlapping sections where I want the edge of the foam to act as the paper pep ridge did in this model.
6036837453_7d7437783a.jpg


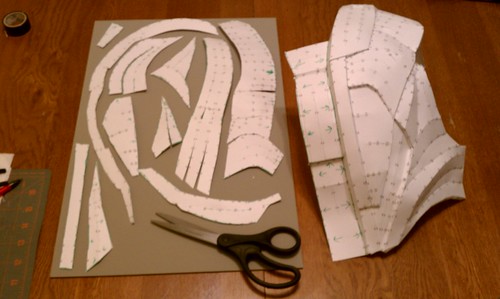
Next shot is of the cut up paper pep parts laid out on the 3mm EVA foam I'm using. Since both sides are mirror images of each other, I only need to make templates of the one side - I will simply flip them over and trace the second side pieces from the same templates.
6036880761_c27d73708a.jpg


After cutting the pieces out and hot gluing them together, here is what that first side came out like (set against the paper pep original so you can see some of the changes I made from paper to foam on this piece).
6036861897_14d750e514.jpg


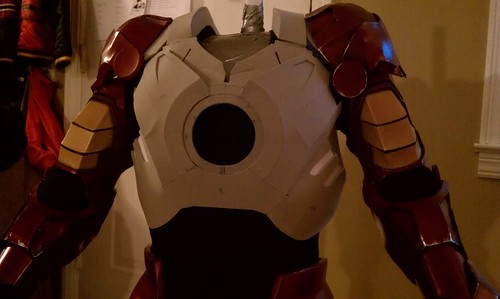
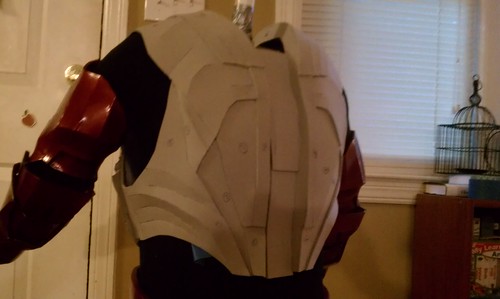
As I mentioned before, I'm still planning on combining the chest, the neck-line of the brace piece and the back all into one complete unit with a seam up the center of the back. It will be a sort of reverse vest with a velcro closer hidden under the spine piece.

Here is a test fit of the unit prior to building the neck-line of the brace into it. First, the front... And, yes, the shoulder bells are still not attached (just set on top of the arms for the picture). :unsure
6037415308_72f8b0f9ba.jpg


And then the back...
6036868897_7ed0487eae.jpg


I'm hoping to have time enough tomorrow to finish up the back and build up the neckline of the brace into the combined piece.

I'm also excited to have the back piece almost done so I can finally attach those shoulder bells. I've been waiting to see how everything will fit together before mounting them with a couple of wide elastic bands which will allow some movement but still keep them in their proper places.

Nite All! :):thumbsup
 
Re: WIP Ironman Costume for 5yr old - Foam back armor pics

wow amazing!! i've been debating of trying to do your process with foam by making a full pep then cutting them to the parts, the back piece in foam looks great, and really good idea on making the front and back one piece with velro, i wonder on a full size adult if this would work well also. Do you just plan on using hot glue to attach the front and back pieces or gonna reinfoced the attachment more with something else?
 
Re: WIP Ironman Costume for 5yr old - Foam back armor pics

Do you just plan on using hot glue to attach the front and back pieces or gonna reinfoced the attachment more with something else?

Yes, I'm attaching the chest and back together around the neck area of the 'brace' pep piece. I'm hoping to have that done today... we'll see.
 
Re: WIP Ironman Costume for 5yr old - Foam back armor pics

Dude, that looks awesome, as always. I'm totally loving this build. If NY and TN were closer together, we could get my son's Ant-Man and Mikey's Iron Man together for a Little Avengers photo. LOL
 
Re: WIP Ironman Costume for 5yr old - Foam back armor pics

How long did the back piece take you to pep, mark out cut lines, cut up, trace onto foam, cut out templates, and re-build in foam? Seems like it would take a long time, but from what I see it's worth the effort! Keep up the awesome work!
 
Re: WIP Ironman Costume for 5yr old - Foam back armor pics

Dude, that looks awesome, as always. I'm totally loving this build. If NY and TN were closer together, we could get my son's Ant-Man and Mikey's Iron Man together for a Little Avengers photo. LOL

A kids Avenger's photo would be awesome! I really liked your son's Ant-Man costume - it's cool that he's into one of the comic characters not featured in all the movies! :thumbsup

How long did the back piece take you to pep, mark out cut lines, cut up, trace onto foam, cut out templates, and re-build in foam? Seems like it would take a long time, but from what I see it's worth the effort! Keep up the awesome work!

It takes me much longer than it would take you if you use STEALTH's tutorial on foam building. His videos show how to modify the pep file inside Pepakura Designer before printing them so you don't have to build a paper pep at all. However, since I'm modifying these so heavily (and since I'm very unfamiliar with the general Ironman models), this tends to work better for me. I just tend to work better if I can manipulate the parts physically rather than virtually. :unsure

dude there r no words to describe ur work! truly amazing.

Thanks, ugameeough. I just hope I can finish it up by Halloween... and still find time to create Mikey's brother his Cyclops costume. :):thumbsup

*****

A little progress tonight after the kids went to bed...

I quickly built up the small 'colar' piece from the Brace file. This is just the neckline of the Brace pep piece that can be seen above the chest piece and around the shoulder pieces of the back assembly.

I then dove in to designing the velcro connected back section. As I've stated before, my intention is to create a reverse vest piece which is a combination of the Chest, Back and Brace pep pieces. The seam will be along the spine of the back.

6043959305_dbca19952c.jpg

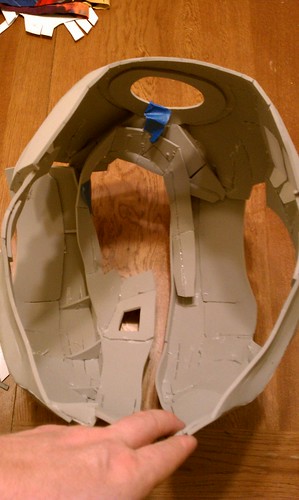
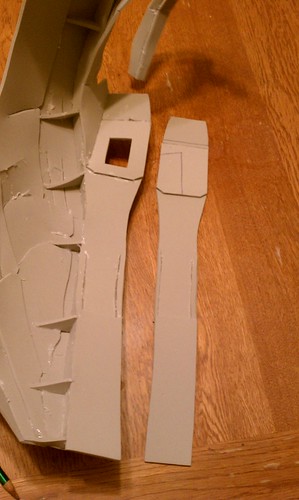
This is the inside of the combined torso piece looking in from the waist side toward the hole for the head. I'm just holding it together in this photo as nothing is permanently glued into place yet.

Note: I've re-enforced the recessed spine area with triangular pieces of foam so that sharp 90 degree angle stays correctly in line.

To create an overlap where I could make my velcro connection, I made a duplicate spine section.
6043957827_5fb3ef00cc.jpg


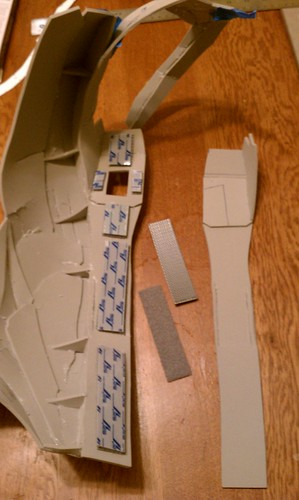
Next I cut and laid out the velcro strips along the top and bottom overlapping spine pieces.

6044504670_2fb7d5e301.jpg


I am using X-treme Velcro (the kind you use for exit signs and other industrial/heavy use). I found these at Wal-mart for the same price as standard velcro.

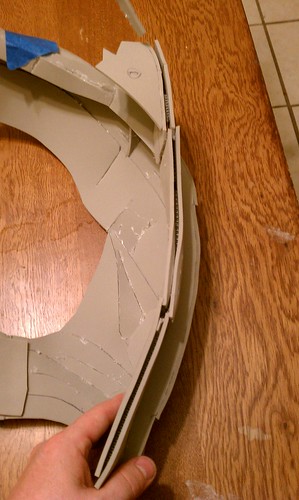
Once the velcro was glued to both side, here is the total thickness of the overlapping pieces.

6044503044_a49ac06db7.jpg


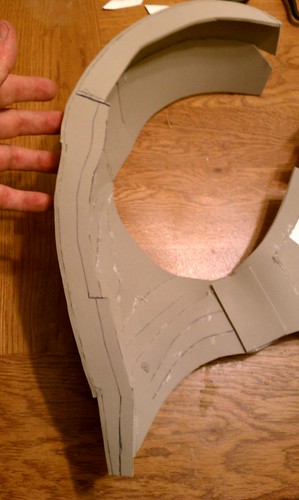
Taking that extra 3/8" into account, I modified the height of the spine recess so the side with the lower velcro overlap flap would still keep the sides of the back the same depth. The extra depth adjustment is marked here in ink.

6043953647_7f2ebcb174.jpg


I've got it all put together now, and everything seems to be working well with this configuration; but I'm going to have to wait until the morning to have Mikey try it on and see if everything is good before nailing down the last of the collar piece and over the shoulder back pieces.

I'll try to get both pictures and video up showing how his connection in the back works.
 
Re: WIP Ironman Costume for 5yr old - Foam back armor pics

A kids Avenger's photo would be awesome! I really liked your son's Ant-Man costume - it's cool that he's into one of the comic characters not featured in all the movies! :thumbsup
.

We must hunt some other Mini Avengers down! Maybe photoshop a cool Assembledge if needed!
 
This thread is more than 7 years old.

Your message may be considered spam for the following reasons:

  1. This thread hasn't been active in some time. A new post in this thread might not contribute constructively to this discussion after so long.
If you wish to reply despite these issues, check the box below before replying.
Be aware that malicious compliance may result in more severe penalties.
Back
Top