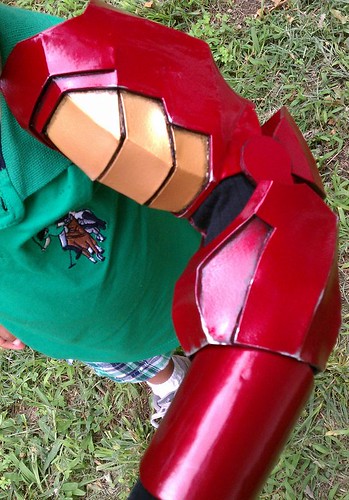
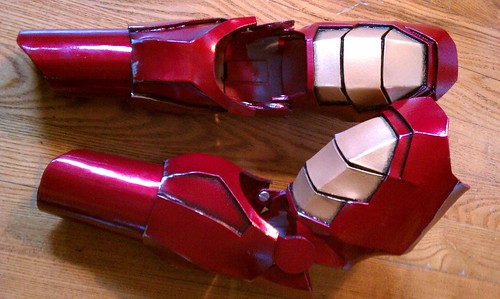
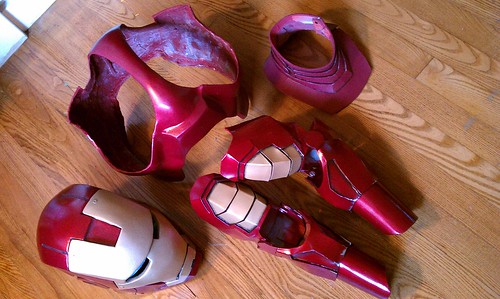
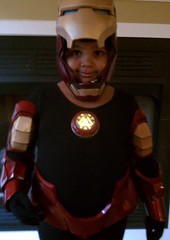
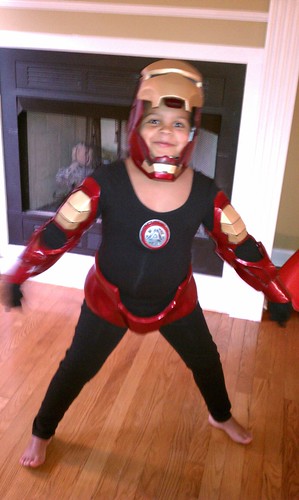
Re: WIP Ironman Costume for 5yr old - Update 6/24
REPLUSORS:
In the past I posted some of my initial thoughts on the subject of gloves and how I'd like the repulsors to work (
LONG POST ON THE SUBJECT HERE).
I broke down the build into the following categories:
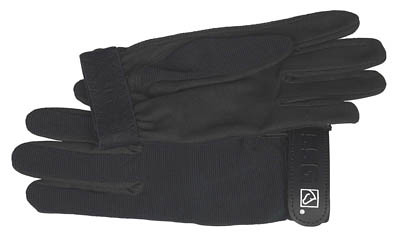
UNDER ARMOR BASE GLOVES
In the original post, I debated cloth vs wool. After that post and some additional materials tests, Joe (TK171) pointed me toward some some great child-size riding gloves (which I purchased and modified slightly to match Mikey's hands). I'll be using these for Michael's Under Armor Base Gloves.
BUILD MATERIALS -- PEP vs SCRATCH BUILD
I'm still leaning toward scratch building these rather than pepping them. I am also adding the option of FABRIC PAINTING them rather than applying a bunch of hardened piece to his gloves... after all, he needs to be able to get candy or perform tricks on Oct 31st.
")
ELECTRONICS -- LIGHT IT UP!
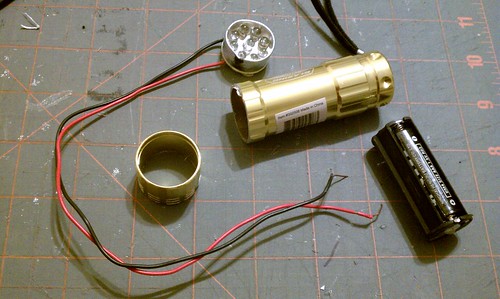
I'm also still planning to use the two 9 LED mini-flashlights I picked up for the repulsor lights. I will cut down to just the thickness of the LEDs and then wire it to the main battery power pack for the suit.
The circumference of the mini-flashlight housing is almost perfectly scale for my 5yr old's hand and the light is intensely bright.
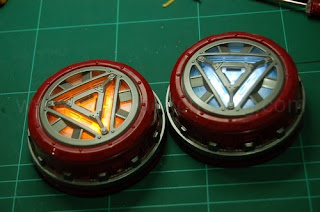
With the light squared away, I'm now focused on making the light strobe and adding sound. To do that, I'm breaking apart a $3 arc reactor toy that has a sound FX component and a light controller. The light controller will be wired to the 9 LED flashlight at Mikey's palm and then those wires will run back to the switch which will activate the sounds and flashes via the toy's circuit board.
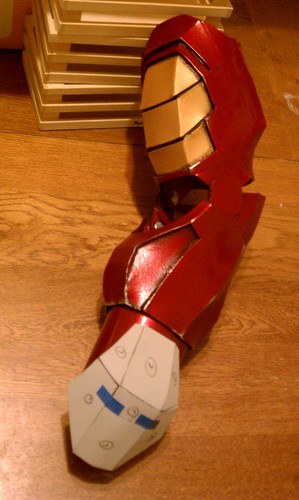
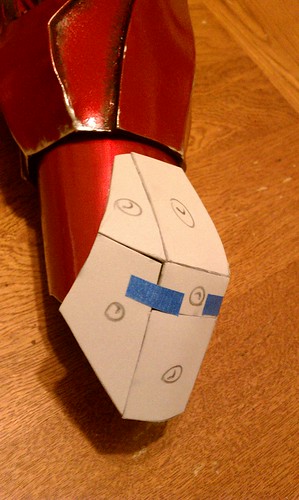
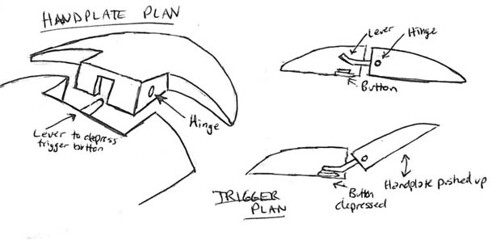
TRIGGER -- HANDPLATE PLANS
Now, I've got the board with the sound and light control, I have the 9 LED light for the palm of the hand and I have a good solid base glove to mount all this stuff to... So, what's missing?
A trigger!
I really want Mikey to be able to 'fire' these repulsors at will, and to do that I need to design something that triggers the sound and lights when he tips his hand back (into firing position).
I played around with several designs for triggers, but most of involved the electronics being housed on the gloves. That seemed dangerous for me, as I figure Mikey will shed these at some point so he can use his hands more freely. And, in that case, these things will be heavy and bulky and probably easy to bang up and damage.
So, my new plan is to hinge the two pieces of the handplate armor so I can build the repulsor trigger into the handplate (which will be hard-mounted on the wrist/bracer piece).
This solves two problems. First, it's a safe and secure location for the electronics (as that piece will not get knocked around as much as the glove). And secondly, it allows for me to only house the 9 LED's (which keeps them light and easy to remove and put back on - especially with a snap-to-connect 2-wire connector).
Here's a quick sketch I did in Church. I know, I know... That's bad form. All things considered, I guess now the costume can be attributed to Divine Inspiration!
With all this in mind I've started to construct the hinged handplates.
Pics and details to follow...