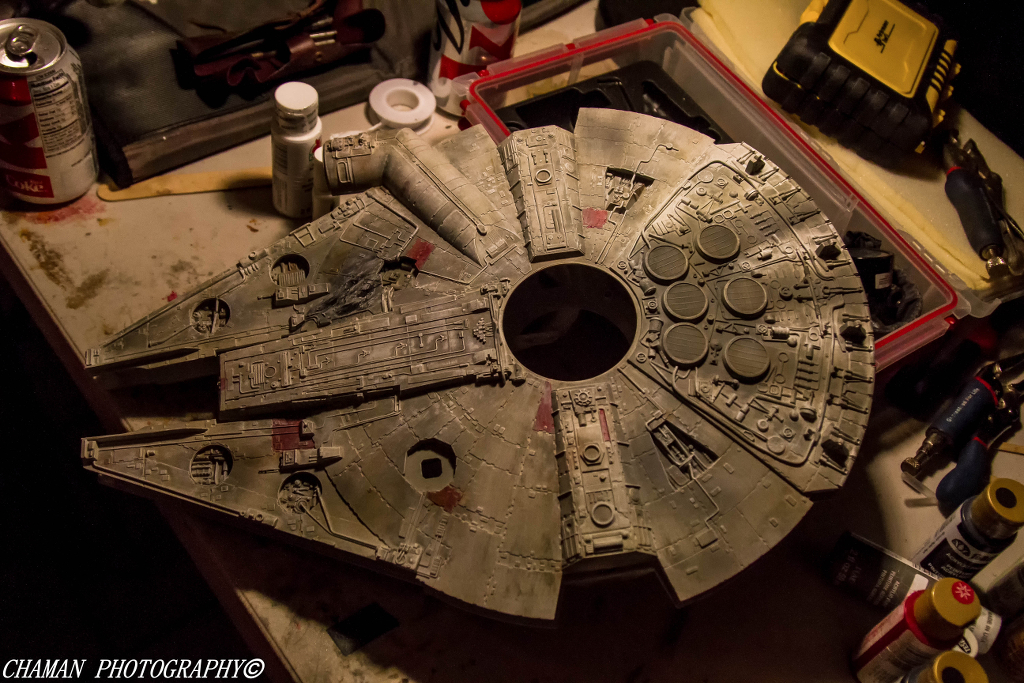
here is the link to Tony's Hasbro upgrade parts on shapeways Right Here. I ordered the cabin walls and cabin cockpit. The sidewalls he is designing, will be cast in resin by Mike Salzo for a lot cheaper than the parts from shapeways.
 
here is the link to Tony's Hasbro upgrade parts on shapeways Right Here. I ordered the cabin walls and cabin cockpit. The sidewalls he is designing, will be cast in resin by Mike Salzo for a lot cheaper than the parts from shapeways.


The resin may be cheaper but for lighting purposes the translucence of the 3-D print makes it a bit more appealing.
 
The resin may be cheaper but for lighting purposes the translucence of the 3-D print makes it a bit more appealing.

Yeah. that's why I got the cockpit assemblies in printed form as they are already set up for lighting with fiber channels already inlaid. As far as I know; the sidewalls don't have any lights in them so resin will be ok for me, although I am trying my hardest to actually design sidewalls myself. I am just not that good at 3D design yet.
 
Yeah. that's why I got the cockpit assemblies in printed form as they are already set up for lighting with fiber channels already inlaid. As far as I know; the sidewalls don't have any lights in them so resin will be ok for me, although I am trying my hardest to actually design sidewalls myself. I am just not that good at 3D design yet.

Tru dat....sidewalls would be a waste to spend more than you need to.
 
Last edited:
Can some one tell me what parts I need just for the side panels,I am having a hard time to figure what parts Tony is offering on shapeways,I just want to make sure I get the correct parts..

Are all the panel parts for both sides of the Hasbro MF available? if so can someone please post a link to each correct ones I need to have a complete set for both sides of the MF..

I just like to make sure I am getting the correct parts..

Thank You.


FZ6 is making the side panels for the Hasbro based off reference pics and measurements I took off my MR falcon. He had made "studio scale" parts for me in the past the quad cannons yoke and Radar dish... he has take those models and scaled them to the Hasbro as well. If you're willing to wait a bit these parts are all going to be cast and offered as upgrade kits... not sure exactly when that will happen but not long. I can't believe how fast the guy works.

Anyway the casting route is likely going to be a TON cheaper then shapeways. if you do order from shapeways you can tell what is for this ship by searching for HSBRO. All the parts are labeled that way... I'm going to ask him to do some more studio scale parts as well...

Jedi Dade
 
Last edited:
Tony is making the side panels for the Hasbro based off reference pics and measurements I took off my MR falcon. He had made "studio scale" parts for me in the past the quad cannons yoke and Radar dish... he has take those models and scaled them to the Hasbro as well. If you're willing to wait a bit these parts are all going to be cast and offered as upgrade kits... not sure exactly when that will happen but not long. I can't believe how fast the guy works.

Anyway the casting route is likely going to be a TON cheaper then shapeways. if you do order from shapeways you can tell what is for this ship by searching for HSBRO. all the parts are labeled that way...

Jedi Dade

Thanks Jedi,I did talk to Tony and as you said I be waiting for the resin parts vs getting them from shapeways,Tony did tell me he will keep us posted when they will be available..
 
Now that we've seen the Millenium Falcon in the new Star Wars trailer (ep VII). I wonder how long it will be until someone has detail parts for that version.
 
Hey all,

With all the new stuff for the Hasbro Falcon already out there, here is yet another add-on.

This upgrade consists of 18 resin (6x 3), and 9 PE (6x + 3) parts. You get 6x resin exhaust fan inserts (2 parts each), plus 6x PE grilles, then another 6x retainer rings. As well, you get three smaller grilles for atop the docking tubes.

This will be available from the SSM store sooner than later (but not before Xmas): They will (as of now) sell for $48.00 USD.

MMI-7781 - 01
MMI-7781 - 02
MMI-7781 - 03
MMI-7781 - 04
MMI-7781 - 05

NOTE: The PE in the images is in fact a custom piece for the SMT 1/48 Falcon. The 7781 PE will have a smaller outer diameter as to not be seen when the retainer ring is added. Hopefully that makes sense.
 
Last edited by a moderator:
Any updates kokkari ?
Are you leaving it for a bit or having a break from posting to get stuff done?, Iv'e noticed that I sit down to work on mine but end up "researching" on the forums instead of working :)
 
Last edited by a moderator:
Any updates @kokkari ?
Are you leaving it for a bit or having a break from posting to get stuff done?, Iv'e noticed that I sit down to work on mine but end up "researching" on the forums instead of working :)

I just finished up a Y-Wing project that I was working on and have been kind of waiting for the resin sidewalls to come out from Mike Salzo. I've also been saving $ to purchase the cockpit interior and other parts from Shapeways. I thought about scratch building the sidewalls, but I think the resin parts will look better and be more accurate from Mike.
 
Anyone have any fantastic ideas on what to do for the engine vents?

I have a great idea for the engine vents but I can't figure out how to post the photos of them here. What I did is I used a high E guitar sring for the vents. I used the actual sticker of the vent for my template. I unpealed the sticker and I was after what was left behind which is the black circular ring. I cut that ring out and then stuck it to plastic styrene. I then cut the hole out in the middle leaving me with a perfect plastic ring that fits over the engine vents. Now.... I took the guitar string, or even stretched plastic sprew and began gluing them on the back side of the ring leaving only a tiny tiny space between to resemble a real vent. Each piece I cut was longer then the diameter if the ring but that's ok because you cut them all off after the glue dries. After you glued all of your pieces then you glue the six horizontal bars that lay on the top of the screen. It's time consuming but it worked for me and it looks killer. If I can figure out how to up load the photos on this site I'd love to show you guys.
 
I have a great idea for the engine vents but I can't figure out how to post the photos of them here. What I did is I used a high E guitar sring for the vents. I used the actual sticker of the vent for my template. I unpealed the sticker and I was after what was left behind which is the black circular ring. I cut that ring out and then stuck it to plastic styrene. I then cut the hole out in the middle leaving me with a perfect plastic ring that fits over the engine vents. Now.... I took the guitar string, or even stretched plastic sprew and began gluing them on the back side of the ring leaving only a tiny tiny space between to resemble a real vent. Each piece I cut was longer then the diameter if the ring but that's ok because you cut them all off after the glue dries. After you glued all of your pieces then you glue the six horizontal bars that lay on the top of the screen. It's time consuming but it worked for me and it looks killer. If I can figure out how to up load the photos on this site I'd love to show you guys.

Dave you can use a couple photo sharing sights that you can post your pictures,all you do is upload your photo's to the photo sharing site and they will give you a URL and then you would post the URL between these 2 tags.. here is a sample I use from imagine shack..What I do is take out the part that is marked and red and copy and paste what is left over to get the imagine you see below,I also make sure I leave type as forum and size I leave at full size as you can see in the picture..

EjRKuU.jpg


oyWMXr.jpg


Here is a couple places you can try out for photo sharing..I use Imagine Shack as my photo sharing host..

https://imageshack.com/

http://tinypic.com/
 
While the airbrushing is good Scarecrow Joe, the overall colour of the MF is a creamy white and I'm afraid that you overdid the "wear and tear" look.
I know, it's going to be another learning curve since you're used to paint military vehicules (painting armor is another story altogether). You'll have to be more gentle with the overall wash (plenty of good pics of MFs painted or re-painted by members here). Good luck and eager to see the rest of your project:)
 
I agree. I will give it a more creamy white airbrush touch up in the darker areas in order to minimize the wear and tear look. While I was painting it I was visualizing the Falcon some years after the ROTJ episode, almost a ship in its last wings before a full refreshening by Mr Solo. A friend of mine recommended a more tear apart look! LOL! Of, course I respectfully disagree.
 
Last edited:
This thread is more than 3 years old.

Your message may be considered spam for the following reasons:

  1. This thread hasn't been active in some time. A new post in this thread might not contribute constructively to this discussion after so long.
If you wish to reply despite these issues, check the box below before replying.
Be aware that malicious compliance may result in more severe penalties.
Back
Top