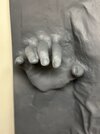
*This project is being conducted by RPF members kenblomi, Hanamaid & myself *
CONTINUED FROM: Original Illusive Concepts makeover by DarthChromer Thread here:

 www.therpf.com
Please take a moment to go back over DarthChromer’s original project at the link above. This build goes through all the alterations and fixes he did to this Illusive Concepts HIC and his mold making and subsequent rubber castings he offered nearly a decade and a half ago. It then goes into my acquisition of the original mold and first gen rubber casting and our initial fiberglass casting from that.
We initially took a couple archival fiberglass castings, and the mold has since DIED. RIP. We did get a few castings out of it before its demise, so we have a couple for archival purposes.
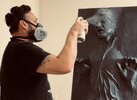
So here we are today... I had hinted at the plan of going even further with the casting to bring back a few details that were overlooked, not deemed as important or whatever, but were VERY important to us and our OCD. So that is exactly what we have been doing over the last year.
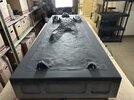
The box itself is our own design that started with 15+ years of research and sketchup work by Kenblomi with further refinements to match the original prop and to be as lightweight & functional as possible.


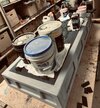
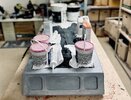
Here are some photos of our fiberglass master of the DarthChromer and our raw box together before we started the project.


Initially we made a list of all the things we wanted to rework and accomplish with our new iteration of this cast. At the same time Hanamaid was commissioned to build a HIC for a friend, so he used one of our boxes and Han castings for that commission. He used that Han as a warmup and to do an initial rework of all the areas we identified for our final makeover. Here are some photos of how that turned out.


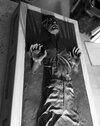
Here are a few comparison images to show the original prop against DarthChromers IC sculpt and what our goal is with the final sculpt based on photos of the first one-off by hanamaid.


So, the plan moving forward is to build out our box to as closely match the original. To sculpt all the identified areas on Han. To integrate Han into the box and sculpt in the transition between them. To make a mold of the entire HIC, box and all. From that we can cast a full light weight HIC shell from fiberglass which will be easier for us to hang on the wall. After we succeed in that we will move onto Phase 2, the panels and electronics which we plan to get from Todd Blatt's 3dstuff.com.
Here is a comprehensive list of the identified areas of work:
-Nose width and shape need minor adjustments.
-Enhance areas where pores and wrinkle details are faded.
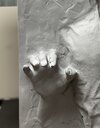
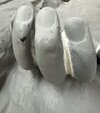
-Re-apply carbonite texture on fingernails.
-Enhance minor hand wrinkle details.
-Restore hip scar that was smoothed over during IC’s run of HiC’s.
-Sculpt collar tip back on and thread textures that are missing in IC HiC.
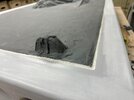
-Sculpt carbonite texture in both top corners where the carbonite meets the box. This was a detail that we assume was altered during the IC cast.
-Sculpt box edge carbonite texture transition with high accuracy.
-Other misc. details.
We have already progressed through most of this work but ill space the progress out in some separate WIP posts.
-Dan
CONTINUED FROM: Original Illusive Concepts makeover by DarthChromer Thread here:

Han Solo In Carbonite prop… going under cover...
Hi friends. As some of you know, I’ve been searching for an Illusive Concepts Han Solo in Carbonite 1:1 prop to strip the paint from for sometime now. Jeff “Gotmagic” on the Yahoo Han in Carbonite builder forum, took me up on my offer. He sent me his #345 Illusive Concept prop with the body and...
Please take a moment to go back over DarthChromer’s original project at the link above. This build goes through all the alterations and fixes he did to this Illusive Concepts HIC and his mold making and subsequent rubber castings he offered nearly a decade and a half ago. It then goes into my acquisition of the original mold and first gen rubber casting and our initial fiberglass casting from that.
We initially took a couple archival fiberglass castings, and the mold has since DIED. RIP. We did get a few castings out of it before its demise, so we have a couple for archival purposes.
So here we are today... I had hinted at the plan of going even further with the casting to bring back a few details that were overlooked, not deemed as important or whatever, but were VERY important to us and our OCD. So that is exactly what we have been doing over the last year.
The box itself is our own design that started with 15+ years of research and sketchup work by Kenblomi with further refinements to match the original prop and to be as lightweight & functional as possible.
Here are some photos of our fiberglass master of the DarthChromer and our raw box together before we started the project.
Initially we made a list of all the things we wanted to rework and accomplish with our new iteration of this cast. At the same time Hanamaid was commissioned to build a HIC for a friend, so he used one of our boxes and Han castings for that commission. He used that Han as a warmup and to do an initial rework of all the areas we identified for our final makeover. Here are some photos of how that turned out.
Here are a few comparison images to show the original prop against DarthChromers IC sculpt and what our goal is with the final sculpt based on photos of the first one-off by hanamaid.
So, the plan moving forward is to build out our box to as closely match the original. To sculpt all the identified areas on Han. To integrate Han into the box and sculpt in the transition between them. To make a mold of the entire HIC, box and all. From that we can cast a full light weight HIC shell from fiberglass which will be easier for us to hang on the wall. After we succeed in that we will move onto Phase 2, the panels and electronics which we plan to get from Todd Blatt's 3dstuff.com.
Here is a comprehensive list of the identified areas of work:
-Nose width and shape need minor adjustments.
-Enhance areas where pores and wrinkle details are faded.
-Re-apply carbonite texture on fingernails.
-Enhance minor hand wrinkle details.
-Restore hip scar that was smoothed over during IC’s run of HiC’s.
-Sculpt collar tip back on and thread textures that are missing in IC HiC.
-Sculpt carbonite texture in both top corners where the carbonite meets the box. This was a detail that we assume was altered during the IC cast.
-Sculpt box edge carbonite texture transition with high accuracy.
-Other misc. details.
We have already progressed through most of this work but ill space the progress out in some separate WIP posts.
-Dan

