FINISHED (see pg 21) WIP - BTTF - Nike Air Mag

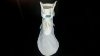
They look good to me. The shape is really good !

Thanks :) I am liking these even more than the parts on my V2 wear pair.

I would dremel the letters edges to get a better "definition".
Then, I'll add some dots with clay or something to get the texture on the cup.

I used the rotary tool to sand them down to take the hard lines off the part. Look at the real shoes. The letter edges are very rounded, almost like they were vacuum formed over the back of the part. Mine have sharp edges and look "glued on".

How hard would you make them ? I think these have to be pretty soft (almost like plastic or foam) so it won't hurt your feet and it could be glued easyly to the fabric.
I don't know if these are also glued to the soles ?

Anyway if I had the material to cast soles, I would do them too (maybe someday...) :)

Based on how my new "softer" ankle buckles are, I'd use the same A65 shore rubber, but with my custom mix, light grey tint added. For giggles I would even paint the inside of the letters first, let them cure, then add the grey so it all fuses together and the colour can not just scrape off.

Once I do the soles, I can also splatter the parts with a fast cure PU to get the same effect on both the heel cup and the mid-sole.

Yes the cups do get glued to the mid-sole.
 
Hey cavx, mags are looking really good! Loving the photos! I just received some V3's, got me thinking about the movie pair.
The original tinker sketch annotates the fabric as sock like. which the film pair are really. the V3's are bad ass, but not really sock like!
I'm liking your neoprene version, I guess you need a bit of rigidity to hold the shoe up, or they'll just flop about!
So I have a pair of V2's and was thinking of embarking on a movie accurate project.
Have you ever thought about a self tightening top strap? My thoughts so far are to use a spring loaded fabric tape measure,
http://www.loveknitting.com/hemline-spring-loaded-tape-measure
love your work, will track back a bit and read up on your journey!
 
Hey cavx, mags are looking really good! Loving the photos! I just received some V3's, got me thinking about the movie pair.
The original tinker sketch annotates the fabric as sock like. which the film pair are really. the V3's are bad ass, but not really sock like!

My V2 wear pair are really floppy and that was just from wearing them heaps. The best mod made to them is probably the sock toe where I delaminated the 3 ply structure of the cloth and removed the toe cap. I kept two layers of fabric and this made them so much more comfortable as the steam toe slim had made them a touch tight in the toe area.

I'd like to do this to a V3 if I get the chance

I'm liking your neoprene version, I guess you need a bit of rigidity to hold the shoe up, or they'll just flop about!

I'd kind of put that project on the back burner in favor or a leather pair. And that has not been finished either. Shoe making is not easy, that is for sure.

So I have a pair of V2's and was thinking of embarking on a movie accurate project.
Have you ever thought about a self tightening top strap? My thoughts so far are to use a spring loaded fabric tape measure,
http://www.loveknitting.com/hemline-spring-loaded-tape-measure
love your work, will track back a bit and read up on your journey!

What I have thought about of late is the use of neodymium magnets and a metal plate. The strap would have to long enough to secure to the buckle at one end, but rather than pass through and loop back like the velcro set up does, it would have to pass through and under the other side. I think magnets (a row of them glued or sewn in) would be the sort of attachment that could give the illusion if a self tightening strap without the need to wind it onto a spool. Because face it, there is not much room in the buckle and the strap need to be at least 5" longer than it is now to work. The strap itself would also have to be made from a plastic (could be laminated with vegan leather for the look) like polyprop because it can both flex and be rigid enough to feed itself into the slot to find the magnets. The metal plate only need to be 1" long and 1/2" wide to do the trick.

If you were really talented, you could use the connection of the metal parts to complete an electrical circuit - IE strap does up and lights come on. undo the strap and the lights go out. This would be better than the pressure switch idea I did a while back.

I have given a bit of thought to the main laces using a similar idea as well.
 
Last edited:
Here is a quick diagram to hopefully better explain my post above.

attachment.php


Note how the strap goes through the buckle slots, but continues under itself. This is the only way I can think (I actually made a mock up a few months ago) you will get the length needed to get your foot in/out of the shoe and not have the bulk of a spool.
 

Attachments

  • MAG strap 1.jpg
    MAG strap 1.jpg
    72 KB · Views: 415
wow that's awesome! I'm going to have to start mocking up some ideas, I just did a toe fix on my V2's and that's as far as I got, there was a lot of rubber under that thing!
Just to share another thought i had for the laces, i found a video showing how a switchblade knife worked, it's pretty ingenious, and works both ways too. those things are fast!
i probably think about this stuff far too much! I might try and make a really quick back strap that you can just pull really fast, no logo for now, and i'll post that, maybe start my own post.
I like the magnet idea, is in keeping with the Mag! why not put some in the sole too??! stick the pair to a wall!
 
wow that's awesome! I'm going to have to start mocking up some ideas, I just did a toe fix on my V2's and that's as far as I got, there was a lot of rubber under that thing!

A proper sock toe or just slim by trim? I think the sock toe looks the best and is certainly the most comfortable to wear.


Just to share another thought i had for the laces, i found a video showing how a switchblade knife worked, it's pretty ingenious, and works both ways too. those things are fast!
i probably think about this stuff far too much! I might try and make a really quick back strap that you can just pull really fast, no logo for now, and i'll post that, maybe start my own post.
I like the magnet idea, is in keeping with the Mag! why not put some in the sole too??! stick the pair to a wall!

I think to make the switch blade thing work, you will need a sleeve that the laces can run through. The PolyProp I have is 1.6mm thick, so thick enough to be strong, but thin enough to keep down the bulk. The pair of laces I made were essentially a single piece with slots cut between the laces. I worked off 1/2" wide laces and 1/2" slots. The four laces were joined at each end, so if one moved, they all moved. The only thing I did wrong was to make the ends where the laces attached to the shoes wider then the main body of the laces. So once I worked out the sleeve, they didn't fit and could not slide. I also tried to make them move from both sides, but as it turns out, it is best to secure them on one side and only have the inner side move up and down. This greatly reduces the bulk as well as you only need one sleeve on the inner side of the shoe. I think my magnet idea would work here as well.
 
Here is a revised drawing of what the part would look like. The exact angle and length would need to be corrected.

attachment.php


Without actually re-making this, I would say the excess would be at least an additional 2" on one side. That excess would slide in under the arch of the foot and the same magnet assembly could be used. The neo magnets are of course those rare 'Earth" magnets that are super strong. They slide off each other, but don't really pull apart easy.

Maybe the sleeve could be as simple as two parts of cloth with stitching in between the laces.

Also if you look at the images of the actual "power laces" prop shoe, you will notice that the laces and strap are made of the same material. That is why I think PP would work here.
 

Attachments

  • MAG strap 2.jpg
    MAG strap 2.jpg
    31.7 KB · Views: 544
Last edited:
@Minok are you talking about my experiments or to cavx ? Cause all pictures of shoes here are from my desk :D
anyway, if you read all the thread you'll see that there is actually already some powerlaces experiments ( where i basically made a mini mecanism almost like a dual action switch blade and another system on the first video i posted) and mag'et straps here :D just need to tweek these projects somedays.
cavx for the powerlaces on the 2016 shoes, they've said that was plastic... So you might be right about polyprop
 
Last edited by a moderator:
I still need to finalize the angles and exact sizes, but here is what the set would look like.

attachment.php
 

Attachments

  • MAG Power Laces.jpg
    MAG Power Laces.jpg
    57.8 KB · Views: 538
Hi guys! Still getting to know who's who on the forum! RVLF, I just saw your tongue extension post, and your mags look very screen accurate!
The movie mags look so comfy! I'm a fan of Nike presto so would like to make a make a kind of mag presto.
Cavx those patterns look great, I will print out 1:1 tomorrow at work, I grabbed the shoe patterns too so will start to get my head around it all.
I see you are actually in Brisbane, I live in Northgate, near Nundah, I'll PM you!
 
I don't think I've ever posted these before, but this is probably the closest I got to a complete MAG. I was never able to work out how to sew the side seam and get the laces to come through. The cuff was real hit and miss and this one is not stuffed. The upper itself actually fits my foot like a glove. It is made from a vinyl mesh and the grey is pretty close to the MAG grey. This was the upper I then started my movable lace system in.

The last image is my prototype lace set up. It was supposed to be attached with wide elastic, but the part would catch because of the way the ends are wider than the body of the strap system. I just hand this out using a dremil. The black part above came with some scuba fins I bought later. It was interesting seeing the design similarities. The black part is useful to stuff an upper with to give it shape and was used in all image captures except the last upper image.
 

Attachments

  • 20161030_160450.jpg
    20161030_160450.jpg
    134.9 KB · Views: 177
  • 20161030_160044.jpg
    20161030_160044.jpg
    49.6 KB · Views: 173
  • 20161030_155940.jpg
    20161030_155940.jpg
    44.4 KB · Views: 161
  • 20161030_155923.jpg
    20161030_155923.jpg
    49.4 KB · Views: 164
  • 20161030_155911.jpg
    20161030_155911.jpg
    57.4 KB · Views: 192
  • 20161030_155744.jpg
    20161030_155744.jpg
    55.4 KB · Views: 222
Minok the who's who on this thread is basically simple :
me, doing and posting experiments on powerlaces, buildups, modifying HC etc. (And yes, i make tongue extention kits now ;) ) mostly here.

and cavx is one of the active member of the rpf boards (specially on bttf topics). Yes, he makes mags from scratch too, but he have his threads too so you should search for them and subscribe to it as i did (bit there are not much updates these days :p )

i guess we are the main people here (on this thread) talking about making things on mags.
maybe we should create a special topic for other things like "powerlaces" or "best methods to make your mags" and get to gather the informations on specific topics
cause here it starts to get a bit messy :/
cavx i don't understand the black part ?
What side joint are you talking about ? Cause the one i see on your pictures is great and almost invisible... :)
the overall shape is good but beware of the ear holes : these should be done before attaching the collar.
did you sewn the bottom ? If yes, inserting the laces will be very challenging :/ laces have to be made (one side) at first moment when you sew the whole upper.
 
Last edited by a moderator:
@cavx i don't understand the black part ?
What side joint are you talking about ? Cause the one i see on your pictures is great and almost invisible... :)
the overall shape is good but beware of the ear holes : these should be done before attaching the collar.
did you sewn the bottom ? If yes, inserting the laces will be very challenging :/ laces have to be made (one side) at first moment when you sew the whole upper.

The black part is nothing to do with these MAGs. Once I had made the white part, I bought a pair scuba fins and they had these black parts pushed inside to help hold their shape - kind of like a shoe tree. I found it interesting that it kind of looks like the part I made for PL.

Yes the sole is on this shoe. Even if it were not, would I have to unpick the stitching at the top but from inside to get the laces through? I can't see any other way.

Yeah, those pull holes. I didn't do them on this as this was just a tester to see if I could actually make an upper with seams. The shape is OK and the seams are neat.
 
the way i make the laces is this :
1 - place the laces facing the fabric
2 - place the second layer of fabric (the one that is going to be inside)
3 - sew the fabric following your pattern but stop right after the demi circle of the toe box
4 - return the fabric

Then, you need to make the joints on the opposite side

Only then, you can pass the visible laces through the opposite side (the one that is still open)
1 - Pass the laces trough
2 - I usually tape them so everything stays where it have to be (this is very important to have them well placed at this point)
3 - get inside the side of the joint where the laces aren't fixed yet
4 - sew this line from the demi circle of the toe box to the top

The lenght of the laces can be trimed out from the inside or you can let them be very long so you can use them to make the ribs and everything would be aligned ;)
I now prefer to make the ribs out of another method and then, place the laces (this is much cost and time effective for me as I get the correct laces from a place far from my home)

Anyway, you'll need to get them made in Two steps : First the smooth side, then insert the other part and finish the sewing ;)

Could you put these on a sole just to see how they would look in the end ?
 
Checkout this picture :

image.jpg

The bottom tape is to mark the lenght of the laces, and the top one is to know where to sew not and will be inside the shoe.
i slide these taped laces in, then i sew where there is no tape
 
not sure. I now always start by the easy side (smooth one) cause I'm sure that the laces will end up aligned with the ribs.
And if there is a nasty sewing or missalinement on the other side, well, it doesn't bother me so much as it is not really visible ;)
 
Back
Top