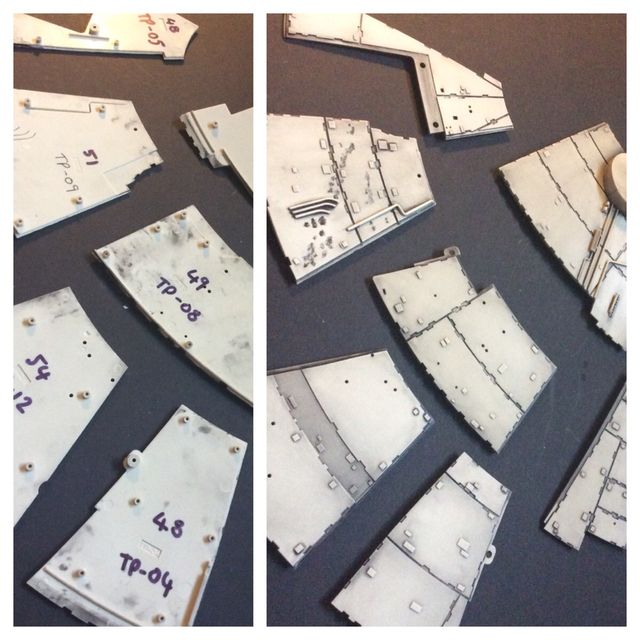
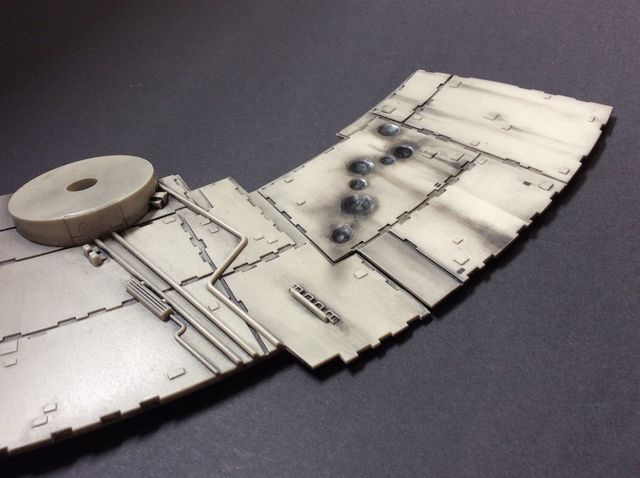
Just sorted out the issues in the folder & checked through the parts, AOK!
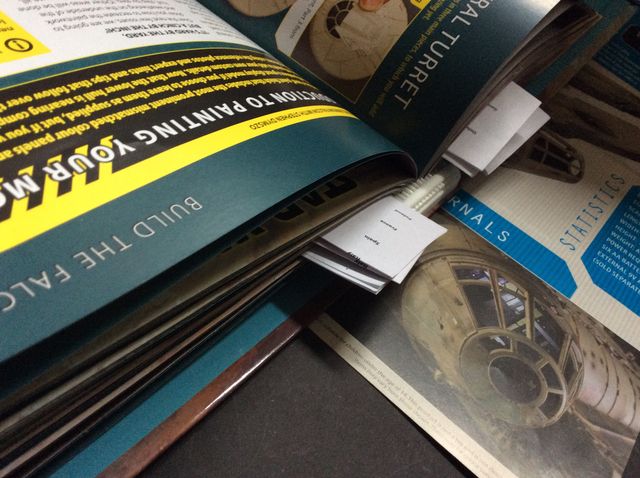
TIP: when you've got lots of issues bookmark the best & correct photo references to the part your weathering... that way your have quick to find images as you work on your particular section, also use the folded white leaflet you get in the plastic bag parts as bookmarks.
6e8c4de7a3aa332f8623db0c379aaa98_zps1r4ljnce.jpg
 
Received my first delivery today - issues 2 and 3, plus my t-shirt. About to take my first step into a larger world! ;)

Here in Australia, we'll be hitting the half-way mark when everyone else is finishing!
 
TIP: if in any doubt of a image in the assembly magazine, double check on the online official build as you will see different & clearer Visually if
the magazine don't clearly do. As a rule lm happy with the product but thought ld warn modellers for future reference..
I do as a rule check both mag & online build but missed it!!! Here to my peril....

(issue 58) Pages 12-13 it clearly shows you to cut off (3) to TP-13 picture 4 (with tweezers) plus the finished picture. I checked online build to find that the part has side poles but it was to late, I'd already cut them off!!!!

Right a bit center...shows with parts cut off! Even used a magnifying glass to check!
5cac99b774938f570b4fb2c252cfefea_zps9ncmxti4.jpg

The bottom picture from online build as it should be. I could kick myself because that's how l had it but the mag showed it without them side arm poles...& my iPad was charging so didn't cross ref... 2 things to do. 1 told Deagostini, 2 micro drill a replacement pole!!!


UPDATE: Those nice people at deagostini are sending me a free replacement part.
 
Last edited by a moderator:
Here's the upper port corridor hull panel from issue 58 plus a extra TP-18 to show the difference..as before I masked & painted the RED (Humbrol matt 153) & Black (matt mix) after the base weathering l usually do with the Lamp Black oils techniques .... If your new here this is the link to the page or go to pg7. http://www.therpf.com/showthread.php?t=240711&page=7


b4d74dedaf2291e0433dd7162de9dbbf_zpsipwg5lll.jpg

9aa832843d4b7fbe024bda97154a9280_zpscpm3klhw.jpg

The 2 main round vents are mostly painted in on the studio model but lve created a more realistic vent weather.
 
Last edited:
TIP: (for the new models) If your making your own colour shades for the greys & red mix them in small well sealed tubs & it keeps for later use to keep the colour consistent... Ive got my various matt enamels mixed for instance, you can do the same for Acrylics etc...
f28fa0e3c3c9fe567ba0deedc1f88540_zpsuyrfw9fn.jpg
 
Last edited by a moderator:
That's a good idea.

I thought long and hard - and ultimately ended up using Tamiya acrylic's (airbrushed) for my reds/greys. I wanted to use Vallejo (as I did in my test-run) - but I don't think they'll hold up well to weathering. I found a Tamiya grey that I can use straight from the pot. However, the Tamiya red needs a drop or two of black to tone it down. Not the biggest fan of Tamiya paints - but they do spray nicely when thinned.
 
Great paints ... I've been working on the turret gun well/chair lately, hate repeating but it's got to be done its creating all the extra details that's time consuming but hopefully worth it..lll show pictures soon
 
Here's what the gun port looks like under the window, as you can see it don't really show much...lve drilled micro holes & more to do... around the well for lighting, will show that at a later date...
1459a679bcccbcec096d16d04dbbb7e1_zpsrojgqjfv.jpg

f6d88eb7d502dfa5c9a92aaad9786530_zpscgxhl7vm.jpg
 
Last edited:
That is the issue with super-detailing model interiors. I super-detailed the Wheelhouse of my 66" Scott Brodeen Disney Nautilus and, now that it's buttoned up, you can hardly see any of the detail. Of course, I have the satisfaction of knowing it is all in there ...
 
Yes agreed... it's mad ;-)... Apart from micro LED lights (if on!) is not too useful....Still more to do....
 
Last edited:
Gun well looks very nice, Jordan. :cool

Seeing as the gun-wells (and other areas) that you've super-detailed won't be very visible - perhaps you could take photos (such as above) - and then make up a framed display piece that can accompany the model itself? One of those largish photograph frames that holds about 20 separate photos?

After much deliberation, I've done a complete 180 with regards to my MF build. I'm now going to prime, pre-shade and base coat my hull parts - a la old-skool model-making techniques. You've done an awesome job with your technique however.
 
I've got about a week before my next delivery so lve been giving the parts a first coat weather. As before a good tip is to number them on the back clearly then you can bag them all together. Then when the frameworks finished it's easier to identify the parts.
be0690fa638d98b269e1f262307aac7d_zpsdxzmu1lv.jpg
 
Last edited:
Finally received issues 59-62 on Friday with last binder.... So l thought I'd today focus on the blast hole impact & carbon scoring under right to the top hull radar (issue 4, pages 7 & 9) for studio shots at closer inspection. I may rip into the hull bullet blasts but till l see more close ups of the studio model thinks I'm happy to leave just for now....

The 1st picture shows my Dremel sanded points....
096e13fdf33ef92816f53bea332c04e6_zpsnjoo91ov.jpg


ed922e9183b31c37d4cb0fa2129f04f9_zpsr5t1cefq.jpg
 
Last edited:

Your message may be considered spam for the following reasons:

If you wish to reply despite these issues, check the box below before replying.
Be aware that malicious compliance may result in more severe penalties.
Back
Top