AI Powered R2D2 | 3D Printed Build Thread

Props3D

Sr Member
RPF PREMIUM MEMBER
I don't know if you've seen the Nvida Jetson powered AI robot called the 'Jetbot' but it's friggen amazing. You can train it to do all sorts of things from object avoidance/tracking to learning where it is/isn't allowed. First thought: This would be an amazing R2!

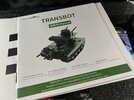
So I ordered a parts kit for it called the 'Waveshare Jetbot kit' and 3D modeled an R2 around it.

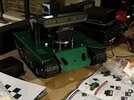
The kit 2 motors are going in the back wheels along with the casters to take some of the weight, I'll have to get another castor for the front.

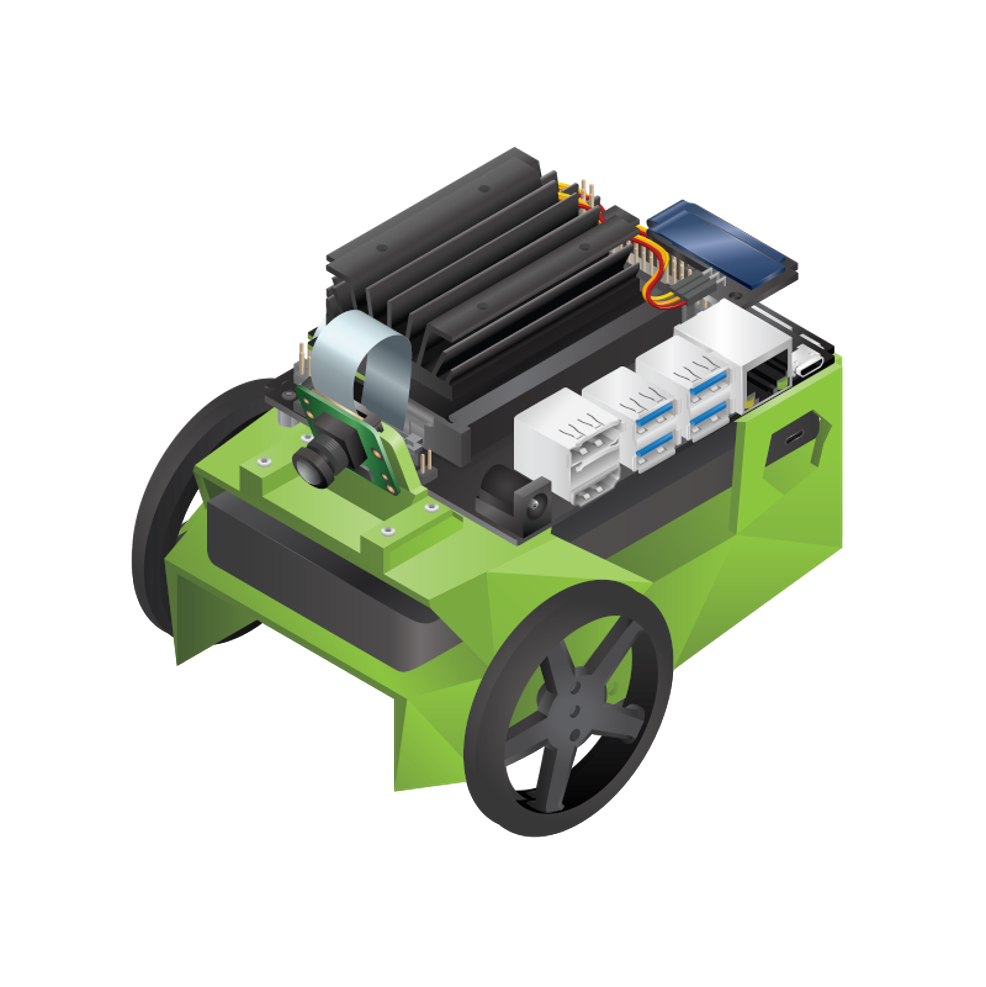
The Jetson and Waveshare controller board goes inside the body with the ventilation on the bottom

The top front vent on R2 will be removable with the camera snapping in place, should have a 10~15deg arc of adjustably.

So far I've got the models done and started the first prints:

R2D2_2022-Jan-10_07-37-04PM-000_CustomizedView15410518039.png


The final model will be posted on thingiverse for free along with the custom code on my github page. Link to PROPS3D Thingiverse page

LINK TO INSTAGRAM POST OF R2 3D PRINTED PARTS <- Here's an Instagram post I did this morning of the prints so far, half what you see there is garbage because I got some of the foot details wrong (if you're a real star wars fan there's a big face palm in there). Hint: It's not the coloring, every time I update a model it removes half my textures so I gave up :)
 
Last edited:
Hey there! Looks pretty cool. :)

You've clearly done a ton of work on your model, but have you seen the Michael Baddeley 3D models? He's done all the gruntwork, and his models are pretty close to screen-accurate. Just if you haven't seen those.

 
Appreciated, but it won't really help here. I'm trying to integrate a lot of electronics so I kinda need to start from scratch. Rhe motor mounts, housing, camera mounts etc need to be correctly scaled and integrated into the model.

I also don't know if he would be ok with that, they're his models so I think any sort of integration and distribution into a project would need to work with him, and since he sells the models I don't think he would be ok with me just giving them away. So modeling it myself is the only clear way to go imho.

Mike Baddeley doesn't actually charge for the R2 and Chopper files. If you look at his patreon, there's a link there to his OneDrive where all the files are available for free, and there's lots of modified versions of his files floating around as well. It would be polite to ask, of course, but I doubt he'd have issues with you redistributing anything you modified. Particularly as his work is all derived from the R2-D2 Builder's Club measurements anyway.

Becoming a patron is first and foremost a way to thank him for the work he did. That said, there are some things that are only available to members, either things that aren't ready for general release or original creations "inspired by" Star Wars but not actually seen on-screen. And, of course, the Fusion 360 documents for all his work are only available to members.

Of course, he has fairly specific solutions to a particular problem... and that's not quite the same problem you're trying to solve, so I don't know that you'd really be saving a lot by using his models as a starting point.

In any case, I'll keep an eye for your progress! Because after all, an autonomous R2-D2 is the dream come to life, innit? :)
Haha, I'll check it out, pinky promise. But I'm already done the base modeling and now moving on to fit and finish. I really like doing my own scratch models, it's part of my process and it keeps everything clean. Parts are already chugging out of the printer, I'll have some pics in the morning when the draft copy is done.
 
Final render before it becomes an IRL object :).

R2D2_2022-Jan-13_05-22-09AM-000_CustomizedView28200620732.png


Top vent can pop out and will be the camera mount, wheels are hidden inside the feet battery boxes. Didn't bother modeling the feet hoses since they'll be 3mm armature wire in the final print, this isn't designed to live in the virtual world so I only modeled what was needed.
 
This is super cool and maybe we can bounce ideas off on another.

We are doing something similar but staring with a TransBOT which is a little bigger than the Jetbot but still based on JETSON and ROS.

We went with modeling up the original production blueprints which give you geometry accurate to the aluminum props used in the first film.

Look forward to seeing what you come up with.
 

Attachments

  • 7C325C0B-2F3D-4314-8F3D-5EB552716F9B.jpeg
    7C325C0B-2F3D-4314-8F3D-5EB552716F9B.jpeg
    2.5 MB · Views: 176
  • 14F9D26A-7FD2-4C92-9FF7-19EDBF013780.jpeg
    14F9D26A-7FD2-4C92-9FF7-19EDBF013780.jpeg
    685.8 KB · Views: 107
Cool, I'd love to share ideas. I do have plans on expanding it later, including using ROS.

I'm working on several projects together here:

One is an 'accessible' version that just uses the cheap Waveshare kit and lets anyone build one of these, just plug in the motors and go. That I'll be sharing on thingiverse and github as a free thing, I've been an educator for many years and sometimes teach robotics and 3d modeling on the side, I love making this stuff more accessible.

The second is a project I'm working on with a machine learning specialist at work to adapt this into a robust platform that can recognize situations such as fires, intruders, etc, and use the software platform at our company for intelligent notifications and incident reporting.

If you see any synergy here I'd love to talk further
 
Last edited:
Got the motor drive done and all the parts fitted, it should be ready to roll but the waveshare image is lacking the wifi drivers. Can't find the correct repo so gotta do more digging. In the mean time I got everything balanced and adjusted so there's enough traction without putting too much strain on the motors. I know the print is rough but it's just my fiddle around version, the final is printing now, will take 3 days just to print the body at .1mm. To those who pointed out the inaccuracies of the model I will address them in V2. But for now I'm sorta focused on the primary objective, the AI drive.

All parts fitted, camera is in the upper vent hole.:
20220117_183013.jpg

Wheels and castors:
20220117_183026.jpg

The guts:
20220117_183043.jpg
 
Oh, wow, that's really tiny! The 3d renders had nothing to give a sense of scale. :)
technically you can print it at whatever scale you want if you print the display version, but the robotic version designed to be an accessible project. So it's printable on any standard 3D printer and uses cheap off the shelf parts or just one 100 dollar off the shelf Waveshare Jetbot kit.

It's meant to work with the Waveshare Jetbot kit straight up with no extra parts, or any of the variations of the parts used NVidia Jetbot build guide. So in this case the size was fixed right from the getgo. My goal here is to create an open project usable by anyone with a couple of bucks and few hours to spare, not some crazy thing that requires specialized tools/knowledge/$$ to replicate.

Following this it has huge potential for expandability, and there's a ton of how to's and guides already out there for existing Jetbot projects.
 
Last edited:
Looks very nifty indeed! The small size definitely makes it more accessible.

How are you finding those ball casters? I went through a number of different ones. The Tamiya ones were too small, a lot of industrial ones tend to bind and lock as they’re not designed for smaller items like little robots. Was thinking of trying the Polulu ones.
There's 2 that come with the Waveshare Jetbot kit in the back legs, so I just used them verbatim. The front one is the cheapest I could find on Amazon. 12 Pcs Casters Wheels Self Adhesive Paste Pulley/Stainless Steel Mini Swivel Caster Wheels with 360 Degree Rotation for Plastic Storage Bins Container Small Furniture Trash Can Box Moving Wheels (12 Pcs) : Amazon.ca: Industrial & Scientific

A lot of the industrial ones are just in a sleeve, no bearings at all. I can totally see how they would bind up without 100s of lbs on them.

The Polulu ones seem to be the best option, I was eying them as well, but I'm hoping I can source something more 'standard' (hear cheap). It's very easy to adapt the models for different castor options so I'm not stressing it too much until I get to the testing phase, which hopefully will be in the next day or two. For all I know these teeny ones will hang up on everything, only one way to tell!
 
It's meant to work with the Waveshare Jetbot kit straight up with no extra parts, or any of the variations of the parts used NVidia Jetbot build guide. So in this case the size was fixed right from the getgo.

And you did say so right at the beginning - but since I didn't (and still don't, because I'm lazy :D ) have any notion of what a Jetbot is, that didn't give me, personally, any sense of the size of this. So the pictures were a surprise!

But he's adorable! Once you get some kinks worked out, maybe I'll poke at trying this.

Do you know what scale he works out to? If not, can I ask for the diametre of the dome? I can calculate scale from there.

It's 120mm in diameter, so I guess that makes him roughly quarter scale :)
 
So it turns out the Waveshare Jetbot image for the kit has no Wifi driver. There's no fix out there so I guess everyone who orders this kit is hooped.

Here's how to get it working:

To get Waveshare Jetbot WIFI Working:
1. Write the Waveshare Jetbot image to an SD card
2. Boot the Jetbot with a monitor and a keyboard plugged in
2. Plug it into Ethernet
3. Open Terminal and run each of the commands below in turn, they will work for both the adapter that came with the Jetson 2GB and the Waveshare dongle, they're both Realtek RTL8811CU under different names.

sudo apt-get update
sudo apt-get install dkms
git clone GitHub - brektrou/rtl8821CU: Realtek RTL8811CU/RTL8821CU USB Wi-Fi adapter driver for Linux
cd rtl8821CU/
chmod +x dkms-install.sh
sudo ./dkms-install.sh
sudo modprobe 8821cu

And update on the project, it's rolling! sorta... the twist fit legs are a double edged sword, drives great in reverse but forward the legs rotate a bit and lift the drive wheel so it ends up balancing on the 3 castors, I made a hotfix for it. The camera bracket is also misaligned a bit, I forgot which way was up on the camera and kinda made it upside down. Once these kinks are ironed out I'll publish the models and a guide in case you want your own R2.

If you want to see what it can do out of the box check out the jetbot site, this project is no more than a Jetbot with an R2 top ;)

Quick update, since I don't want to spam the thread it's just an edit: It's driving perfectly from my computer with an xBox controller, camera works, drive works, steers great with tank controls. So as an RC R2 this is pretty gold already
 
Last edited:
It's 120mm in diameter, so I guess that makes him roughly quarter scale :)

Closer to 1:4 scale than the Water Rockets files! Those are 22%. I suspect people will be interested in the files just to have a little R2, since the Water Rockets files are very hard to find these days.

Keeping the legs sturdy and stable is a major problem for the full-size R2s, so I'm not surprised it's showing up a bit here, too.
After creating the shims it's rock solid, scooting around the floor with no issues or wobbles now. Pretty happy I didn't have to do any major changes to sort that out.

I created alternate parts for all the drive parts for display parts (just the legs and front top vent really), with one screw and a twist of the legs it can be hot swapped between a robot and a display. After I get all the kinks worked out I'll work on getting it screen accurate then releasing both versions on thingiverse.
 
Just to hijack my own thread and ask a bit of advice. I'm new here and I've started build threads for 2 of my most interesting projects but I have like 6 on the go.

Is it worth creating build threads for all my big projects on here, as I give them away after and the feedback I've been getting so far is extremely valuable, or just keep it to one or two so I'm not spamming?

I just finished the base model for this last night to kick off another one, Shatner is coming to town next month and I'd love to build one and get a sig, lifelong fan:

69128978-c89b-4e76-9d0e-95883ecc416f.PNG
Login • Instagram
It's a full light/sound model for a TOS type 2, I just did a base type 1 first to get started.

What do I have on the go? (all for 3D printing)
Aliens Pulse Rifle, fully electronic and mechanical. I have the mechanical done and working on the code with spidy74
Mando pistol fully electronic with working trigger and selector, almost done, works awesome
E-11 Light and Sound, also almost done. Stock folds out, bolt works scope lights up with proper display, etc
SE14r, same features as above, working
DC17, convertible prop/rubber band gun
Luke/Vader ESB sabers, fully electronic and battle read. PVC core with collar makes them incredibly strong. Models done, demos done, power holding me up
Lawgiver, mechanical/light sound, voice recognition, oled (that's the other project I have here) modeling done, code a nightmare but mostly done (also working with spidy74)
5th element stones, light up with animated effects, code done, models done, in paint

ADHD is both a blessing and a curse...
 
Last edited:
This is a really fun project (to be honest they are all)!

I have the parts printed and in paint now. Everything printed wonderfully, and it doesn't need too much clean up. I'm not spending too much time on processing and finishing because I just want a working R2 unit in my house :)

1643846492534.png

1643846515968.png
 
Last edited:

Your message may be considered spam for the following reasons:

If you wish to reply despite these issues, check the box below before replying.
Be aware that malicious compliance may result in more severe penalties.
Back
Top