Awesome! Until then, I’ll be poring over whatever tutorials are a 5 steps below the “arduino for dummies” level hahaWorking on it, I took the week off and I'll be finishing the run and filming. I'll post progress here as I go")
You are using an out of date browser. It may not display this or other websites correctly.
You should upgrade or use an alternative browser.
You should upgrade or use an alternative browser.
Dredd 2012 Electronics 3D Model and Build
And the run is done! Promised myself I'd have it done in 2022 and I got 3 hours to spare. Going to start on the videos tomorrow.
If there's anything you'd like to see let me know. I'm going to make them long and boring, starting with a roll of plastic to a finished product, nothing missing. When I got started with 3D printing that's the kinda thing I was looking for so now I finally get to do it.
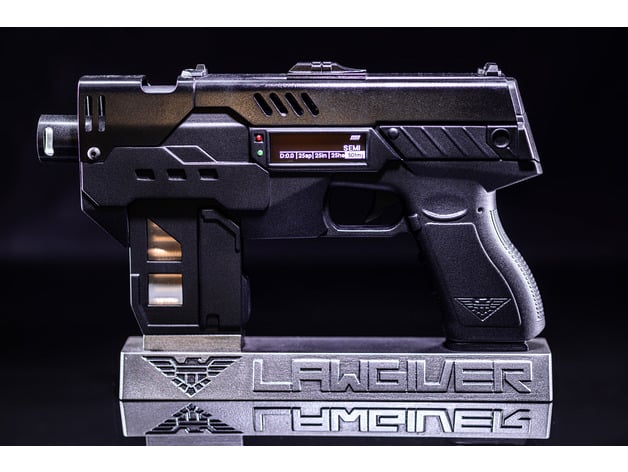
Here's the final feature set, completely locked now for consistency. Only thing missing in this demo is the 3 second hold to change modes (override for the voice recognition):
godsmagicguy
New Member
Let me know when your taking souls again
Update: There was the usual last minute kerfuffle with the run going out and the craziness of back to work after the xMas break, but still beavering away on the script and setup. It's kinda hard to know what to include, I really want this to be a complete stand alone guide on taking this from a roll of filament and a bucket of parts to a final working Lawgiver. But then you have the decisions: Do I include the machining? Do I include variants? How much detail to go into? Do I get all rapid cut twitchy like my kids seem to think I should do or do I got all Ben Stein and get into every head splitting detail?
So here's what I'm thinking:
Machining
Metal triggers=no, these don't add a lot and there's pretty much impossible without a CNC, so plastic it is!
Barrels: Yes! But with a twist! A lot of people have drill presses with those little cross tables, but there's no way to really figure out where to cut. So I noodled on it a bit and came up with these combo work holders/cutting guides. Now you can just drill and cut in the slots and off you go! Any vice can hold them. You still need to cut the step inside for the lens which is hard to do without a lathe but the hardest part is now easy. Remember that you can also just 3D print the barrel
.jpg")
Aluminum mag pins: Yes, these are dead easy
Brass plates: No, they don't really add a lot and need a CNC to do
Versions
I'm going to do the non-electronic with action and electronic versions, this makes it a lot more accessible. I'm going to make the electronics their own vid so you can just skip it if you don't want to go there. There's a static version too but where's the fun in that?
Videos
There will be 4 videos:
Dredd Lawgiver | Interactive 3D Prop | 1 - Intro
Step-by-Step guide to making a professional 3D printed prop from start to finish with tips and tricks every step of the way, from tools to techniques, no corners cut.
Shot list (WIP)
00:00 Intro and Features - Funny Intro, Show Features
00:00 Breakdown of video series and how to navigate - 4 videos highlight reel, talk about tips, tricks, tools. Brief as possible but from roll of plastic to finished prop will be covered, bonus weathering at the end
00:00 Getting the models and code - F360 Model Rotation, thingiverse page, Github overview
00:00 Get Prepped - Complete Parts list - On table, zoom to each part
00:00 Get Prepped - Print the parts - Print orientation (On table, slider pan), filament recommendations
00:00 Video 2 Leading - “Now we’re ready to rock the next challenge is to take these parts from this (with supports), to this! (totally ready to go)
00:00 4 Video wall with clickable panels to each of the 4 videos
END
Dredd 2012 Lawgiver | Interactive 3D Printed Prop | 2 - Prepping the Parts
Print orientation and printing tips
Removing support material
Initial sanding (you can just hose in black and finish at this point)
Tapping and fitting
Dredd 2012 Lawgiver | Interactive 3D Printed Prop | 3 - Electronics
Soldering components
Loading code and training code
Testing
Dredd 2012 Lawgiver | Interactive 3D Printed Prop | Complete Guide | 4 - Painting and Finishing
Priming
Detail Finishing
Top coats and airbrush
Final assembly and demo
Weathering?
Dredd 2012 Lawgiver - Owners Guide
This is the fun one, I won't spoil it
Let me know what you think!
-------------kits update-----------------
Still rolling around kits, trying to get all the parts together for 10 and see how they look but it's not something I planned so still trying to figure out what I'm missing, what it costs, etc. It's quite headachy getting all this crapola together and sorted, but at least I know what I'm missing now and ordered the parts. I'll post again when it's making sense.


So here's what I'm thinking:
Machining
Metal triggers=no, these don't add a lot and there's pretty much impossible without a CNC, so plastic it is!
Barrels: Yes! But with a twist! A lot of people have drill presses with those little cross tables, but there's no way to really figure out where to cut. So I noodled on it a bit and came up with these combo work holders/cutting guides. Now you can just drill and cut in the slots and off you go! Any vice can hold them. You still need to cut the step inside for the lens which is hard to do without a lathe but the hardest part is now easy. Remember that you can also just 3D print the barrel
Aluminum mag pins: Yes, these are dead easy
Brass plates: No, they don't really add a lot and need a CNC to do
Versions
I'm going to do the non-electronic with action and electronic versions, this makes it a lot more accessible. I'm going to make the electronics their own vid so you can just skip it if you don't want to go there. There's a static version too but where's the fun in that?
Videos
There will be 4 videos:
Dredd Lawgiver | Interactive 3D Prop | 1 - Intro
Step-by-Step guide to making a professional 3D printed prop from start to finish with tips and tricks every step of the way, from tools to techniques, no corners cut.
Shot list (WIP)
00:00 Intro and Features - Funny Intro, Show Features
00:00 Breakdown of video series and how to navigate - 4 videos highlight reel, talk about tips, tricks, tools. Brief as possible but from roll of plastic to finished prop will be covered, bonus weathering at the end
00:00 Getting the models and code - F360 Model Rotation, thingiverse page, Github overview
00:00 Get Prepped - Complete Parts list - On table, zoom to each part
00:00 Get Prepped - Print the parts - Print orientation (On table, slider pan), filament recommendations
00:00 Video 2 Leading - “Now we’re ready to rock the next challenge is to take these parts from this (with supports), to this! (totally ready to go)
00:00 4 Video wall with clickable panels to each of the 4 videos
END
Dredd 2012 Lawgiver | Interactive 3D Printed Prop | 2 - Prepping the Parts
Print orientation and printing tips
Removing support material
Initial sanding (you can just hose in black and finish at this point)
Tapping and fitting
Dredd 2012 Lawgiver | Interactive 3D Printed Prop | 3 - Electronics
Soldering components
Loading code and training code
Testing
Dredd 2012 Lawgiver | Interactive 3D Printed Prop | Complete Guide | 4 - Painting and Finishing
Priming
Detail Finishing
Top coats and airbrush
Final assembly and demo
Weathering?
Dredd 2012 Lawgiver - Owners Guide
This is the fun one, I won't spoil it
Let me know what you think!
-------------kits update-----------------
Still rolling around kits, trying to get all the parts together for 10 and see how they look but it's not something I planned so still trying to figure out what I'm missing, what it costs, etc. It's quite headachy getting all this crapola together and sorted, but at least I know what I'm missing now and ordered the parts. I'll post again when it's making sense.
Last edited:
I have a few more coding updates I posted from the Lawgiver Run. But thought it might help post the technical details here.
It’s been very interesting coming back to the code and rebuilding the kit since I did the original one over a year ago. Feels like deja vu. There’s been some odd behaviours pop up, specifically with the audio component. This has lead me to doing some debugging and finding some interesting insights. We sourced all the components at the same time to eliminate variability. But each component can come with different ICs that may not operate as expected. For instance, Chris recently ran into a small glitch that was related to the boot loader on the Arduino, where the first playback would not work when powered by battery. I replicated the same glitch, so in my travels here’s what I learned.
First, I wanted to do some wire tracing on the components. I could see that the commands were being issued properly. So I took to the forums and started reviewing other open source code for the DF players. I discovered that some IC variants have a different packet frame so I tested that to learn that some chips are very forgiving and support both structures. It didn't solve the issue but it was helpful to explore and better understand the serial communication. The code now has support for both formats if needed.
Next, I started reading about the DF Player Pro which functions in exactly the same way as the DF Mini. It's is a nice alternative which has 128mb onboard memory with a 3w amp. Testing this component worked pretty well, so now the code base has support for both audio components. But initially it wouldn't start up with the OLED plugged in, which made no sense to me so I had to explore further.
I turned toward reviewing the entire Arduino sketch. It's pretty large and with all the libraries it uses 99% of the available 32k ram on the Arduino Nano. So I started reviewing some of the optimizations I made to move static data out of the RAM and into the Flash memory. The objective of these changes was to reclaim some RAM so it wasn't at the threshold of 100% which might make it difficult for others to get it to compile on their environments. I discovered that moving some of the String data into the Flash memory might not work properly with the OLED, although it had been always working just fine. So I made some updates to store the String data in Flash memory, but it's pulled into RAM when it's needed by the OLED to write to screen. This makes the code more robust and helps with preventing memory fragmentation.
Speaking of memory frag, I wanted to make sure the application code was optimal since the Nano runs on such a small amount of memory (32k) and it was compiling to nearly 100%. So I reviewed a few other areas. First up was the use of String objects and string manipulation. Using String objects can fragment memory very quickly because it creates a lot of temporary objects. So I made some changes to use static character buffers and standard clib functions to prevent memory fragmentation.
Last set of changes I made was to reclaim some program memory by reducing the overall sketch size. I did this by replacing the external libraries with something smaller. I added to the sketch my own implementations for handling serial comms to the audio and VR component. I only added the necessary features that were required for our application and left the rest. This help save nearly 10%-12% of memory needed by the sketch but more importantly gives way more control on how we can debug and troubleshoot any issues. Another benefit is that there are less steps to compiling the project since there are fewer libraries needed.
The upshot here is that nothing has changed functionally. This is the nature of building these types of projects where we continue to learn and improve the end product. And as usual, I'll provide more updates as I make progress or new learnings.
Hi all! Just an update, I'm about a week behind in filming, I do some of the props for Bucketheads. If you wanted to watch some classic Star Wars stories with some real grit, this show is what you've been looking for (and Andor, I will grudgingly admit that grew on me).
Last week they graciously gave me a bit of time on their set to film intros for my upcoming electronic action Star Wars models, they're a lot more basic than the Lawgiver but they all have sounds, lighting effects, and moving parts. The problem was I was no where near ready to film, so every evening/night was spent franticly painting and finishing so I can film at least 4 intros. The glue was barely dry when I got on set (a fin fell off Luke's saber in the pic below when the sabers clashed, that's what I get just gluing paint to paint, hope I can mask it out):

And on the LG side:
Spidey74 has also been hard at work perfecting the code, he went into great detail about the improvements on the LG in the post above but I'm going to fill in the gap I'm most excited about: He automated a lot of the setup and training! I really needed this done before filming anything, it basicly takes almost all the steps out of training the Voice Recognition and prepping the Arduino, That wasn't super hard but if you're not familiar with editing code out of libraries the video was going to be bit convoluted. Now it's almost one click and go, the guy's a genious! I took a screenshot of a zoom call, I'm on the bottom politely pretending I'm following all this:

Today I'm furiously set building, I decided I'm just going to go full hog and add addressable LEDs to the BG to make it cooler, so I spent all morning cutting aluminum and drilling wiring channels:

I've also been taking some test footage through the week and it was REALLY hard to see what I was doing, so I've been building my 'YouTubeInator' on the side as well:
.jpg")
- Dual 4k cameras with preview monitors, one is on a positional jib and one is on an independent tripod with remote focus and 10-bit recording
- Dual sound recording (shotgun and lav),
- All mobile on dollies (only one shown) so I can move it between all the different stations around mygarage shop
A lot went into this because after all the time that went into the LG I don't want to piss around and do the videos half-arsed, so please forgive the extra setup time. The next update WILL be about completed videos, promise!
Last week they graciously gave me a bit of time on their set to film intros for my upcoming electronic action Star Wars models, they're a lot more basic than the Lawgiver but they all have sounds, lighting effects, and moving parts. The problem was I was no where near ready to film, so every evening/night was spent franticly painting and finishing so I can film at least 4 intros. The glue was barely dry when I got on set (a fin fell off Luke's saber in the pic below when the sabers clashed, that's what I get just gluing paint to paint, hope I can mask it out):
And on the LG side:
Spidey74 has also been hard at work perfecting the code, he went into great detail about the improvements on the LG in the post above but I'm going to fill in the gap I'm most excited about: He automated a lot of the setup and training! I really needed this done before filming anything, it basicly takes almost all the steps out of training the Voice Recognition and prepping the Arduino, That wasn't super hard but if you're not familiar with editing code out of libraries the video was going to be bit convoluted. Now it's almost one click and go, the guy's a genious! I took a screenshot of a zoom call, I'm on the bottom politely pretending I'm following all this:
Today I'm furiously set building, I decided I'm just going to go full hog and add addressable LEDs to the BG to make it cooler, so I spent all morning cutting aluminum and drilling wiring channels:
I've also been taking some test footage through the week and it was REALLY hard to see what I was doing, so I've been building my 'YouTubeInator' on the side as well:
- Dual 4k cameras with preview monitors, one is on a positional jib and one is on an independent tripod with remote focus and 10-bit recording
- Dual sound recording (shotgun and lav),
- All mobile on dollies (only one shown) so I can move it between all the different stations around my
A lot went into this because after all the time that went into the LG I don't want to piss around and do the videos half-arsed, so please forgive the extra setup time. The next update WILL be about completed videos, promise!
Last edited:
Would love to hear more about your YouTubeinator setup when you have time to come up for air!
Been trying to build something similar, but right now, it’s all very static… C-clamp for overhead shot. Tripod for the main camera. I sync audio in post… Would love to hear your thoughts on how you approached this and the solution you came up with!
Sean
Been trying to build something similar, but right now, it’s all very static… C-clamp for overhead shot. Tripod for the main camera. I sync audio in post… Would love to hear your thoughts on how you approached this and the solution you came up with!
Sean
masterjedi322
Sure. First off, I've worked in media for years and done a lot of this stuff before, so I had a pretty good idea of what I wanted coming in. A very important thing is 'consistency', last year all my videos were 1 offs as more of 'sandbox tests' as I finished models and got ready for this year. When I launch properly I'll delete most of that and start with the Dredd Lawgiver, and when I do I don't want to touch ANYTHING for at least a year. That way I can focus on making content.
4k: 4k is NOT necessary, but I'm doing stuff with small parts, so I want to be able to cut in and show action, I also have the infrastructure to handle it so why not?
Sony ZV-1: This is an excellent YouTube camera, it does log footage so you can grade it later (especially when you have to screw black screws into a black thing) and I leave it on manual for recording, but auto-focus on. Auto-focus is a mixed bag because it will 'focus hunt' from time to time but when I does I can cut to the main camera to cover
EOS-R/Ninja V: This is the cheapest equiv to a cinema camera you can buy IMHO, 10 bit recording is huge but you can make it look amazing later. When I need to go on external shoots etc this thing is very easy to grab and go and the output is totally pro. I use an EF-S adapter with a 17-55 I bought off a documentary crew. Crop lens on a full frame?!?! Yes! 4K has a 1.7X crop on most DLSRs so you're just wasting your money buying full frame lenses for video. This camera is generally 'locked off' on a front shot so I can talk to it like a person, but is my A cam for soldering/machining closeups since I don't need a presenter cam.
Audio: Zoom H5 is a fantastic recorder, this is connected to a Synco D2 shotgun on one channel and a wireless LAV on the other. Together they sound kinda crap but I can separate the channels in post so the Synco can capture the machining noises well and the Lav mic captures my dialogue without echo. It's pretty much always 'one or the other'.
The arm: Overhead cameras on fixed points are a pain, the shots are never quite right and you end up covering a lot, so a counter-weighted jib on a dolly gives me HUGE flexibly to reposition the camera on the fly. I don't want to have to get up every time I need to reposition, so I can just grab it and move it around to where I need. The camera is also on a mini ball head giving it further movement with a quick detach mount, I can slide it off this and right on my gimble for steady shot use in 5 seconds.
The monitors: The hardest thing is to see what the heck is happening, and make sure everything is exposed correctly and in focus. These little cheapo F200 monitors let me see what both cameras see at all times. They also have a histogram, so I can see the shot is exposed correctly, and focus peaking making sure everything is in focus. So just glancing at these really tells me everything I need at a glance rather than finding out the shot was messed up in post. This is a huge deal because something like the Lawgiver takes days of effort and if I miss a part near the end I will literally have to make another one and catch up to where I was to refilm.
The other big consideration is lighting. I have lights everywhere: overhead, fill, side, etc. There's no angle without lights. They're super cheap these days so there's no excuse. Lights are more important than your camera and will last 10X longer. The only big one of note is a Amaran 100X with a 5ft wide softbox way at the back. This is to kill shadows from the camera and other things that can be distracting.
Hope that helps! Let me know if you want any more details or rationale
Last edited:
Let the games begin!


(that friggen RGB shelf lighting took like 10 hours, over 400 addressable LEDs controlled with my phone in 9 zones so I can change colors on the fly and add animations, all custom built. I prob could have got some lights from Ikea for like 30 bucks, I think I may have a problem with overengineering things)
(that friggen RGB shelf lighting took like 10 hours, over 400 addressable LEDs controlled with my phone in 9 zones so I can change colors on the fly and add animations, all custom built. I prob could have got some lights from Ikea for like 30 bucks, I think I may have a problem with overengineering things)
masterjedi322
Sure. First off, I've worked in media for years and done a lot of this stuff before, so I had a pretty good idea of what I wanted coming in. A very important thing is 'consistency', last year all my videos were 1 offs as more of 'sandbox tests' as I finished models and got ready for this year. When I launch properly I'll delete most of that and start with the Dredd Lawgiver, and when I do I don't want to touch ANYTHING for at least a year. That way I can focus on making content.
4k: 4k is NOT necessary, but I'm doing stuff with small parts, so I want to be able to cut in and show action, I also have the infrastructure to handle it so why not?
Sony ZV-1: This is an excellent YouTube camera, it does log footage so you can grade it later (especially when you have to screw black screws into a black thing) and I leave it on manual for recording, but auto-focus on. Auto-focus is a mixed bag because it will 'focus hunt' from time to time but when I does I can cut to the main camera to cover
EOS-R/Ninja V: This is the cheapest equiv to a cinema camera you can buy IMHO, 10 bit recording is huge but you can make it look amazing later. When I need to go on external shoots etc this thing is very easy to grab and go and the output is totally pro. I use an EF-S adapter with a 17-55 I bought off a documentary crew. Crop lens on a full frame?!?! Yes! 4K has a 1.7X crop on most DLSRs so you're just wasting your money buying full frame lenses for video. This camera is generally 'locked off' on a front shot so I can talk to it like a person, but is my A cam for soldering/machining closeups since I don't need a presenter cam.
Audio: Zoom H5 is a fantastic recorder, this is connected to a Synco D2 shotgun on one channel and a wireless LAV on the other. Together they sound kinda crap but I can separate the channels in post so the Synco can capture the machining noises well and the Lav mic captures my dialogue without echo. It's pretty much always 'one or the other'.
The arm: Overhead cameras on fixed points are a pain, the shots are never quite right and you end up covering a lot, so a counter-weighted jib on a dolly gives me HUGE flexibly to reposition the camera on the fly. I don't want to have to get up every time I need to reposition, so I can just grab it and move it around to where I need. The camera is also on a mini ball head giving it further movement with a quick detach mount, I can slide it off this and right on my gimble for steady shot use in 5 seconds.
The monitors: The hardest thing is to see what the heck is happening, and make sure everything is exposed correctly and in focus. These little cheapo F200 monitors let me see what both cameras see at all times. They also have a histogram, so I can see the shot is exposed correctly, and focus peaking making sure everything is in focus. So just glancing at these really tells me everything I need at a glance rather than finding out the shot was messed up in post. This is a huge deal because something like the Lawgiver takes days of effort and if I miss a part near the end I will literally have to make another one and catch up to where I was to refilm.
The other big consideration is lighting. I have lights everywhere: overhead, fill, side, etc. There's no angle without lights. They're super cheap these days so there's no excuse. Lights are more important than your camera and will last 10X longer. The only big one of note is a Amaran 100X with a 5ft wide softbox way at the back. This is to kill shadows from the camera and other things that can be distracting.
Hope that helps! Let me know if you want any more details or rationale
I have a very similar set up.
It's a really out of date smartphone, that at this point can safely be called a tiredphone.
The key is to try and get what I want to film in the viewy thing on the phone.
Then I press record and hope.
I think you all will benefit from my experience..
As I go through this video making process I will grudgingly admit that electronics may not be for everyone, so I'm creating a branching path so you can choose to do an action only or electronic version.

As such I've uploaded 2 versions of a few of the models so you can decide which version you want and a 4X6 printable version of the display with a holder so you can mount it like the above.
Both versions are hot swappable so you can change your mind later and upgrade it just by taking out a few screws and swapping. If you've already printed it all the parts are the same except for Dredd2012_Electronic_RearMagazineSwitch_V3 is now Dredd2012_ActionOnly_RearMagazineSwitch_V3 and Dredd2012_Electronic_RearMagazineSwitch_V3 needs to be printed, that's it!
I also uploaded paint stands and masks to help you finish it, and I will upload machining templates later if you want to make metal parts.
 www.thingiverse.com
As such I've uploaded 2 versions of a few of the models so you can decide which version you want and a 4X6 printable version of the display with a holder so you can mount it like the above.
Both versions are hot swappable so you can change your mind later and upgrade it just by taking out a few screws and swapping. If you've already printed it all the parts are the same except for Dredd2012_Electronic_RearMagazineSwitch_V3 is now Dredd2012_ActionOnly_RearMagazineSwitch_V3 and Dredd2012_Electronic_RearMagazineSwitch_V3 needs to be printed, that's it!
I also uploaded paint stands and masks to help you finish it, and I will upload machining templates later if you want to make metal parts.
Dredd 2012 Lawgiver- Action, Light and Sound | Holster and Stand | V4 by Props3DPro
Detailed Build Videos and Instructionshttps://youtu.be/mkcb6rsvBS8Code, parts list here:https://github.com/Props3D/dredd-lawgiverBuild and development thread:https://www.therpf.com/forums/threads/dredd-2012-electronics-3d-model-and-build.343348/Models are finalized so print away but code is...
www.thingiverse.com
Last edited:
In a brilliant late night fueled researching session, I remembered, hey-- Github is a code hosting website, and realized I had never thought to look at what the bright green button that says "code" did. Props3D your instructions have become much more clear once I realized I was stupidly missing 90% of the puzzle. We'll chalk it up to me being new to github and only recently starting to modify my 3d printer firmware through github repos haha.
Been slowly working on mine, popping outside for quick paint sessions whenever the days have been warm enough-- 98% done on the externals, just have the sights and trigger to finish up-- and I didnt see them in the files page,but I like those little silver inserts for the cocking slide you made so Ill probably model up a simple pair of those for mine as well.

Been slowly working on mine, popping outside for quick paint sessions whenever the days have been warm enough-- 98% done on the externals, just have the sights and trigger to finish up-- and I didnt see them in the files page,but I like those little silver inserts for the cocking slide you made so Ill probably model up a simple pair of those for mine as well.
Dredd 2012 Lawgiver- Action, Light and Sound | Holster and Stand | V4 by Props3DPro Good call! It's only on the left side since it was used to pin the glock slide and the prop slide together but I never actually modeled the pin since it was pointed out to me after I finished and I just made it on my lathe. I modeled it up as 'Dredd2012_SlidePin_V1' just now and added it to the thingiverse link.In a brilliant late night fueled researching session, I remembered, hey-- Github is a code hosting website, and realized I had never thought to look at what the bright green button that says "code" did. Props3D your instructions have become much more clear once I realized I was stupidly missing 90% of the puzzle. We'll chalk it up to me being new to github and only recently starting to modify my 3d printer firmware through github repos haha.
Been slowly working on mine, popping outside for quick paint sessions whenever the days have been warm enough-- 98% done on the externals, just have the sights and trigger to finish up-- and I didnt see them in the files page,but I like those little silver inserts for the cocking slide you made so Ill probably model up a simple pair of those for mine as well.
View attachment 1660675
Your print looks awesome!
I did a bunch of filming for the videos today which walks through all the electronics in detail and I'll have something up soon.
Last edited:
Update on filming, I'm about 40% of the way though getting the entire build processes on tape, and I'm editing behind filming.
There's been a lot of hiccups along the way since this is the first time I've tried a video of this scale and so a lot of learning has been happening, so it's been a slower process than I hoped.
Some "funnies" so far:
- I built quick detach sound panels to hang on my garage door to improve the sound, the idea is they'll fall off if someone opens it by accident rather than tearing my door off. I hit them with my jib and they all came crashing down on the power bar, killing the cameras mid shoot and corrupting the files.
- My powered camera lens adapter 'jitters' the focus when turning on and the support material segment was out of focus, I had sorta thought it would be a 'set and forget' situation, over 2 hours of filming out the window. I had to print an entire second Lawgiver just so I could take the support material off on camera again.
I've broken it into sessions, of which 3 are done and 4 more to go. Since 1~3 are done I didn't bother annotating them. So far It's been about 1.5TB of footage and I've had to order 2 16 TB drives just to make sure I can handle it all. I want to capture everything and the sanding alone is prob going to be close to 6~8TB. I'm filming electronics etc around it to make sure I don't slow down.
Just to show you where things are at here's my notes:
Session 1/2/3: Intro, Parts Overview, Content Overview, Support Material Removal (done)
Session 4:
- Gluing the first part of the frame
- Showing sanding tools, getting up with tools to go to sink
- Swap with sanded, [keep sanding second one on the side filming the whole thing]
- Showing drilling and tapping, LED hole setting
- Dry fitting it all together, prepping for paint
- Prime the parts, end video 1
- Recap Video 1
- Assembling action only version,
- Showing finishing electronics components,
- [Sourcing materials]
- Prepping the components using materials list
- soldering the components,
- [coding arduino]
- Soldering components to arduino and connecting them up
- Powering it on for first test
- Training the voice recognition
- Final test all working and how to debug
- Show lawgiver and components side by side on the table, end video 2
- Recap Video 2
- Intro final video, putting it all together
- Show airbrushing gear
- Airbrushing all parts
- Topcoating all parts
- Weathering the lawgiver
- Milling the metal barrel
- Lathe the pin
- Putting it all together
- Final demo (smoke machine!)
Video 1 is filmed and I'm starting to cut it together and now working on filming Video 2~3.
I've filmed 8.5hrs of footage to get from the raw prints to primer. Crazy part is I didn't even film the sanding yet, my wife and I took turns sanding another one a week in advance so I could switch it in the video so I could keep filming. Then when I'm done filming I'm just going to set up a camera and film the process of sanding an entire one end-to-end while I'm editing the vids together.
Today I have to replace the Motherboard on my computer to handle all of this, the I/O is just melting when I have the 4 internal NVME drives and 4 external drives hooked up while editing, my USB just completely fries and my drives, and mouse/kb, just disappear. This is a trial by fire but I'm learning a lot, and getting through it.
I've started my next model release, the Mando IB94 blaster, and it feels like such a walk in the park compared to the Lawgiver, I literally build 2 full electronics one, finished, in the time it took me to just sand the Lawgiver. I'm trying to get it done and released by S3, but only when the LG videos are done. Then I'm taking a break for a bit and going to take another run and a full electronic Pulse Rifle, I finished a mechanical one last year and want to upgrade it but I'm waiting for the Prusa XL to finally come out..
After some feedback from the Props3D Discord and just some general noodling I've created the 'beefcake' electronics caddy. Since the one I made before doesn't take any stresses I made it wafer thin so you would have as much space as possible for wiring, but I've had 2 counts of it breaking on install or removal, and now it's happened to me once as well.
I've rolled it around and strengthened everywhere I can without sacrificing fit, creating the V5 Beefcake Caddy. I have yet to test so I'm attaching it here if you want to give it a whirl, but not putting it in the release until I have one fit, I'll let you know when it is.
Another large benefit is deeper speaker wells and cutouts for the black glue they put on the speakers so they'll sit deeper in. What was happening is the push fit caused it to 'bow' a bit and the speakers can pop out easier than I thought, and the black glue can cause it to sit a bit proud making the problem worse. So this update should hold the speaker much tighter at the expense of hiding them a bit more.
Update: Tweaked the model a bit, update is reattached
Attachments
Last edited:
Video 2 is now filmed, just passing the 18 hour mark on raw footage from my A camera. Still haven't filmed the sanding of the alternate Lawgiver for video 1 (the one in the vid was sanded beforehand so I could keep filming), saving that fun for the end. These are epically involved to build, and trying to do it while not obscuring a camera makes it that much more fun. Just filmed all the electronics and coding, sooo much smoother now Spidey74 automated all the training and included all the library files. It went from like 30min of faffing to about 5min all in, what a difference!

Last edited:
Similar threads
- Replies
- 3
- Views
- 522