GINO
Sr Member
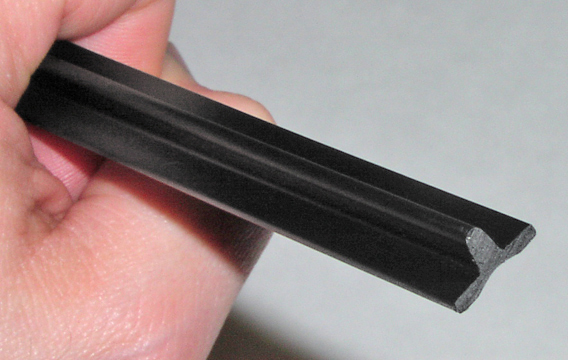
In the original SW films, prop makers utilized black plastic T-track on all the lightsabers and blasters. In case you were wondering what T-track is, it was commonly used in cabinetry as a means for doors to slide open and close. There are many different styles and shapes of T-track out there, but EVREY item we've seen spanning all three OT films utilize the exact same style.
This style consists of black plastic track with a groove in the bottom to accomodate a bead of glue, as well as drill holes on the sides of the center rib every foot or so to accomodate nails for installing into cabinets.
The props that utilized it were:
Every lightsaber (long list)
E-11 trooper blaster
MG-34 trooper rifle
Boba Fett ROTJ rifle
Made from measurements taken directly off screen-used T-track, I executed a run of extruded T-track so that for the first time ever, we could use the correct grip shape and material on our props.
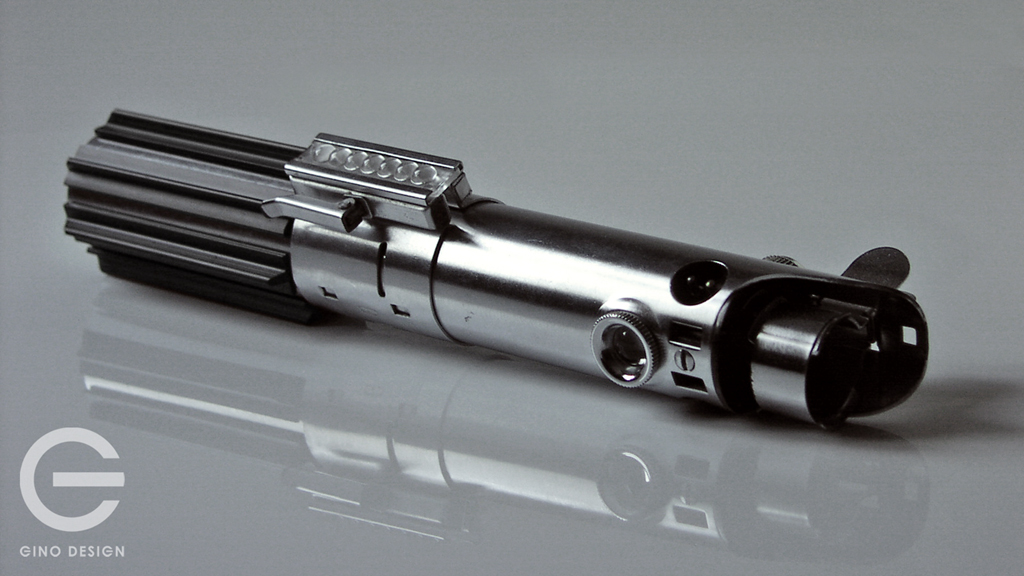
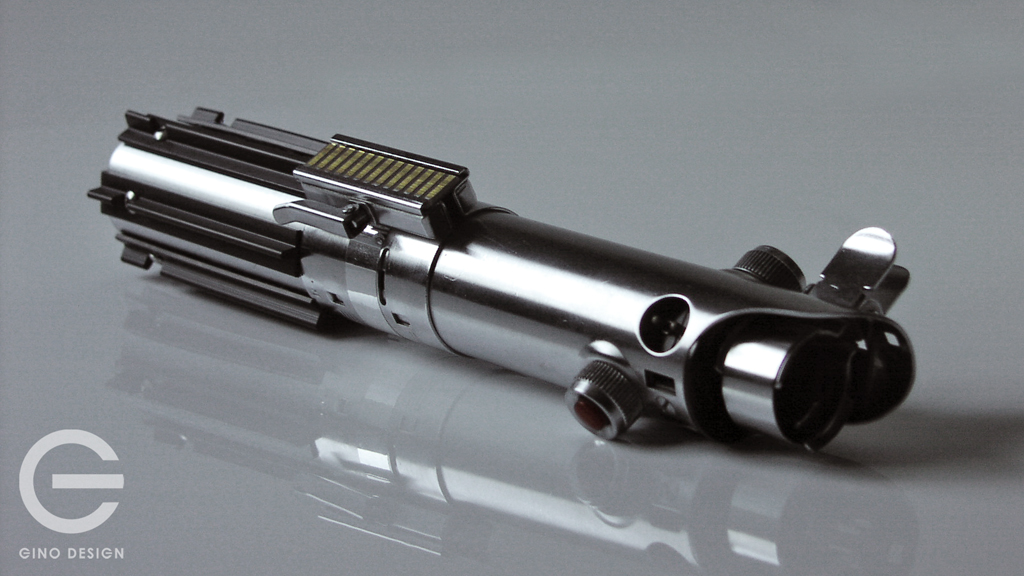
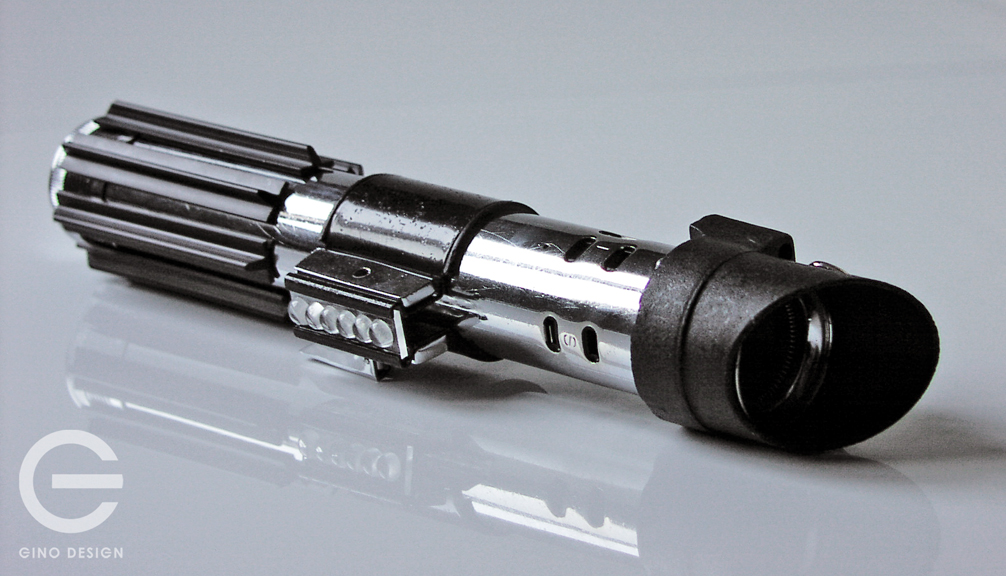
Here are some pics of the T-track as well as some of it incorporated into some of my sabers.
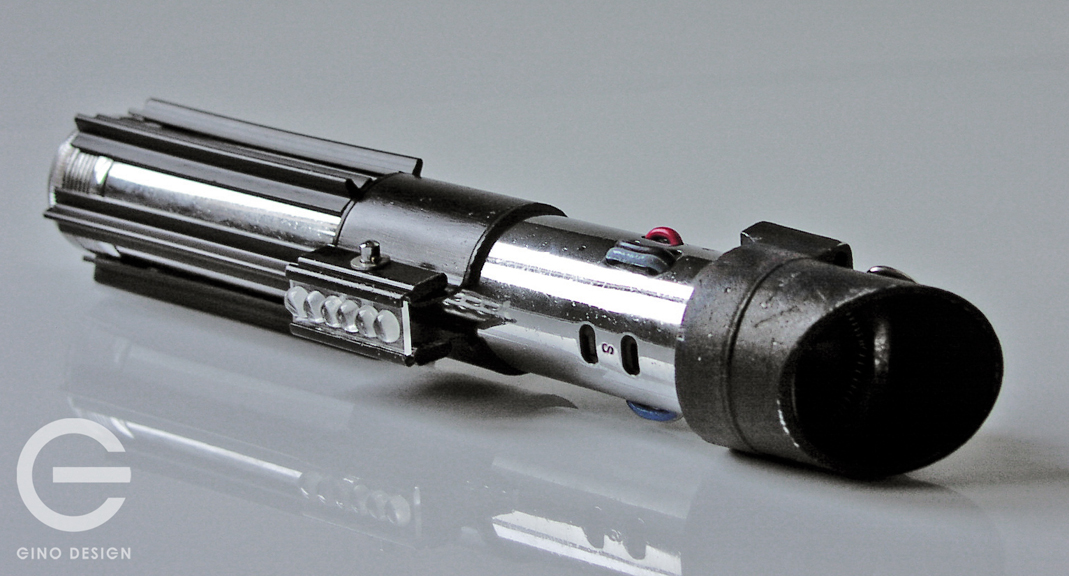
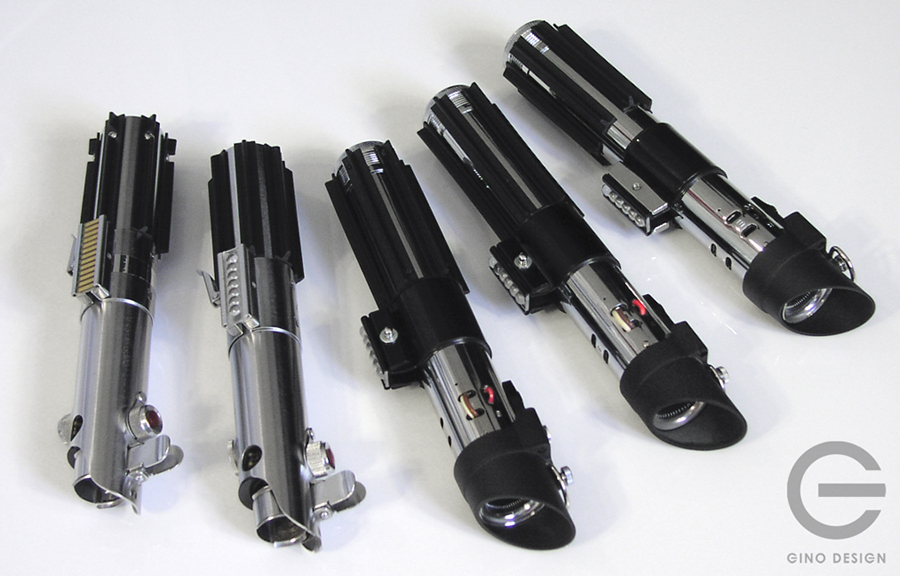
There are other replica t-track options out there, some might be a little cheaper, but NONE of them are as precisely accurate as this t-track is.
I don't know about you, but the last thing I'd ever do is invest in a really nice saber or blaster and then skimp when it comes to the grips.
Accuracy matters!
You can sign up for T-track in this JY thread:
http://www.therpf.com/showthread.php?t=258205&p=3937849#post3937849
I'll be posting some details about how I feel is the best way to remove your old grips as well as how to best attach these. It's more simple than you know.
If any of you use my grips on your props, please feel free to post here and show everyone how awesome they look!
I hope you guys like it. It was a huge milestone for me to finally get these on my sabers after all these years.
SPECS AND TUTORIAL
I've gotten some requests from people for tips on finishing their t-track.
I can only help with sabers (as I don't have a sterling, mg-34, or rotj fett rifle). So anyone who finishes theirs off feel free to post any helpful tips here. Oh yeah, and some nice showoff pics as well.
ANH Luke and ANH Vader:
Grip length: 3 9/16"
Angled ends: On top of center ridge, make a pencil mark 1/8" from end to designate where the angle should stop
Tips: I used a 1" metal file and it ground down like butter.
ESB Luke:
Grip length: 3 9/16"
Notched end: (starting from bottom end) ridge length before notch 7/16", length of notch 5/16"
Tips: Make your marks in pencil on top and down sides of ridge. Use a dremel tool to hog out most of the area. Get as close to your lines as possible without going too far. Then use a brand new x-acto blade to gently square up your corners and flat area (where the screw/rivet goes). I would not use a file for these notches as it is practically impossible not to make unwanted scratches on either side of the center ridge.
ESB and ROTJ Vader:
Grip length: 4.25"
No angles or notches.
Only the ROTJ Vader uses little screws at each end of grip.
I attached my t-track using hot melt glue. The opaque yellow kind, not the standard clear. If you don't want to use hot glue, you could use 5 min epoxy instead. I don't recommend using anything else, especially not any kind of adhesive tape.
Keep in mind that regardless of whether or not you used hot glue or epoxy, that you will use WAY less than you think. Just a teeny tiny bit in that channel goes a long way. If you use hot glue, you have to be super fast when applying it because if you are too slow, the glue will start to cool and won't allow you to squish the grip flush against the saber body.
After doing mine, I would recommend using 5 min epoxy as it is easier to control.
As for the screws in the ESB Luke and the ROTJ Vader, I went balls out and decided to actually screw into the metal saber body. That's how they did it for the films right? I've had my Luke ESB graflex since 1993 and I have to say that it was extremely gratifying to finally drill into it.
For those who aren't ready to take that step yet, I would suggest cutting off the tops of your screws so that they are only cosmetic. You can always take the plunge later.
For those ready to go all-in, here's what I did. I bought the appropriate screws for each saber as well as corresponding taps and drill bits made especially for the taps.
I pre-drilled the holes in the grips so that the screws would easily slide through. Then I marked the hole placements on the saber body. Use a center punch to make accurately placed dings in the saber body where your marks are. Then I recommend making pilot holes with the smallest drill bit you have. It is easier to control and center that way.
After, use the drill bit designated for the tap.
Tap your holes using a little wd-40 and some patience.
Then proceed to epoxying your grips in place making sure all the holes are lined up. Make sure you don't confuse which grip goes where. I used tiny pieces of tape to mark them.
Afterward, simply screw in your screws. Don't overtighten, or you might pop the hot glue or epoxy on the opposite end.
If I missed anything, let me know.
.
This style consists of black plastic track with a groove in the bottom to accomodate a bead of glue, as well as drill holes on the sides of the center rib every foot or so to accomodate nails for installing into cabinets.
The props that utilized it were:
Every lightsaber (long list)
E-11 trooper blaster
MG-34 trooper rifle
Boba Fett ROTJ rifle
Made from measurements taken directly off screen-used T-track, I executed a run of extruded T-track so that for the first time ever, we could use the correct grip shape and material on our props.
Here are some pics of the T-track as well as some of it incorporated into some of my sabers.


There are other replica t-track options out there, some might be a little cheaper, but NONE of them are as precisely accurate as this t-track is.
I don't know about you, but the last thing I'd ever do is invest in a really nice saber or blaster and then skimp when it comes to the grips.
Accuracy matters!
You can sign up for T-track in this JY thread:
http://www.therpf.com/showthread.php?t=258205&p=3937849#post3937849
I'll be posting some details about how I feel is the best way to remove your old grips as well as how to best attach these. It's more simple than you know.
If any of you use my grips on your props, please feel free to post here and show everyone how awesome they look!
I hope you guys like it. It was a huge milestone for me to finally get these on my sabers after all these years.
SPECS AND TUTORIAL
I've gotten some requests from people for tips on finishing their t-track.
I can only help with sabers (as I don't have a sterling, mg-34, or rotj fett rifle). So anyone who finishes theirs off feel free to post any helpful tips here. Oh yeah, and some nice showoff pics as well.
ANH Luke and ANH Vader:
Grip length: 3 9/16"
Angled ends: On top of center ridge, make a pencil mark 1/8" from end to designate where the angle should stop
Tips: I used a 1" metal file and it ground down like butter.
ESB Luke:
Grip length: 3 9/16"
Notched end: (starting from bottom end) ridge length before notch 7/16", length of notch 5/16"
Tips: Make your marks in pencil on top and down sides of ridge. Use a dremel tool to hog out most of the area. Get as close to your lines as possible without going too far. Then use a brand new x-acto blade to gently square up your corners and flat area (where the screw/rivet goes). I would not use a file for these notches as it is practically impossible not to make unwanted scratches on either side of the center ridge.
ESB and ROTJ Vader:
Grip length: 4.25"
No angles or notches.
Only the ROTJ Vader uses little screws at each end of grip.
I attached my t-track using hot melt glue. The opaque yellow kind, not the standard clear. If you don't want to use hot glue, you could use 5 min epoxy instead. I don't recommend using anything else, especially not any kind of adhesive tape.
Keep in mind that regardless of whether or not you used hot glue or epoxy, that you will use WAY less than you think. Just a teeny tiny bit in that channel goes a long way. If you use hot glue, you have to be super fast when applying it because if you are too slow, the glue will start to cool and won't allow you to squish the grip flush against the saber body.
After doing mine, I would recommend using 5 min epoxy as it is easier to control.
As for the screws in the ESB Luke and the ROTJ Vader, I went balls out and decided to actually screw into the metal saber body. That's how they did it for the films right? I've had my Luke ESB graflex since 1993 and I have to say that it was extremely gratifying to finally drill into it.
For those who aren't ready to take that step yet, I would suggest cutting off the tops of your screws so that they are only cosmetic. You can always take the plunge later.
For those ready to go all-in, here's what I did. I bought the appropriate screws for each saber as well as corresponding taps and drill bits made especially for the taps.
I pre-drilled the holes in the grips so that the screws would easily slide through. Then I marked the hole placements on the saber body. Use a center punch to make accurately placed dings in the saber body where your marks are. Then I recommend making pilot holes with the smallest drill bit you have. It is easier to control and center that way.
After, use the drill bit designated for the tap.
Tap your holes using a little wd-40 and some patience.
Then proceed to epoxying your grips in place making sure all the holes are lined up. Make sure you don't confuse which grip goes where. I used tiny pieces of tape to mark them.
Afterward, simply screw in your screws. Don't overtighten, or you might pop the hot glue or epoxy on the opposite end.
If I missed anything, let me know.
.
Last edited:
