Terminator 2 Harley Fat Boy 1/6th scale

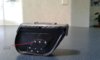
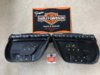
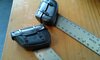
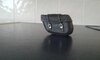
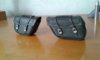
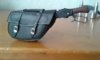
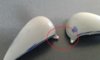
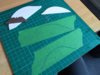
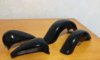
I've been researching how to paint the saddle bags and have settled on the following approach as the best approximation of a leather finish I can find. Fantastic work in this example, although I'm not going to do the "distressed" Stage 4. I'll go straight to the pin-wash of the seam-work (Stage 5). Just waiting now for my Vallejo paints to arrive.

Painting Leather Boots | planetFigure | Miniatures
 
Last edited:
I use oils to get a leather look. Here's a seat I did for my Rey's Speeder repaint:

20190129_010656440_iOS.jpg 20190129_010711604_iOS.jpg 20190129_010719735_iOS.jpg

Loving your build! I'm looking forward to seeing it done...
 
Saddlebag (mounting side) painted up. The quality of detailing is average as it won't be seen in the final assembly. This is a painting test using satin black enamel base, green/grey enamel washes (airbrushed on) and some eye make-up for shading/highlighting. Note that the inner surface on the real saddlebag is plastic, not leather.

I've included a shot of the full size saddlebag for comparative purposes.
 

Attachments

  • 20190302_111226.jpg
    20190302_111226.jpg
    536.2 KB · Views: 191
  • s-l1600 (13).jpg
    s-l1600 (13).jpg
    326.4 KB · Views: 196
Saddle bags. Base coat of Matt Black with some Tan mixed in. It has quite a sheen currently as there was a lot of thinners in the mix. Multiple coats applied as a result. I'm now debating how much shading the bags actually need, as per my previous post where I was going to apply Game Ink washes.
 

Attachments

  • 20190310_133909.jpg
    20190310_133909.jpg
    407.7 KB · Views: 176
My custom printed water-slide decals for the pin-striping have arrived from Australian company customhobbydecals.com. Very pleased with the result. They look excellent! The pinstripes have been pre-cut too, with about 0.7mm clear film either side.

The pinstripes are available for purchase from customhobbydecals. I gave customhobby the rights to use my design free of charge. They can print the decals in a number of scales, not just 1:6th scale. If anyone knows the barbie fatboy scale please let customhobby know. One last thing, if you don't like the design, curvature or attempt at color matching blame me, not customhobby.They only printed what I sent them. Link to website follows.
http://customhobbydecals.com/
 

Attachments

  • Pinstripe decals.jpg
    Pinstripe decals.jpg
    343.6 KB · Views: 155
Last edited:
Gas tanks and front fender sprayed gloss black. The gas tank finish came straight out of the Tamiya ts14 can. Amazingly good finish from a spray can. Unfortunately lightning wouldn't strike twice when it came to the fender paint jobs. These I had to work at...spray, sand polish, then a light spray of highly thinned paint and some final polishing.

The rear fender is still a work in progress...
 

Attachments

  • 20190414_171031.jpg
    20190414_171031.jpg
    368.8 KB · Views: 175
Last edited:
Not to be a downer on your searching - BUT - its highly unlikely that any bike today has the same tires it had in 1990, when it was made. The rubber naturally breaks down over time and the tires were likely replaced - with something not OEM. Additionally they had MANY bikes for filming that movie... and probably several tires, depending on if the stunt guys wanted to skid, jump, run on the street vs. gravel etc. You're probably OK using any tire that fits that bike from the 90's.

Again not trying to poo poo all your efforts... Just pointing out something that may give piece of mind when you can't find the "Exact" tire in any given picture.

Jedi Dade
 
Totally unrelated but drawing on my photo-etching experience developed during this build. While I wait for some things to come together (decal related) I decided to replace the license plates on my 1/24th scale Chevy Nova from the film "Deathproof". If you've seen my earlier posts of that build, the plates needed work.

1. Find a good reference photo, 2. laser print onto transparency and iron the laser ink onto a piece of brass sheet. 3. Photo etch the brass sheet. 4. emboss a piece of aluminium oven tray onto the brass photo etch to make an actual embossed license plate. 5. Print a decal of the license plate on white decal paper and apply.
 

Attachments

  • 20190519_162013.jpg
    20190519_162013.jpg
    3.1 MB · Views: 165
Replacement decals from Best Balsa Kits (BBK), based in Belgium. One of my Gas Tank logos from the original decal set that came with the kit disintegrated as I went a bit heavy handed with the decal setting solution. Thank heavens for BBK. The decals are superb!

Next steps involve waiting for film-free decal paper to arrive from Korea. I'll then attempt to laser print the pinstripes onto that paper and following the application process end up with pinstripes that have no transparent carrier film.
 

Attachments

  • 20190531_163443 (2).jpg
    20190531_163443 (2).jpg
    1.4 MB · Views: 142
Hey Terminator! Here is a shot of my test-cutting pinstripe masks using the most primitive option: 4 Stanley blades held side by side!

I've looked at wet and dry transfers; I doubt from the lack of response to my inquiries that craft and signwriter cutting machines can cut 0.5mm wide pinstripes in a curved pattern.
 

Attachments

  • 20190817_130411.jpg
    20190817_130411.jpg
    4 MB · Views: 102
Fenders and gas tanks, painted with Tamiya TS14, then sanded and polished with a combination of non-scratch ceramic stove top cleaner, followed by Meguiars Scratch X2.0 and Tamiya finish polishing compound.
 

Attachments

  • 20190817_182939 (2).jpg
    20190817_182939 (2).jpg
    649 KB · Views: 92
Looks like you are off to a great start... oh so happy I found a bike with those :p ;)

"non-scratch ceramic stove top cleaner" :lol: hahaha (y)(y)(y) Awesome.
 

Your message may be considered spam for the following reasons:

If you wish to reply despite these issues, check the box below before replying.
Be aware that malicious compliance may result in more severe penalties.
Back
Top