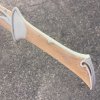
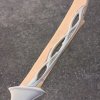
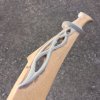
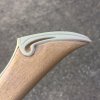
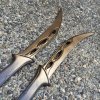
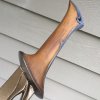
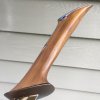
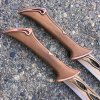
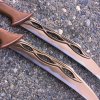
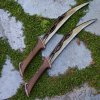
Tauriel Daggers from The Hobbit

coregeek

Active Member
I recently completed a scratch build of Tauriel's Daggers from The Hobbit films. Thought I'd share the complete build process.
This is a comprehensive build covering the prop master build, molding/casting, and final finishing.
I have 50+ photos so I'll post in sections.

I started with a piece of scrap 5/8" thick MDF that I sawed down to 3/8" thick.

Transferred reference to MDF.
tdcoregeek-1.jpg

Drilled out spots to make cutouts with scroll saw.
tdcoregeek-2.jpg

Cutouts made. I decided not to cutout the two small hole on the blade. I didn't want to deal with them during the molding process.
I also decided to cut them in one string so I wouldn't have to fiddle with removing the scroll saw blade a bunch.
tdcoregeek-3.jpg

Starting the bevel of the blade. I freehanded this with my bench belt sander.
tdcoregeek-4.jpg

Cleaned up the transition of the blade to handle by hand cutting and sanding.
tdcoregeek-5.jpg

Still rough cuts at this point.
tdcoregeek-6.jpg

Shaping the blunt edge top.
tdcoregeek-7.jpg tdcoregeek-8.jpg

Overall progress.
tdcoregeek-10.jpg

Built up the handle thickness by gluing MDF slats on each side.
tdcoregeek-11.jpg tdcoregeek-12.jpg

Shaped the handle with combination of belt sander and hand sanding. The handle had several angles that made it a bit of a challenge to get right.
tdcoregeek-14.jpg tdcoregeek-15.jpg

That's it for the MDF.
Next up adding all the detailing.
 
Last edited:
I decided to use Apoxie Sculpt for all of the detailing. I like Apoxie Sculpt because it is easy to work with, smooths well and is sandable. I'm a better at sanding then sculpting so that last part is important.

Started with the guard piece first.
tdcoregeek-16.jpg tdcoregeek-17.jpg

Next the grip back-strap detailing.
tdcoregeek-18.jpg

Last the pommel.
tdcoregeek-21.jpg tdcoregeek-20.jpg

I decided the area near the circular cut-out had more of a flared shape to it, so I built that up a bit.
tdcoregeek-23.jpg

Next, I tackled the part I was most apprehensive about. The ornate detailing of the blade. I decided that the Apoxie Sculpt would need a little bit of a filler to get the correct profile. My solution was to superglue down thin sections of common garden wire to build up the profile.
tdcoregeek-32.jpg

Here you can see the stages of the initial slopping it on and the results of a bit of smoothing.
tdcoregeek-33.jpg

Detailing all done, prior to sanding.
tdcoregeek-36.jpg

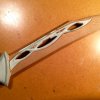
The results of sanding, using sandpaper and needle files.
tdcoregeek-27.jpg tdcoregeek-28.jpg tdcoregeek-29.jpg
tdcoregeek-30.jpg tdcoregeek-31.jpg

The prop has a wooden grip so I added "woodgrain" to it by scraping it in with an awl. I also carved out the recessed "outline" that is visible around the detailed sections.
tdcoregeek-40.jpg tdcoregeek-41.jpg

The actual build complete!
tdcoregeek-37.jpg

Next up: Sealing, priming and molding.
 
Last edited:
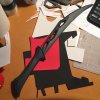
I sealed the MDF with several coats of spray-on Shellac.
tdcoregeek-43.jpg

Next, lots of sanding, priming, filling and repeat to clean up any imperfections.
tdcoregeek-45.jpg tdcoregeek-46.jpg

Final primer pass prior to wet-sanding.
tdcoregeek-44.jpg

Wet-sanded 320 then 400.
tdcoregeek-48.jpg

Starting of the claying process for molding.
tdcoregeek-50.jpg tdcoregeek-49.jpg

Added a pour spout.
tdcoregeek-51.jpg

Added mold box walls. (Also shown: foam Samus Paralyzer pistol I was working on at the same time.)
tdcoregeek-52.jpg

Added registration keys.
tdcoregeek-53.jpg

I forgot to take a photo of the poured side of the box so we jump to the results of the first side of silicone poured.
tdcoregeek-55.jpg

Once the first side is cured you remove the box and clay leaving the prop in the silicone. Clean up all the clay from the prop, rebuild the box, spray it with mold release and pour the second half.
tdcoregeek-59.jpg

Here's the second side poured.
tdcoregeek-56.jpg

Assuming all goes well, your silicone cures and your prop releases you then have a two part mold.
tdcoregeek-58.jpg tdcoregeek-57.jpg

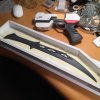
Mold done. Next up: casting!
 
Last edited:
WOW! You do awesome work.

Do you have a brand of Apoxie Sculpt that you prefer. I've never used the stuff before, but I like that it's sandable and have a project that I could use it on.

Great job, looking forward to seeing the rest of your build :thumbsup
 
WOW! You do awesome work.

Do you have a brand of Apoxie Sculpt that you prefer. I've never used the stuff before, but I like that it's sandable and have a project that I could use it on.

Great job, looking forward to seeing the rest of your build :thumbsup

Thank you. I've only ever used Aves brand Apoxie Sculpt. Mostly because it's easy to order on Amazon Prime. I've also heard good things about Smoothon's Free Form Sculpt but have yet to try it.
 
Thank you. I've only ever used Aves brand Apoxie Sculpt. Mostly because it's easy to order on Amazon Prime. I've also heard good things about Smoothon's Free Form Sculpt but have yet to try it.

Cool. Thanks for the brand name. I'll check it out, as I also have Amazon Prime. I'm just now getting into the whole molding and casting thing. So the more tools, tips and advice I can get the better.
 
I failed to take photos of the mold prep. Basically you dust the inside of the mold with a talc based powder then clamp it together.
Next mix your resin and pour. I used Smoothon's Black Only resin because that's what I had on hand. Also, Onyx has one of the hardest densities so I thought that would be good given the thinness of the blades.

Here's the mold after the first pour. The drips on the side are from where I cut channels in the mold in areas that I thought may cause trouble with air pockets. The channels act as a vent allowing the air to escape as the resin flows through the mold.
tdcoregeek-60.jpg

I neglected to take photos of the demolding, it's not that exciting anyway. You just remove the prop from the mold. Here's the freshly molded copy next to the handmade master.
tdcoregeek-64.jpg tdcoregeek-66.jpg tdcoregeek-61.jpg tdcoregeek-63.jpg

I was worried about how those blade cutouts would fare being molded but they actually turned out great.
tdcoregeek-65.jpg

I prepped the cast by lightly sanding it (to aid with primer adherence) and cleaning up a few spots that had surface air pockets.
tdcoregeek-71.jpg tdcoregeek-70.jpg tdcoregeek-69.jpg

Primed the cast daggers. (Had a few other projects gong at the same time.)
tdcoregeek-72.jpg
 
First paint I put down was on the blade. This is Valspar Classic Bronze from a can.
tdcoregeek-73.jpg

Two colors of brown airbrushed on the wooden grips. I then hand rubbed burnt umber over that to help with the natural variations. First picture shows before and after burnt umber was applied.
tdcoregeek-76.jpg tdcoregeek-74.jpg tdcoregeek-75.jpg

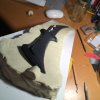
Masked off the "wood" to paint the detailing.
tdcoregeek-77.jpg

Detailing painted with Rustoleum Hammered copper.
tdcoregeek-78.jpg tdcoregeek-79.jpg

Blade silver (Wicked colors metallics) added along with dark wash to fill in all of the weathered crevasses. These show the before and after of weathering.
tdcoregeek-80.jpg tdcoregeek-81.jpg

- - - Updated - - -

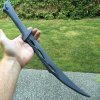
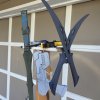
Final props!
Last picture shown with the Sword of Thranduil I made a few months ago.

tdcoregeek-83.jpg

tdcoregeek-84.jpg

tdcoregeek-85.jpg

tdcoregeek-86.jpg

tdcoregeek-87.jpg

tdcoregeek-82.jpg

tdcoregeek-88.jpg
 
Thanks. I was unsure if it would but really couldn't be happier.

Yeah, I was impressed that that grain came out so nice in the cast version. The wood grain looks better on the cast version compared to the master, at least in the side by side comparison. Maybe just the way it looks in the photo.

Oh, and I gotta say, the finished version looks killer! :thumbsup
 
So, uhh, coregeek..... are these for sale now? They look fantastic and I'd be all about buying a set if you're offering them.

I'm wondering the same thing. Personally I'm not interested and that's in no way a reflection of your work, just not interested in collecting for this franchise. BUT...I do have some friends that would love a set of these.

I'm willing to spread the word about your great work. Have you thought about creating an interest thread?
 
Hey all. Sorry it's taken me a while to get back to this. I subscribed to the thread but for some reason haven't been getting notified about updates.
First thank you all for the kind feedback.

Secondly I'm as of today taking orders on the raw kits for these daggers. Sorry to those who want fully finished product. I just do not have the time to commit to finishing.

Here's where you can place an order:
https://www.etsy.com/listing/241852135/tauriel-woodland-elf-prop-daggers-for
OR
http://www.coregeek.net/shop/

Thanks again!
 
Last edited:
Amazing work man, love the details on working within technical and ability limitations. Things can be done that don't at first glance seem achievable by varying technique to using methods we are stronger with. Well done, thanks for all the detail.
 
This thread is more than 8 years old.

Your message may be considered spam for the following reasons:

  1. This thread hasn't been active in some time. A new post in this thread might not contribute constructively to this discussion after so long.
If you wish to reply despite these issues, check the box below before replying.
Be aware that malicious compliance may result in more severe penalties.
Back
Top