You are using an out of date browser. It may not display this or other websites correctly.
You should upgrade or use an alternative browser.
You should upgrade or use an alternative browser.
Studio Half Scale TOS Enterprise Scratch build
- Thread starter SteveNeill
- Start date
- Status
- Not open for further replies.
SteveNeill
Sr Member
Thanks David!
Steve
Steve
SteveNeill
Sr Member
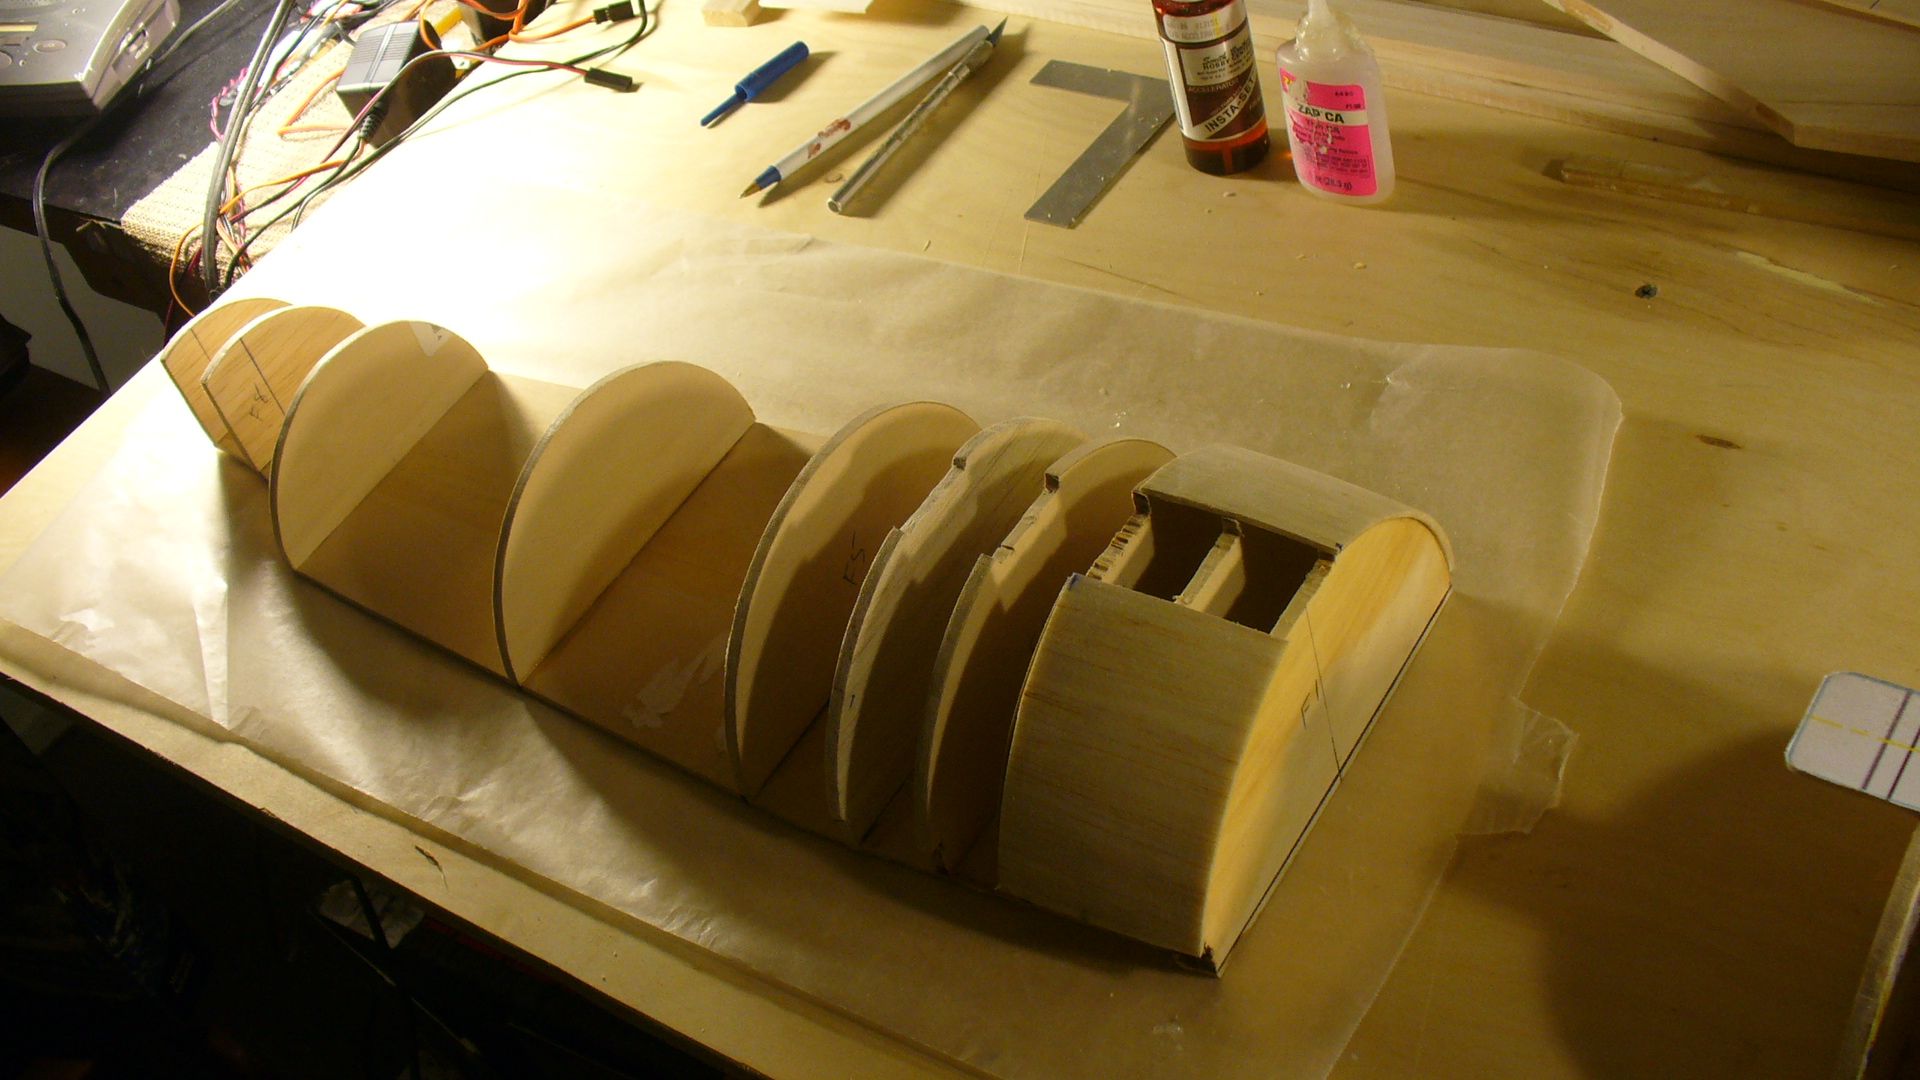
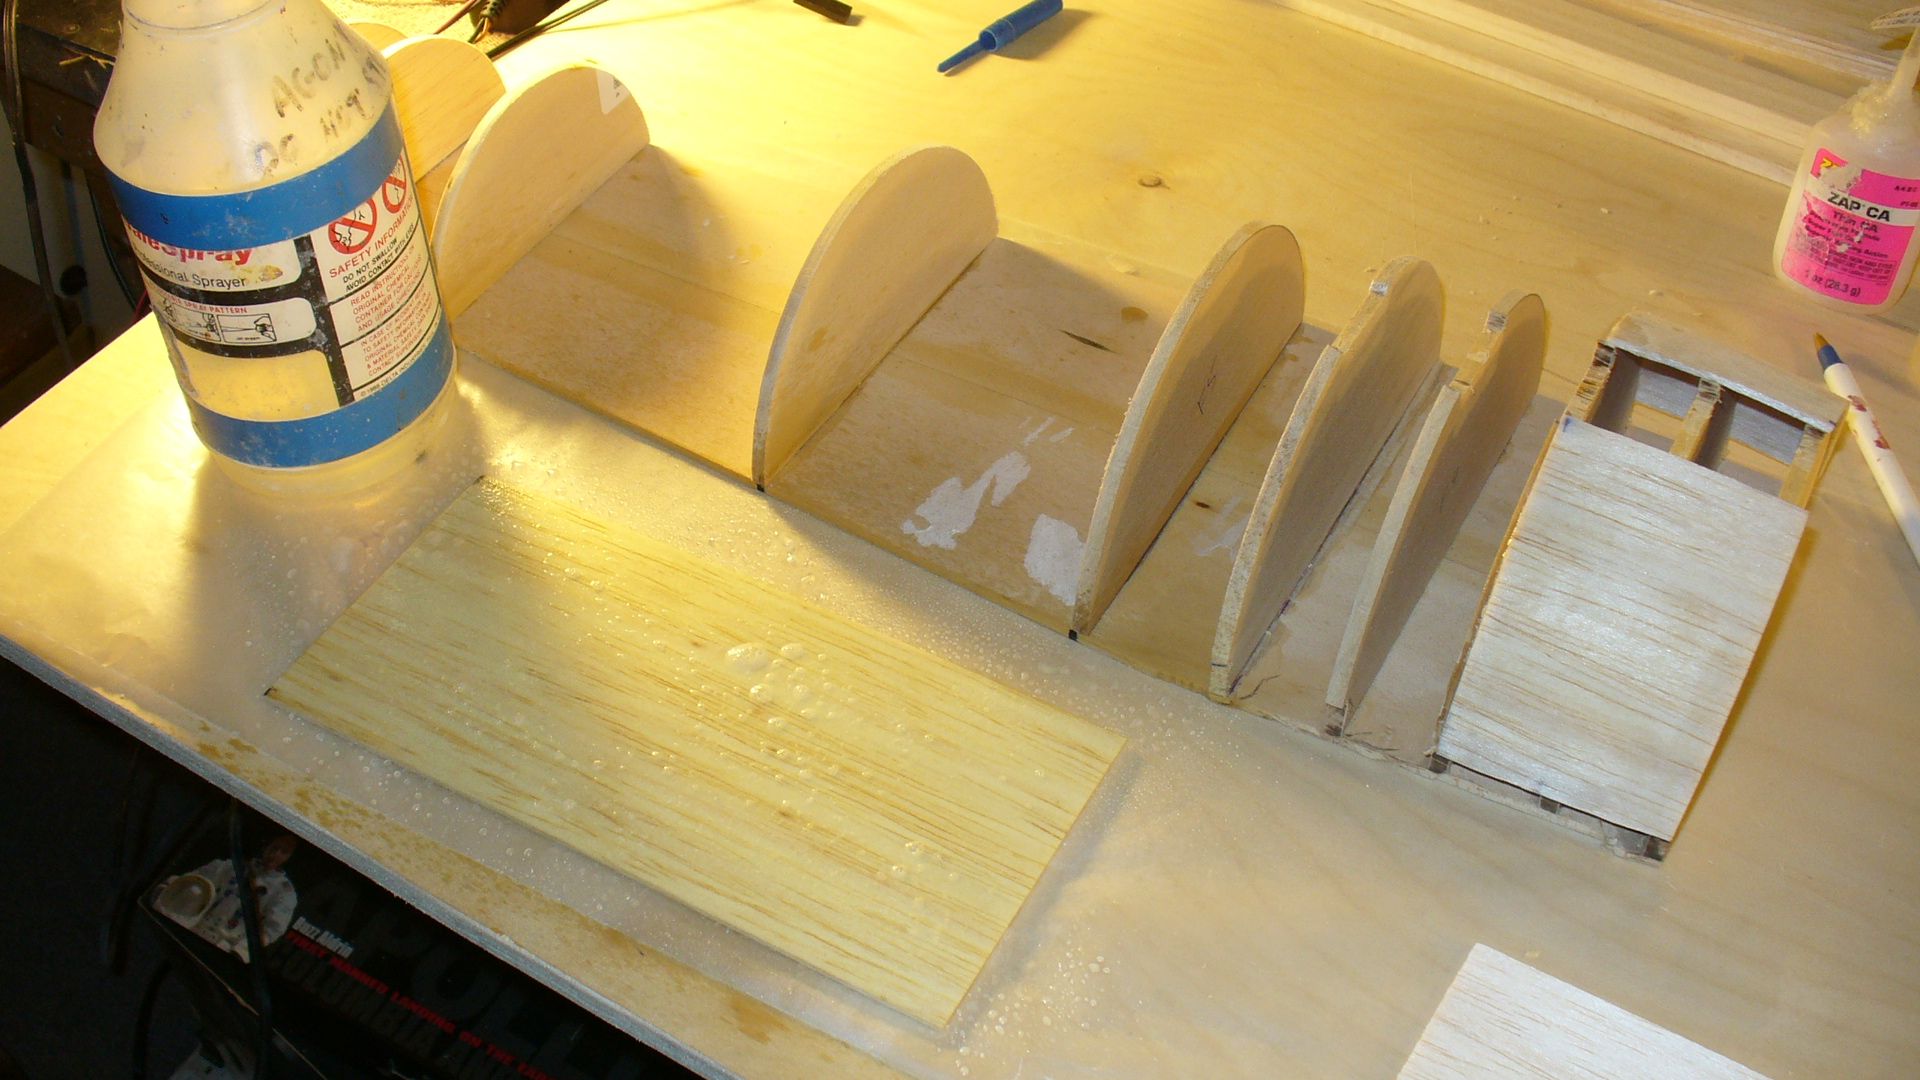
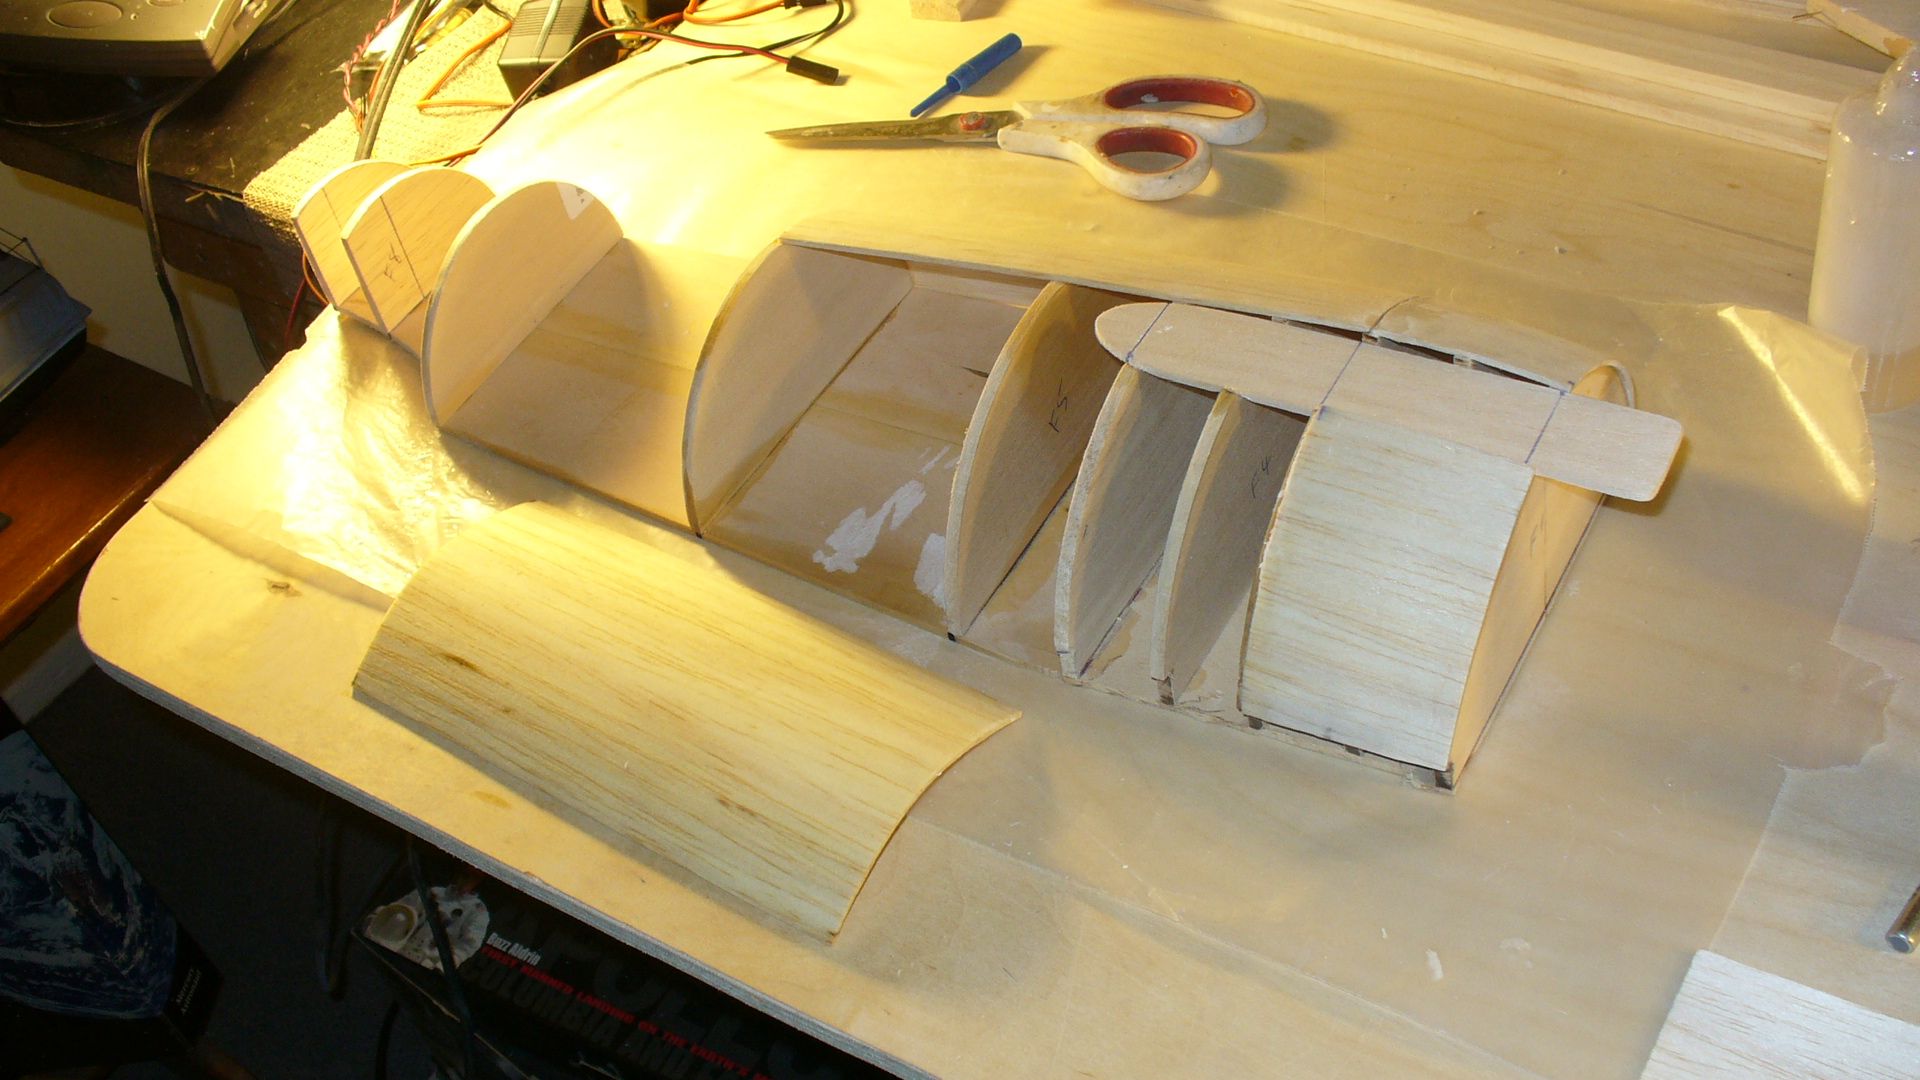
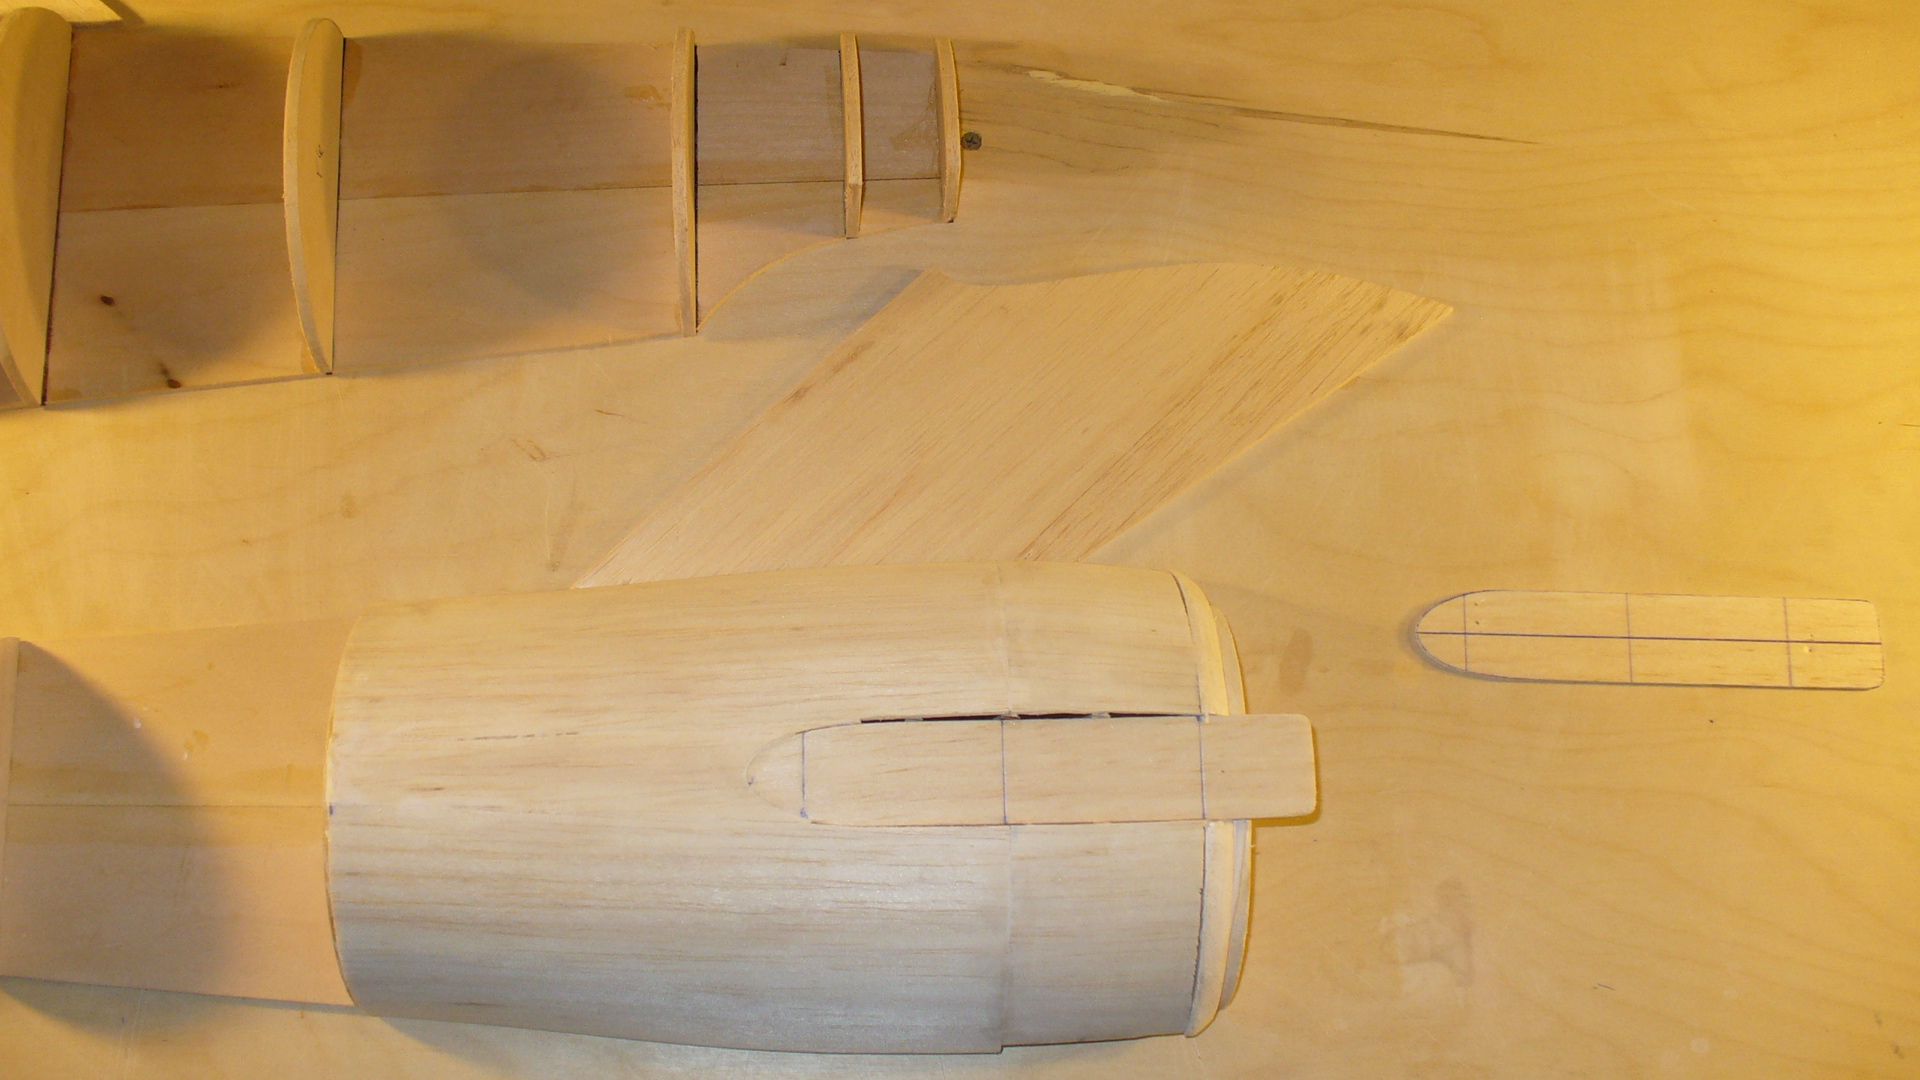
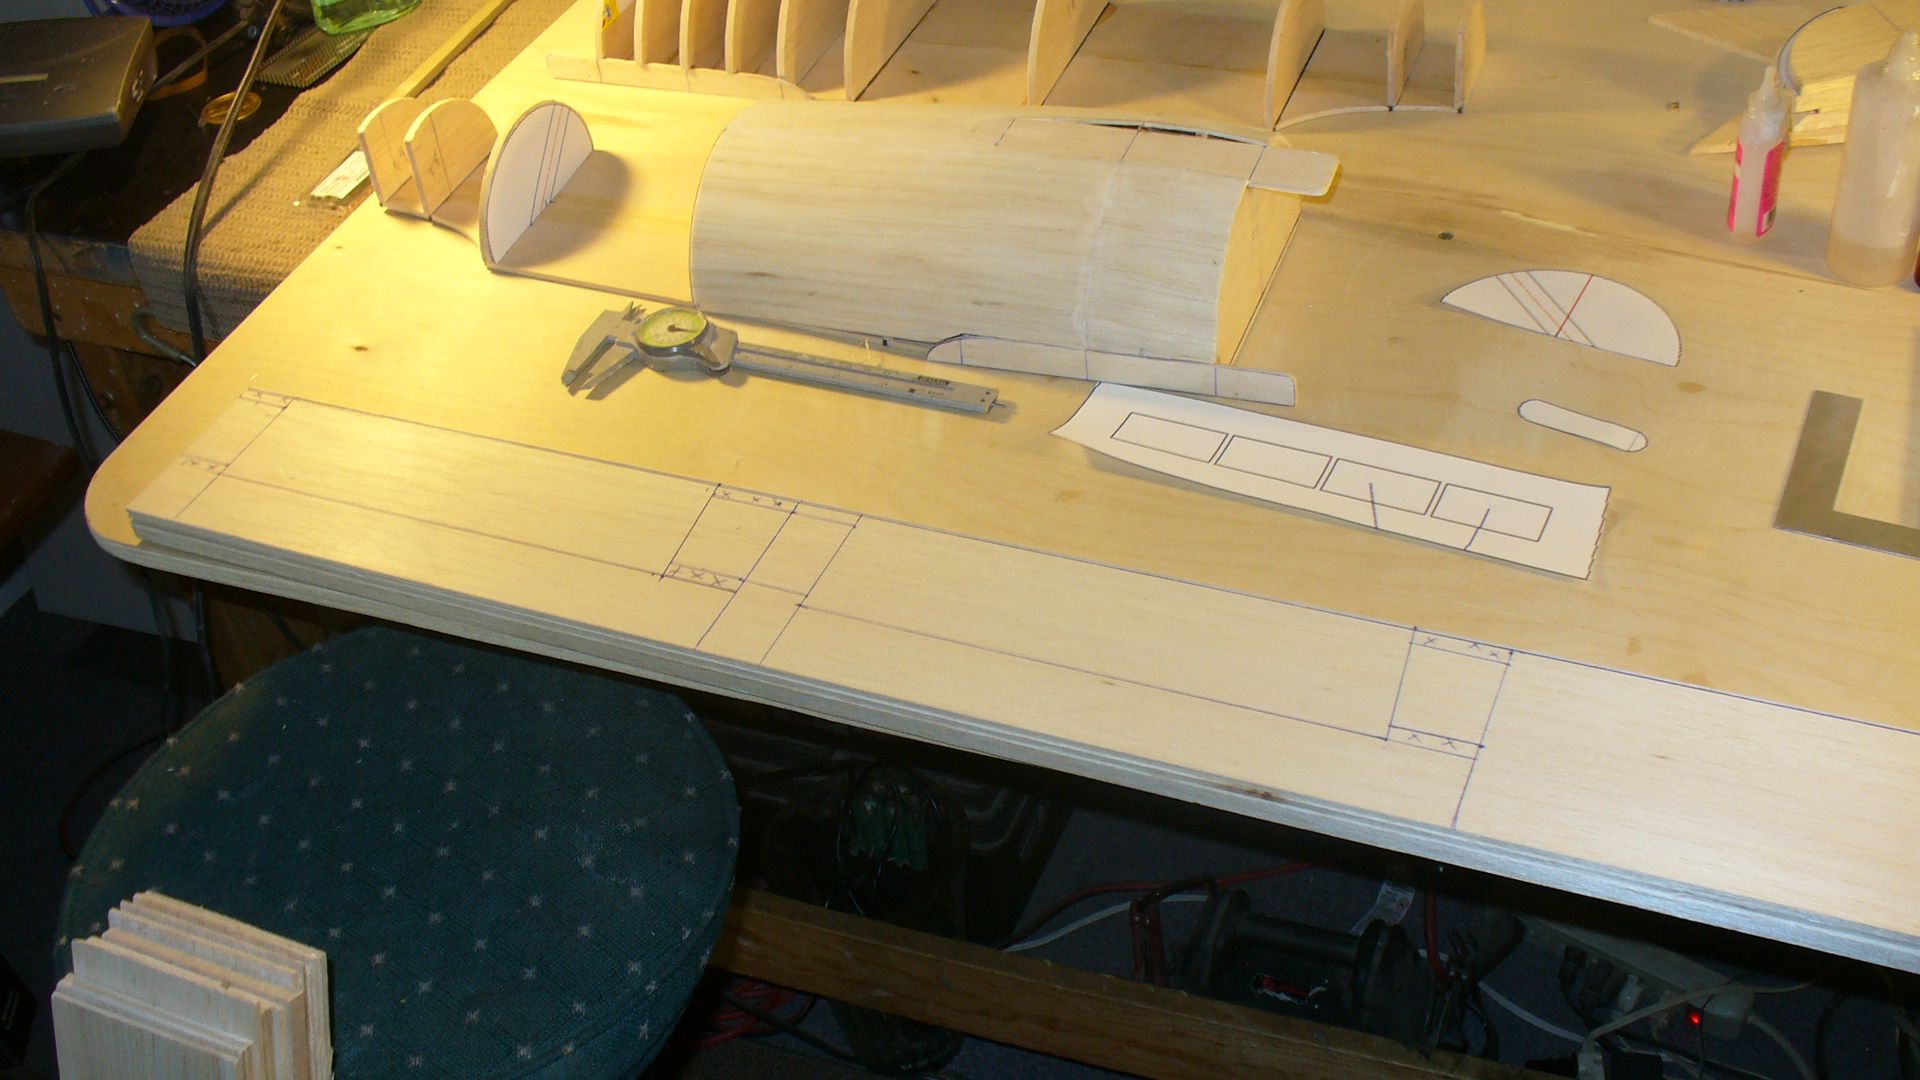
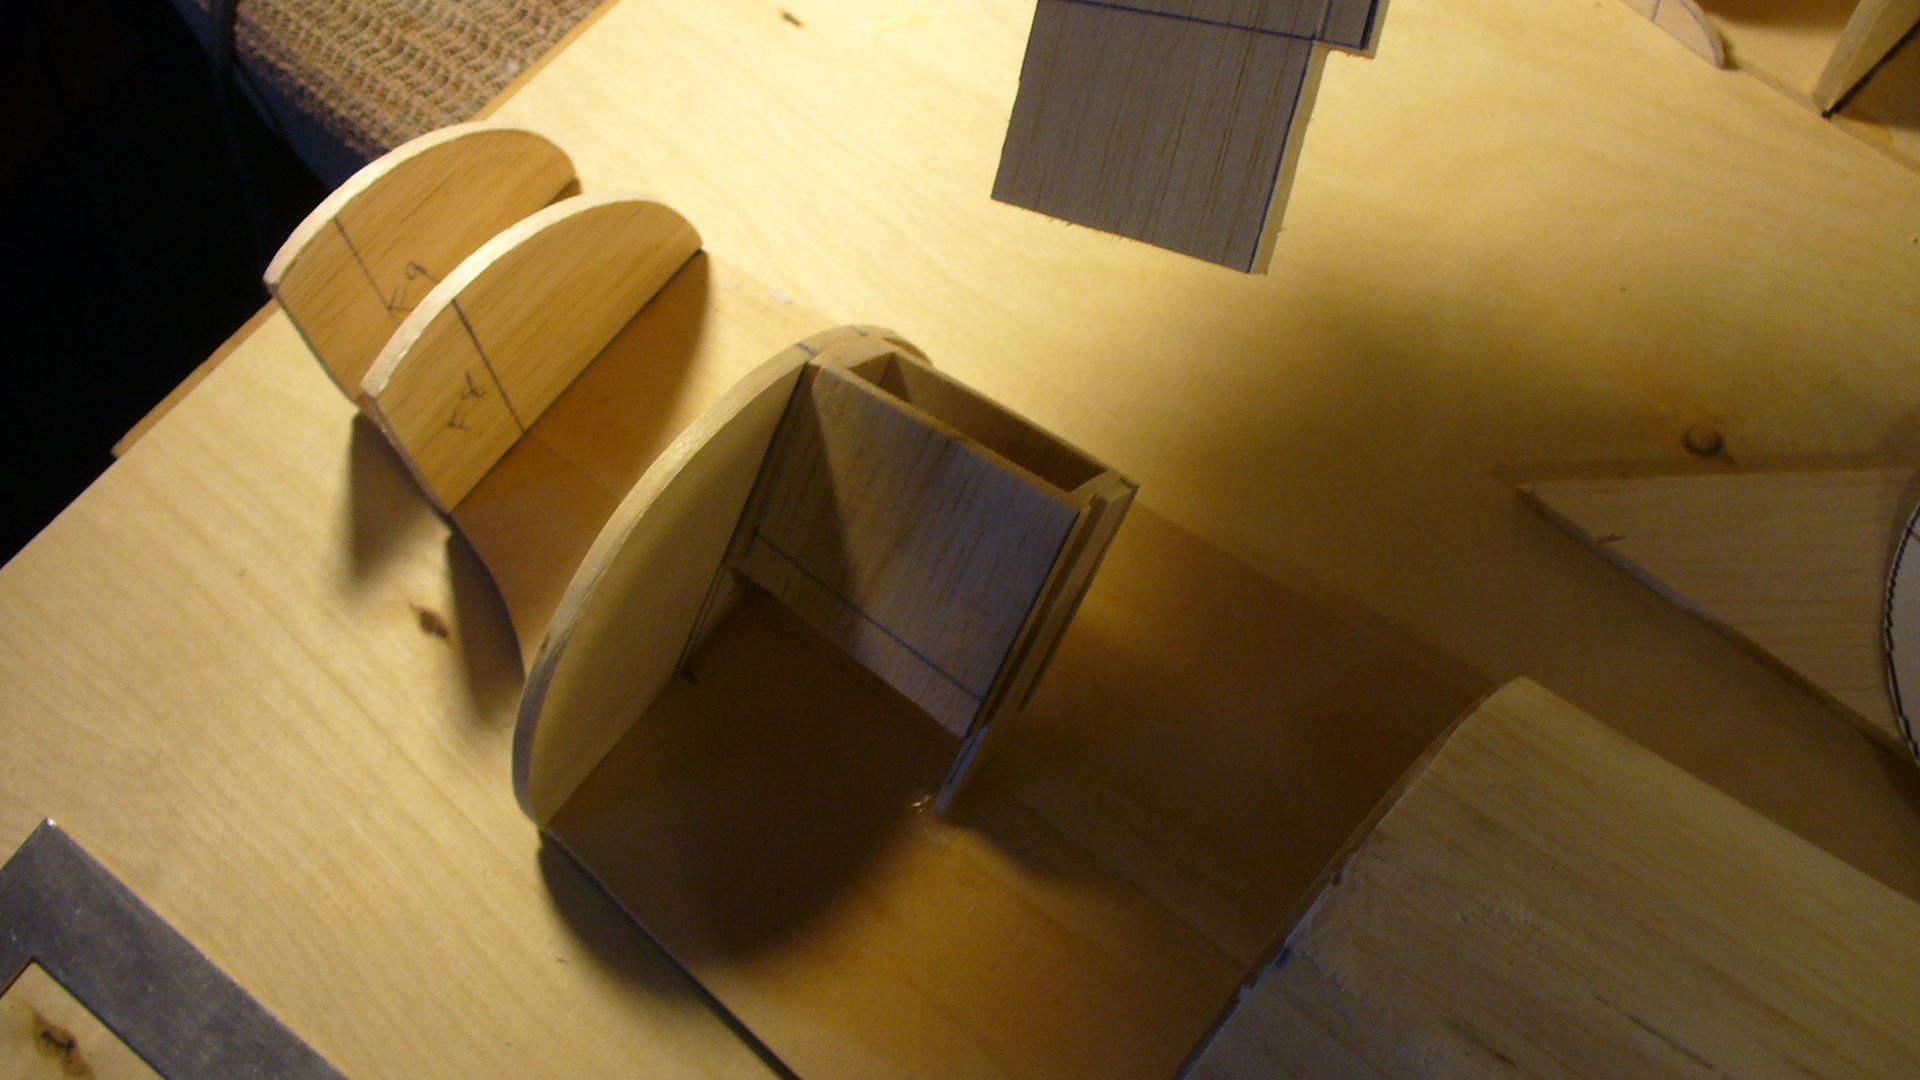
A long day updating websites, filling new orders that came in today...yada, yada...Ok but I got the sheeting started. And it looks like it will work out just fine. I need to calculate the angles of the pylons for the nacelles before I sheet aft and put in brass support pilot tubes first. The sheeting will be cut out around them and flush. This way they are in the molded epoxy hull castings and all the builder has to do is plug them in and they will be sturdy and straight. More of you will keep your hair and marriages this way too. ")
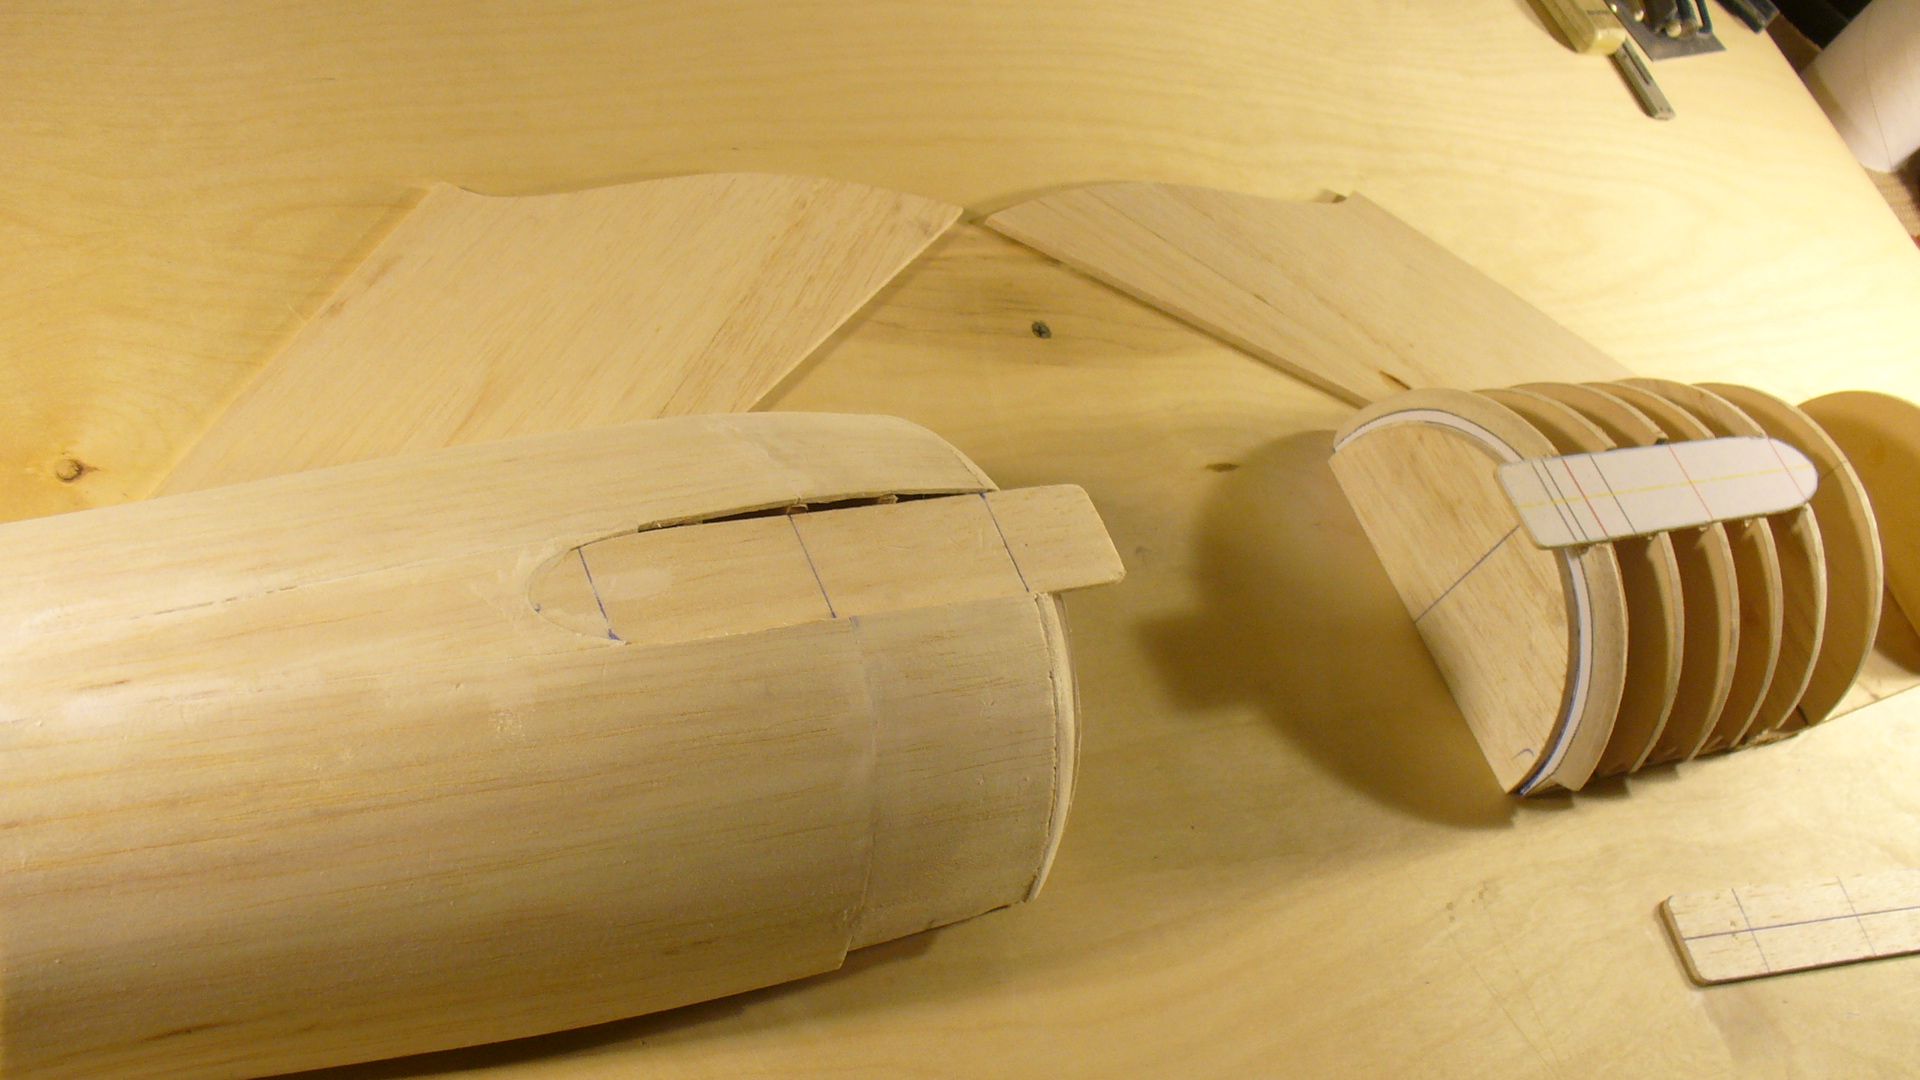
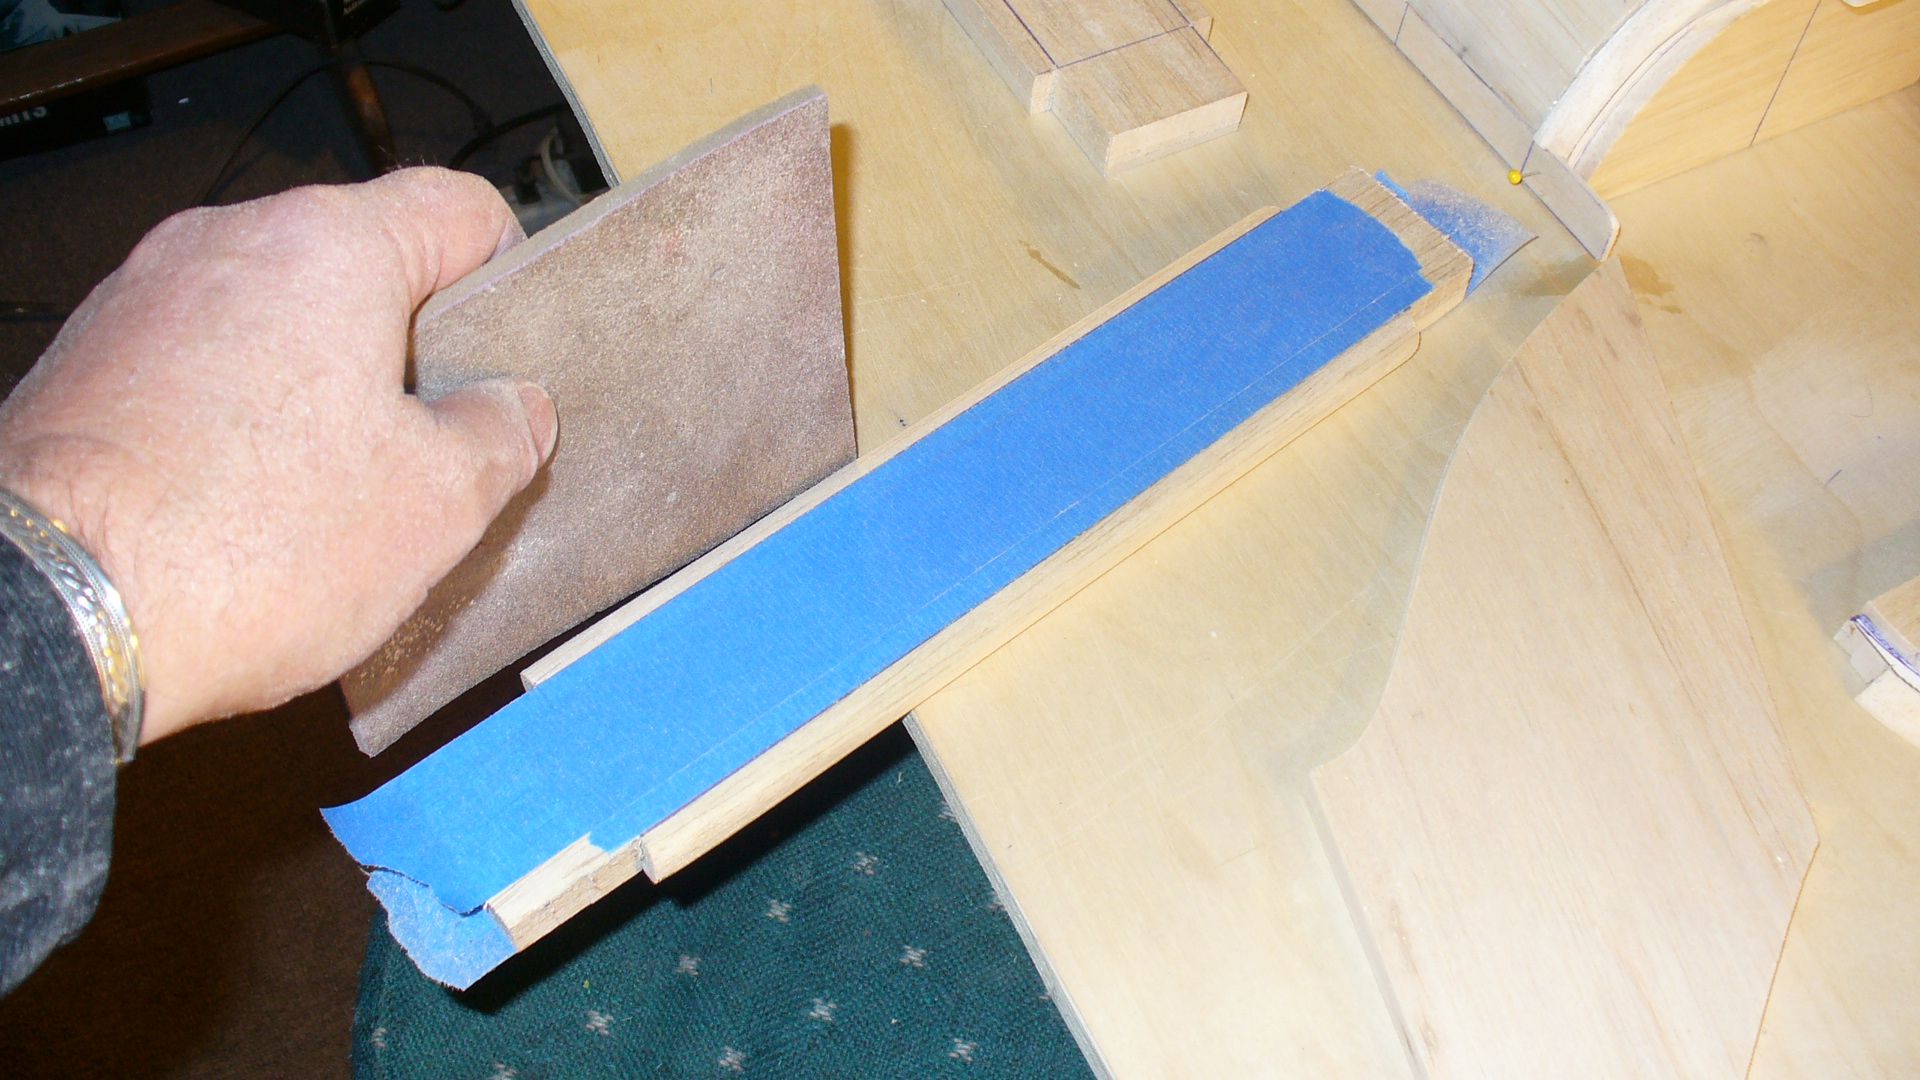
I usd amonia water in a spray bottle to soften the balsa. Bends like rubber then in both directions. Ths way you get the curves both ways.
Here's those pictures,
Steve
I usd amonia water in a spray bottle to soften the balsa. Bends like rubber then in both directions. Ths way you get the curves both ways.
Here's those pictures,
Steve
PHArchivist
Master Member
Glad you labeled the bottle! We don't want you keeling over after taking a swig!
crackerjazz
Sr Member
So that's how you do sheeting. Very interesting that technique about making balsa flexible.
SteveNeill
Sr Member
It's marked for alcohol as it was handy and empty. And yes that's the way to do it or the balsa will sometimes crack and not bend evenly. Thanks men,
Steve
Steve
Colin Droidmilk
Sr Member
Wowzers!
SteveNeill
Sr Member
Thanks Colin.
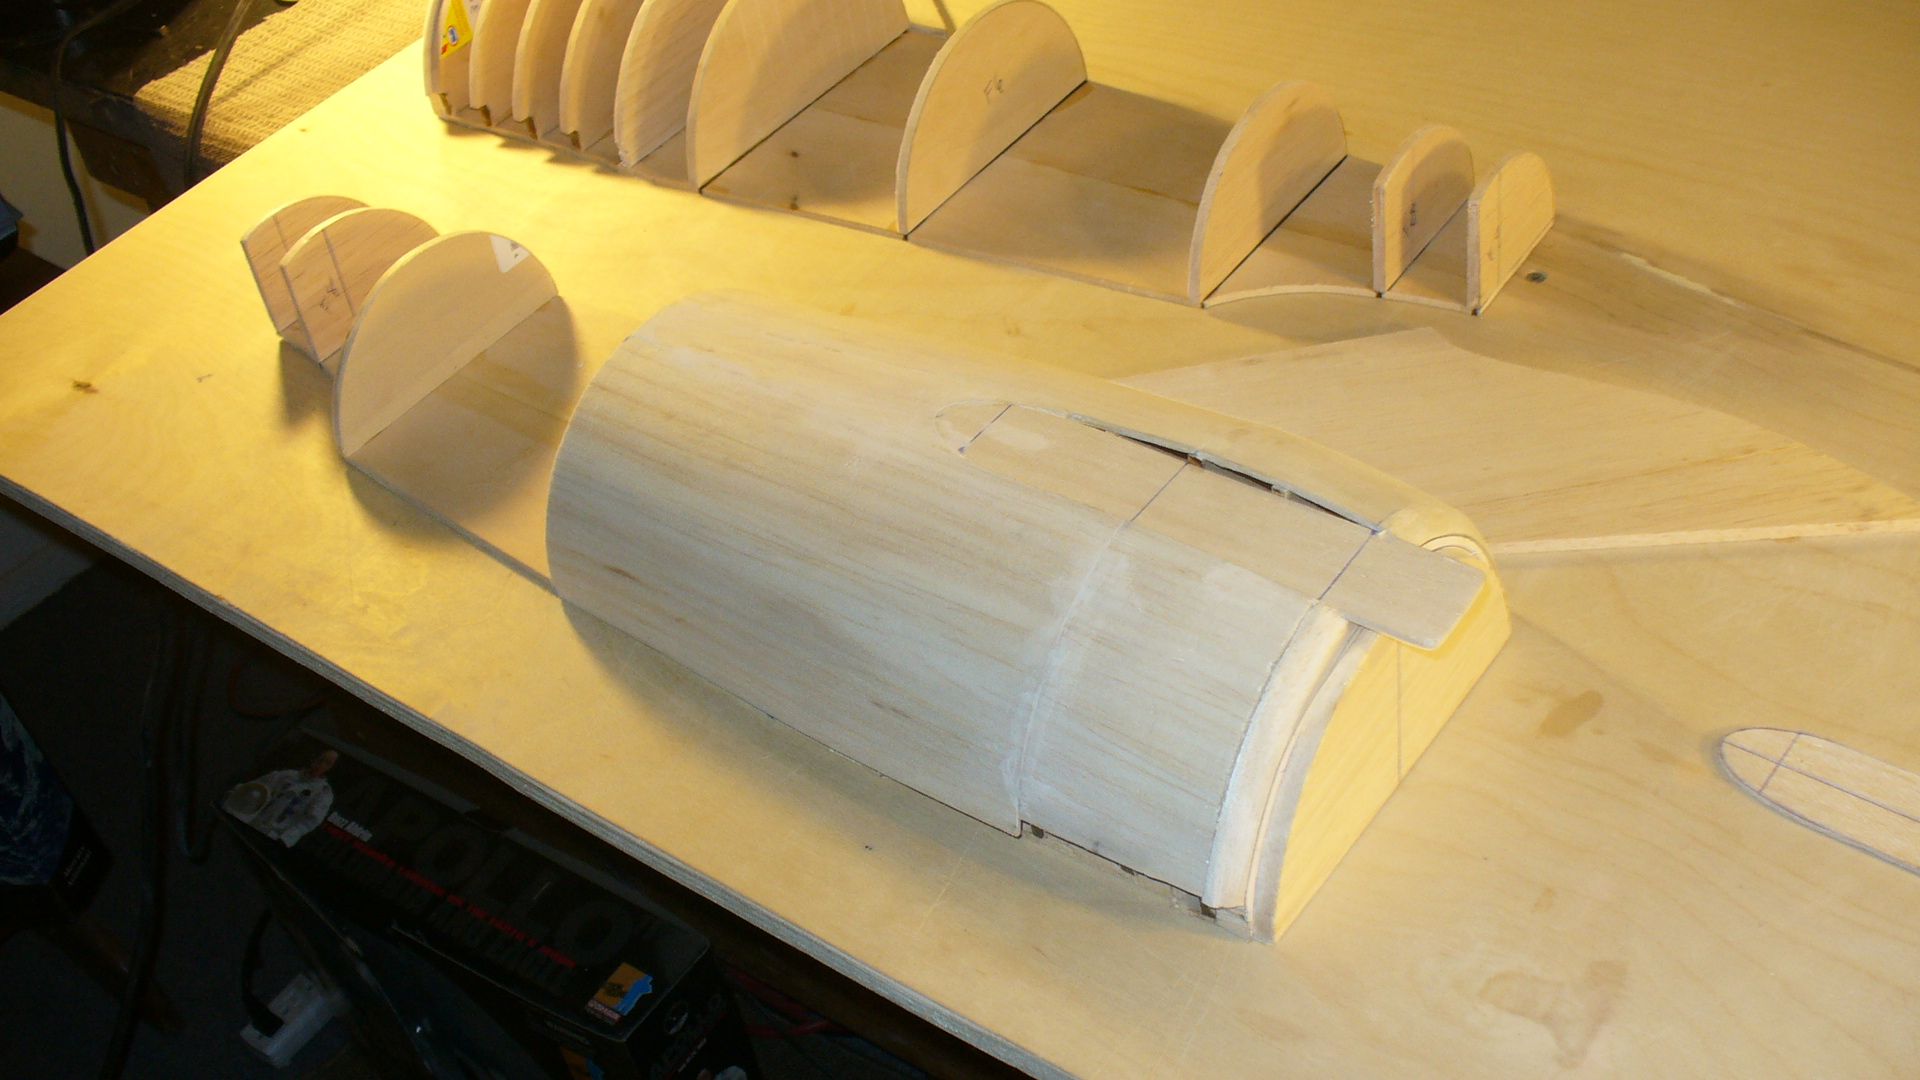
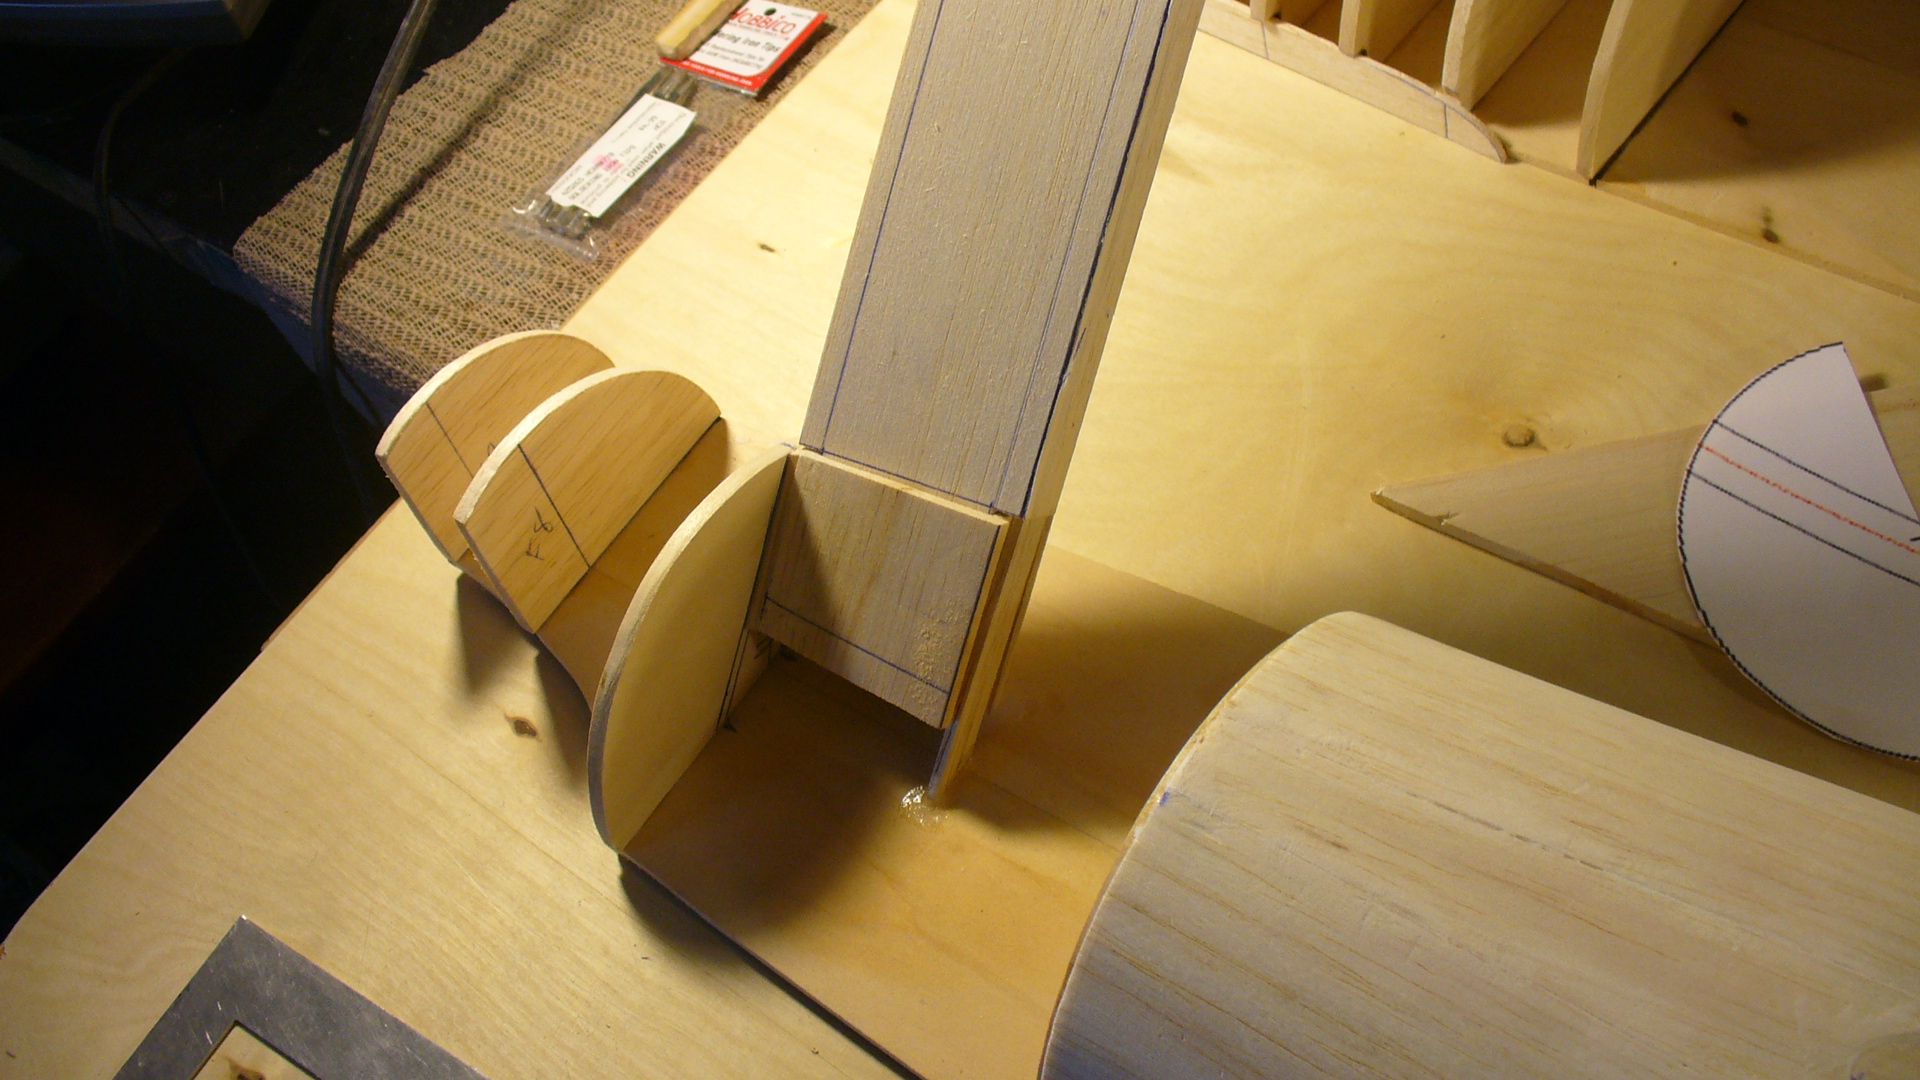
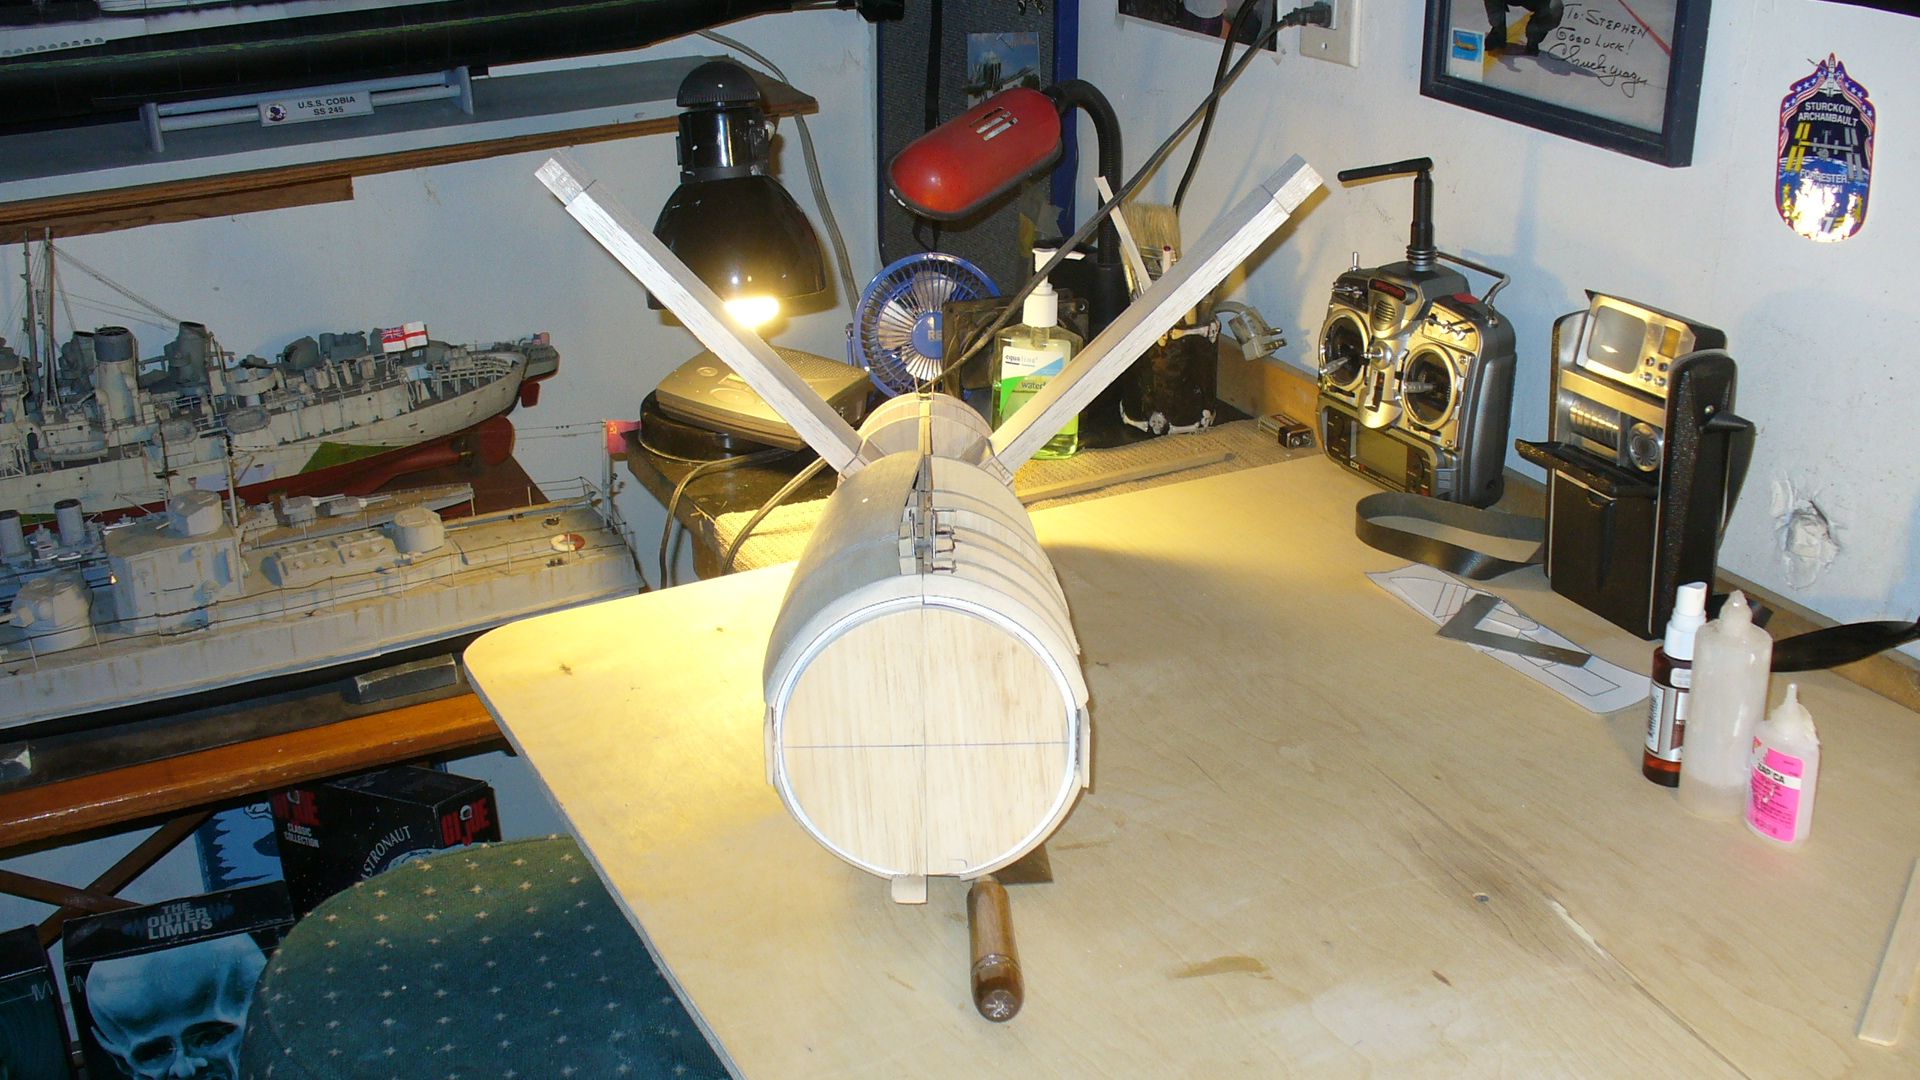
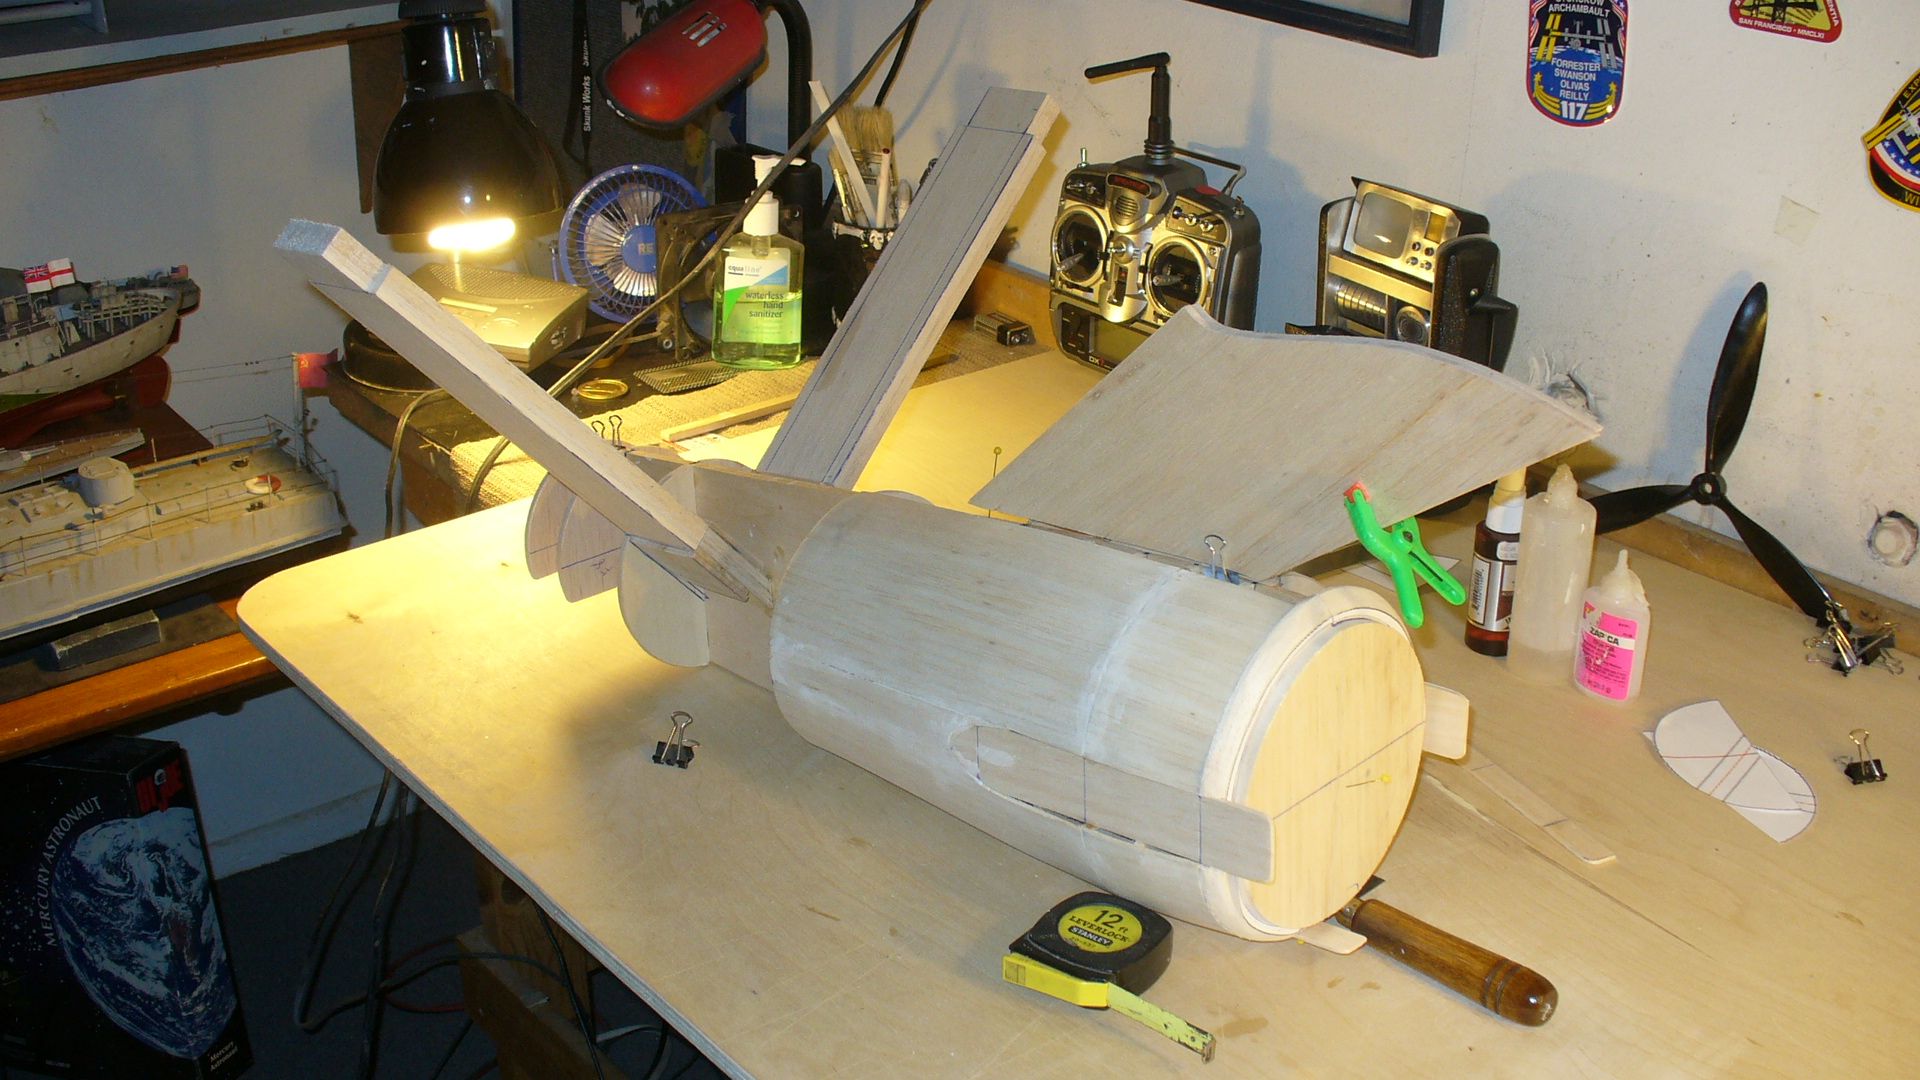
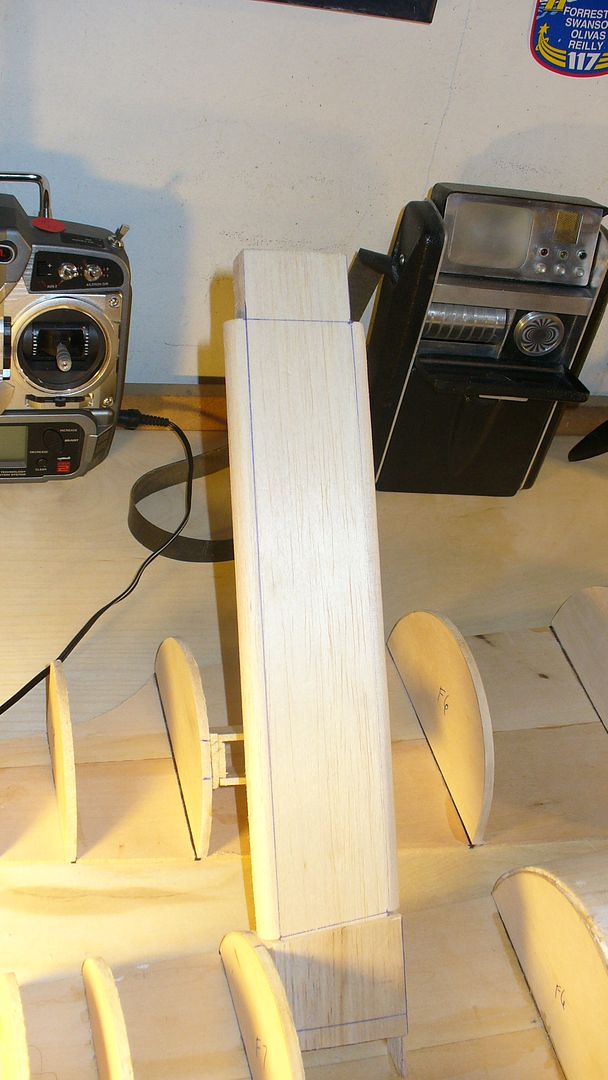
I can't believe it took the whole day to get these pylons framed up and their angles set correctly on all axis. What a haul. But they are perfectly set in the bx slots.
Now I can sheet over them and around the boxes. This makes installing the nacelles on the actual model model plug and play.
BTW the painters tape on the pylons was used to round the LE and TE without damaging the flat part. Later the vents and the lighted windows location will be scribed in. But I had to have the pylons in there slots to check it all against the saucer to make sure that when the nacelles go on they are in their correct positions.
Tomorrow I'll finish the sheeting.
Steve
OK, this is starting to get exciting. :cool
brandomack
Sr Member
Steve,
are you planning on adding another former between the pylon socket and F6 to sandwich it in place?
just curious about that void space in between.
Brandon
are you planning on adding another former between the pylon socket and F6 to sandwich it in place?
just curious about that void space in between.
Brandon
PHArchivist
Master Member
SteveNeill
Sr Member
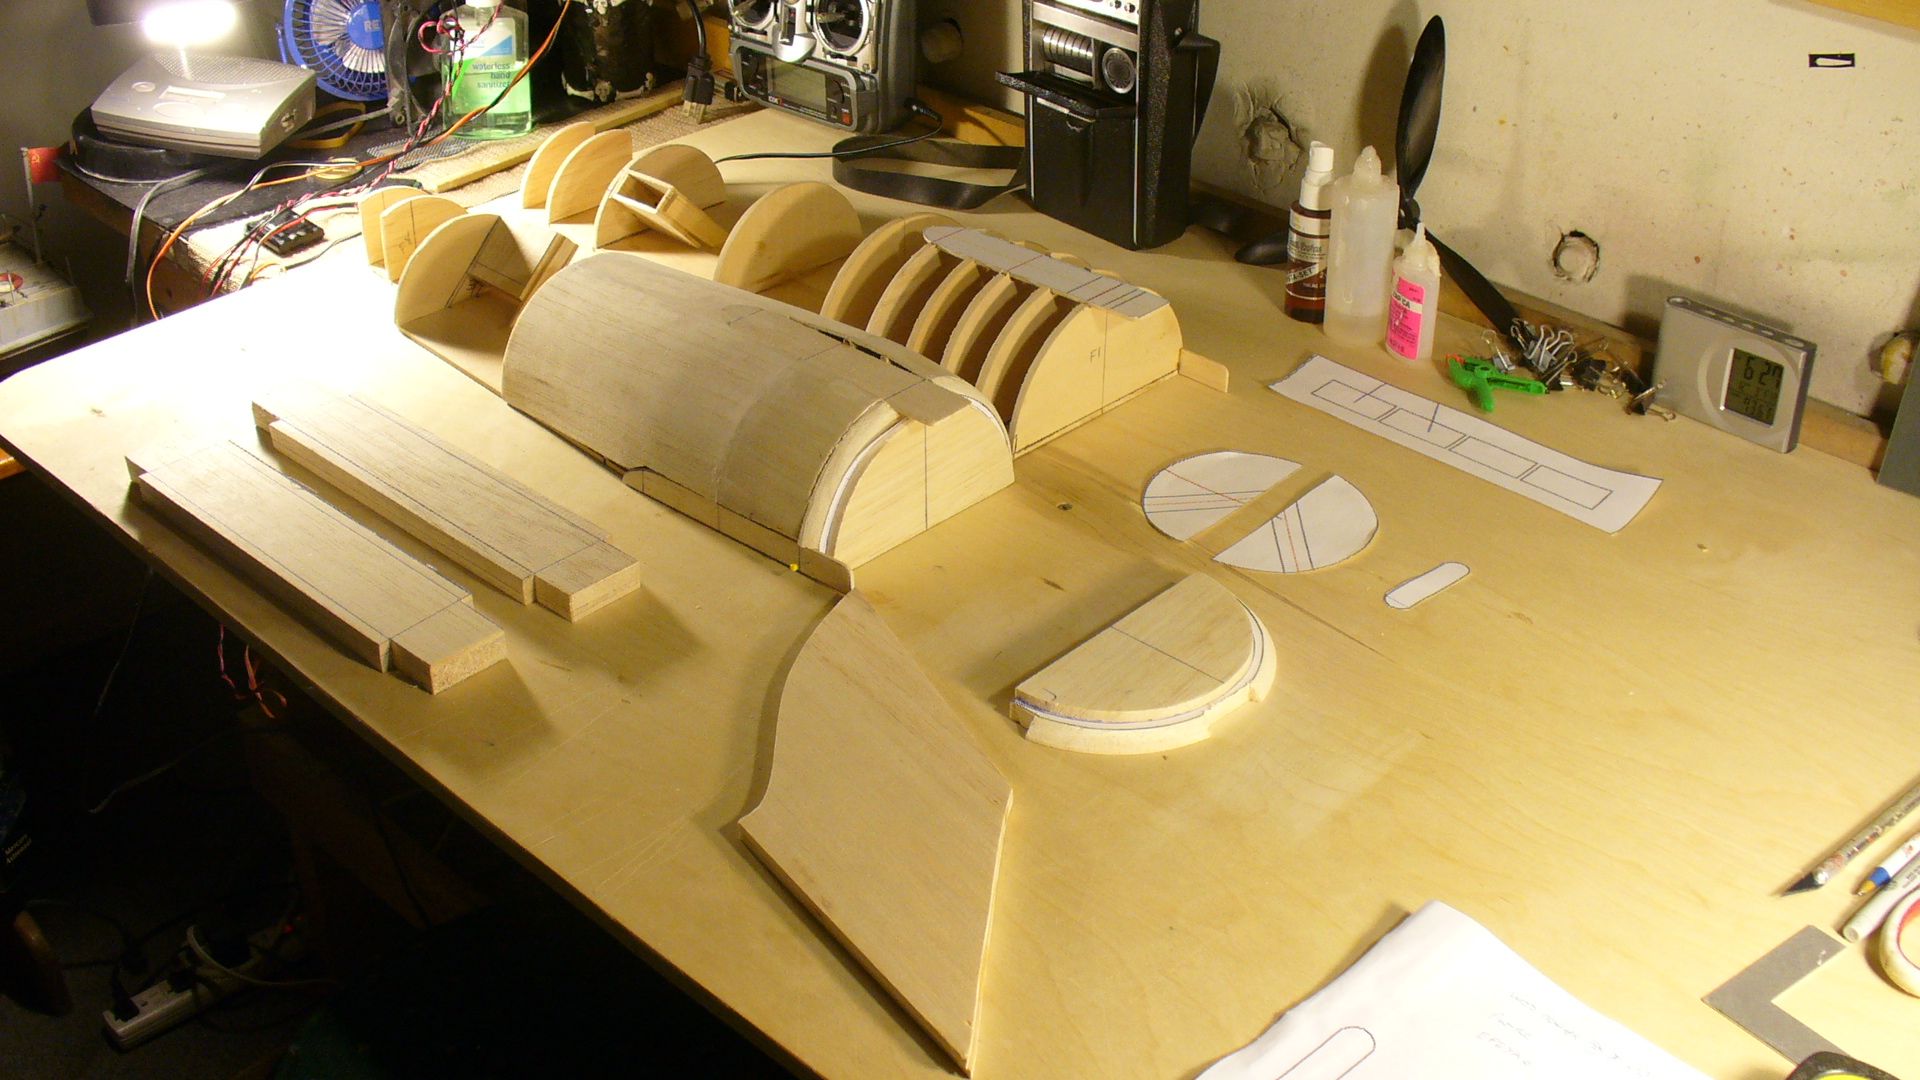
Brandon. I really don't need it. These are just masters that will be molded. I don't need the strength as the actual model will be cast from mold in epoxy glass.
Thanks guys for the excitement. I'm a bit excited myself!
Steve
Thanks guys for the excitement. I'm a bit excited myself!
Steve
Steve- How do you account for the thickness that the layer of glass/epoxy and glazing putty adds to these masters? Do you hold back Xmm in dimension from the balsa sheeting or is it thin enough so as to be negligible? Sorry if i missed that part of the lesson.
SteveNeill
Sr Member
Bondo. I just don't let it bother me. One thing is it's all proportionally larger by a fraction. But yes you are clever to think of that as I have. Also RTV shrinks. Not by much but it does. Then there's the shrinkage of the epoxy. Sanding the parts. In the end I bet it evens itself out. Either way you get a big model.
Kurok, thanks for the kind comment, you are appreciated!
Steve
But yes you are clever to think of that as I have. Also RTV shrinks. Not by much but it does. Then there's the shrinkage of the epoxy. Sanding the parts. In the end I bet it evens itself out. Either way you get a big model. Kurok, thanks for the kind comment, you are appreciated!
Steve
SteveNeill
Sr Member
Thanks Actias. I do actually have access to CNC. A good friend has offered many times to help. But to me like CGI (which by the way, I do for a living) just lacks soul.
Steve
Steve
Thanks Actias. I do actually have access to CNC. A good friend has offered many times to help. But to me like CGI (which by the way, I do for a living) just lacks soul.
Steve
I agree. The CGI stuff doesn't measure up. The old hand built filming miniatures gave you a feeling of weight and scale. All the TINY imperfections gave those hand made models character that CGI and and CNC machines dont. They are just too perfect.:thumbsup
SteveNeill
Sr Member
As Monty Python would say, "it's only a model." LOL!
Thanks so much Tony!
Steve
Thanks so much Tony!
Steve
- Status
- Not open for further replies.
Similar threads
- Replies
- 10
- Views
- 1,097
- Replies
- 117
- Views
- 12,231
- Replies
- 11
- Views
- 1,142