You are using an out of date browser. It may not display this or other websites correctly.
You should upgrade or use an alternative browser.
You should upgrade or use an alternative browser.
Star Wars Themed Photo Backdrop / Set Piece build...
- Thread starter Indy Magnoli
- Start date
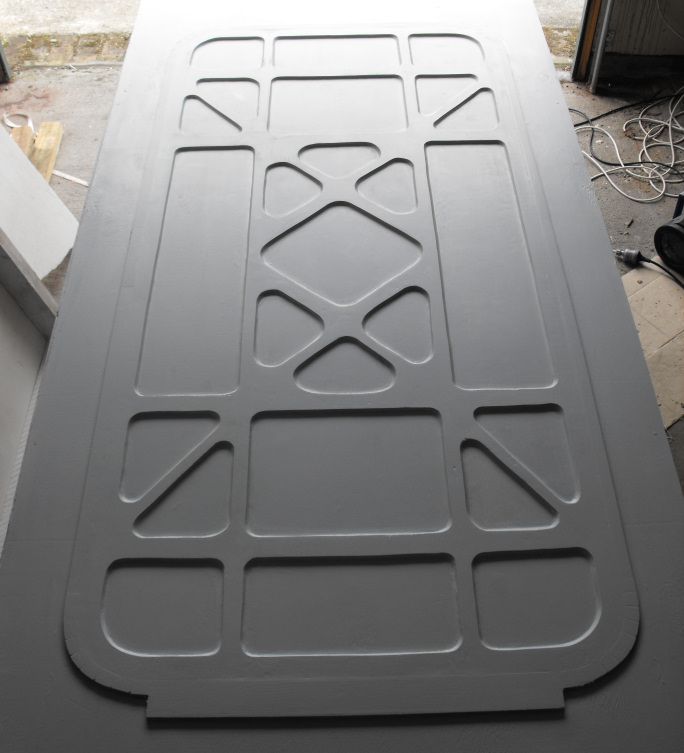
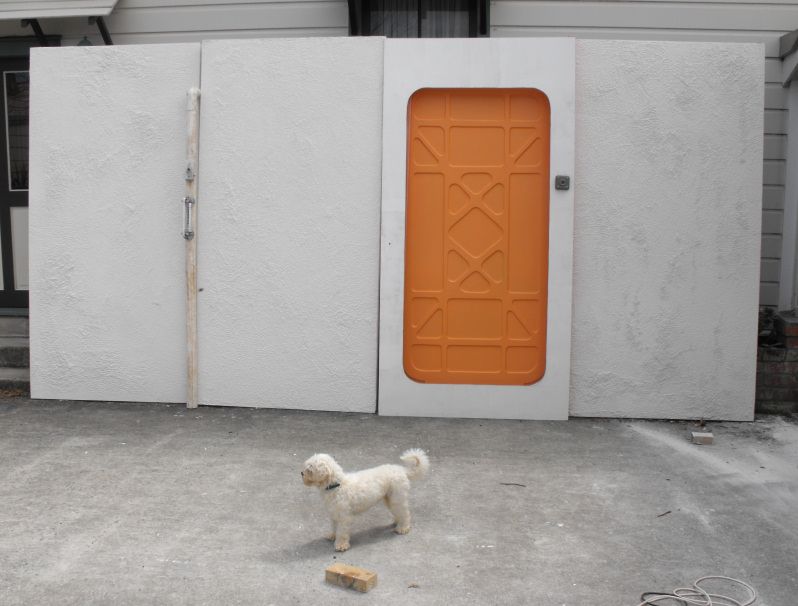
Door has been primed:
very nice... ")
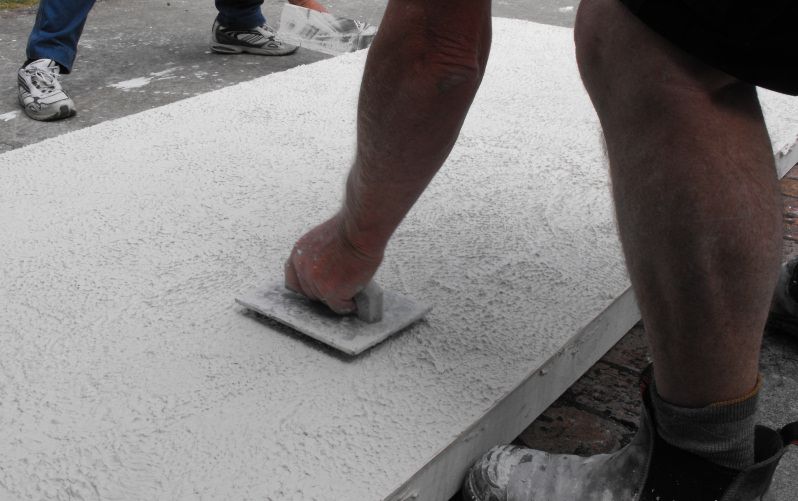
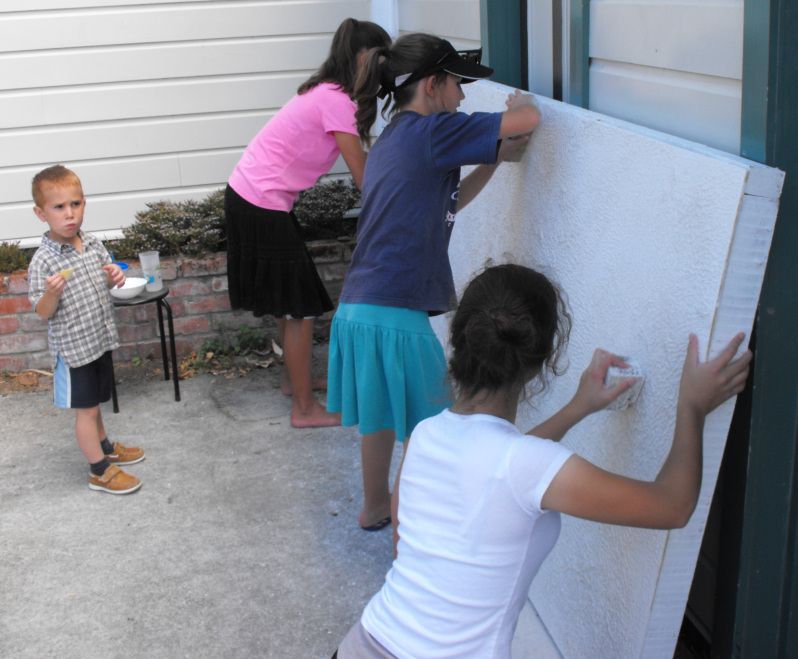
Adding plaster texture to the walls:
Big day planned tomorrow... should have some good progress photos by the evening.
Big day planned tomorrow... should have some good progress photos by the evening.
oota goota
Sr Member
nice work you fullas I love that door!
Paint mixed with sand will do the same "stucco" effect...
We're planning on using sand over a thin layer of resin for the floor to get a realistic ground effect.
Skaught
Sr Member
Very nice! I did the same set for Celebration V and VI (and a couple of other Florida events). Must be nice to have a team! I did it almost completely by myself. For my wall texture, I used ceiling texture paint. Light weight, rolls on and so far has stayed on there. Here are some photos:


Close up of texture:

Close up of texture:

Here are some pics of Blaxmyth putting down a coat of fiberglass resin and sand onto the floor panels, and starting to mount some wall panels to the floor to see what it all looks like. The floor will be painted over eventually with a color similar to that on Tatoine as we feel the Iron deposit left by the crashed freighter years ago just didn't look right.


More progress!
Door being painted:
To give the plastered walls a more flattened, uniform finish, we rubbed wood blocks along the surface to smooth out the pattern:
Getting an idea of the finished wall:
We painted two layers of PVA (white) glue on the styrofoam blocks to seal them:
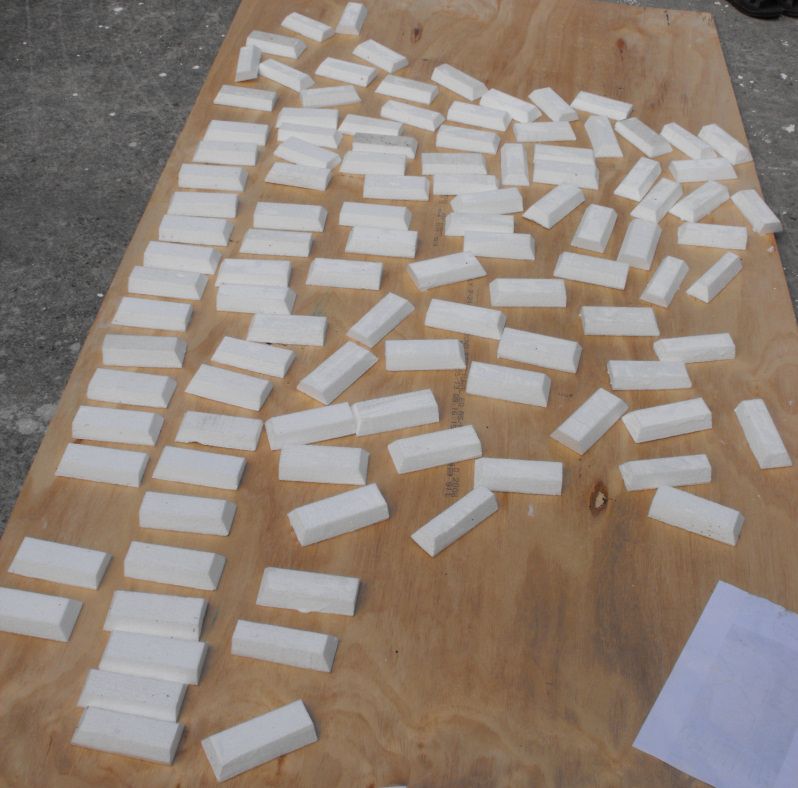
A quick test fitting of the blocks:

Door being painted:
To give the plastered walls a more flattened, uniform finish, we rubbed wood blocks along the surface to smooth out the pattern:
Getting an idea of the finished wall:
We painted two layers of PVA (white) glue on the styrofoam blocks to seal them:
A quick test fitting of the blocks:
F
F S CREATIONS
Guest
Haven't seen this attempted yet, beautifully done so far.
Amazing DJ
Well-Known Member
Looks great with the blocks on there. Did you cut those to shape with a hot wire?
Looks great with the blocks on there. Did you cut those to shape with a hot wire?
Yes, exactly. See more in this post: http://www.therpf.com/f79/star-wars-themed-photo-backdrop-set-piece-build-189769/#post3196197
Excellent work so far! Quick note: Getting a box of greeblies ready for ya!
Similar threads
- Replies
- 16
- Views
- 3,889
- Replies
- 12
- Views
- 4,784
- Replies
- 12
- Views
- 5,029
- Replies
- 2
- Views
- 2,978