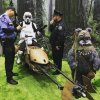
Star Wars Full-Size Scout Trooper Speeder Bike Build

Hey T K - Thanks for the note on the weathering - that's always the best part and something I do a lot of (and enjoy the most). There will be much more in the weathering department as things develop!

Regarding the Scout Trooper - I actually DON'T have one just yet! :) I have a Scout Trooper Helmet, but don't have the rest of the build for the uniform. We have a huge Halloween effort every year (was in the Wall Street Journal last year) and we're hosting a food drive in October. I'd love to get some 501st - Carolina Garrison support for all my props this year.
Oh, I am sure that the 501st would love to see this. I know I would. :)
 
Okay - it's been nearly 100 degrees in the garage, so I've been hunkered up on the PC working on building some greeblies. I currently have some "placeholder" items on the bike at this point and have been busy designing my new components and getting them on the 3D printer.

Everything from the gun, to the hose clamps, dash controls, and random engine bits are in process of being created in PLA.

Here we are just about done:

20160719_174227.jpg

20160719_174126.jpg

20160719_174140.jpg

- - - Updated - - -

Oh, I am sure that the 501st would love to see this. I know I would. :)

Thanks T K! That'll be my next step - to find some support for the big night from some 501st friends in Charlotte or Mooresville. If you know of anyone who might be interested, send them my way! :)
 
Here are a few more shots - had to take a break, but should get some more done this weekend:


20160708_182926.jpg

20160708_183155.jpg
 
Last edited:
Looks amazing, you should change the rubber stoppers on the seats to castors so you can roll the kids down the street ;)
 
Looks amazing, you should change the rubber stoppers on the seats to castors so you can roll the kids down the street ;)

That's awesome! I've been working on balancing it so that when you sit down, the weight in the back just barely lifts the front pedestal off the ground and you can swivel it left and right.

In fact, some kind of electric go-cart would be pretty fun too!

- - - Updated - - -

This looks absolutely fantastic! Stellar work!

Thanks Sheeple for kind words! Glad it's getting some respected approvals here on TheRPF!

- - - Updated - - -

Nice work ! finished mine a few months back.

View attachment 647368View attachment 647369

Hey Chivo - Do you have a build thread or any notes on the design? Was yours fabricated from fiberglass or metal? Would love to see more on it... Thanks!
 
Last edited:
I've been making a few mods lately as the sidewalls of the bike are beginning to bulge ever so slightly due to 2 things:

1) The sitting on the bike is adding some sidewall pressure... and...

2) I've discovered the super expanding foam seems to be fluctuating with heat/humidity -i.e. it's slightly bulging.

Also, I want sharper edges on the turtle deck as well, so I've been working up a few options to remedy this. I've been looking into the following:

A) Adding bondo over the bulging and more sanding - fast to apply, but adds weight and a ton more sanding...

B) Sheathing the sidewalls and turtle deck in plastic - takes more time to cut templates, but hides the bumps...

Let's go with option B!
 
In considering the type of sheathing to use, I'm opting to use PETG (Polyethylene Terephthalate) - or better known as vacuum forming plastic. It's very rigid, can be heated and stretched, and I also like the fact that it's clear, so I can see how well it's adhering.

Start by making some paper/tape templates to determine the shape and then cut out slightly oversized sheets of PETG.

20160723_144506.jpg


Here, I have the top of the turtle deck:

20160723_101759.jpg

- - - Updated - - -

In order to get good adherence, the paint/primer on the bike and the adhered side of the PETG plastic sheet need a good sanding. In this case, I'm opting to leave on the protective blue plastic on the pretty side to keep it from getting dinged.

20160722_175451.jpg
 
Last edited:
Once everything is sanded, 5-minute epoxy makes quick work to get a good bond started. There will be slight gaps between the bike and the plastic - corners, edges, etc. I'll come back with some West Systems slow-cure (very thinset) epoxy and pour it in the edges and tape them down to dry overnight.

This is creating a very nice, smooth and hard material that will hide any imperfections and create those sharp demarcations.

20160723_101954.jpg
 
Keep in mind, the plastic is clear, so it's tough to not see through it to the sanded surface, but the plastic provides a nice, hard outer shell.

20160727_203953.jpg

20160723_142603.jpg

20160723_142608.jpg

20160727_204013.jpg
 
Last edited:
Made some good progress today - began painting some greeblies and getting the front end assembly completed -

20160729_122611.jpg

- - - Updated - - -

I found that Rustoleum Metal paints are thick enough to actually cover some of the printed grain in the 3D prints.

20160729_122630.jpg

- - - Updated - - -

To make some of the various components, I used some ready made components and combined those with prints from the 3D printer.

20160729_125402.jpg
 
Incorporating ready-made objects is what many movie prop makers employ to keep costs and time down - wonder if any butter tubs were used in Star Wars?

20160729_125534.jpg

- - - Updated - - -

After some paint and mounting - Vwalla! Another thingamajigger on the Speeder Bike!

20160729_143307.jpg

- - - Updated - - -

I continued making some of the components with ready made plastic tubs and objects. In this case, a Country Crock tub for back of front plate.

20160729_144710.jpg

- - - Updated - - -

Painted all black and secured...

20160729_145312.jpg

- - - Updated - - -

Additional Greeblies;

20160729_145532.jpg
 
Some More!

20160729_152053.jpg

- - - Updated - - -

Getting there - Just about ready to paint again. This time I'm going to be using an old 80's model building and hairstyling technique using Aquanet. If you don't have a can of this stuf for your prop/modelling tools - I suggest you run down to the 7-11 and pick on up!

20160730_142729.jpg
 
Back
Top