Star Lord helmet AND accessories!!! by Helagak!

Could someone...anyonethat's capable, output these .pdo files as PDFs and post links here in this thread?

I'm a mac user so I cannot download the pepakura editor to my computer. But I can open, resize and print PDFs.

I know there are other forum members in my predicament that would love to be able to pep Helagak's amazing work! Thanks in advance, and again, AWESOME work, Helagak!
PDF FOAM - Download - 4shared - Kevin Langer

Will that work?
 
Big thanks to Helagak for releasing these files to the public! Very cool of you man!

Longtime lurker, rarely feel like I have anything to add so almost never post, but figured I'd put up some print pics for a little change.

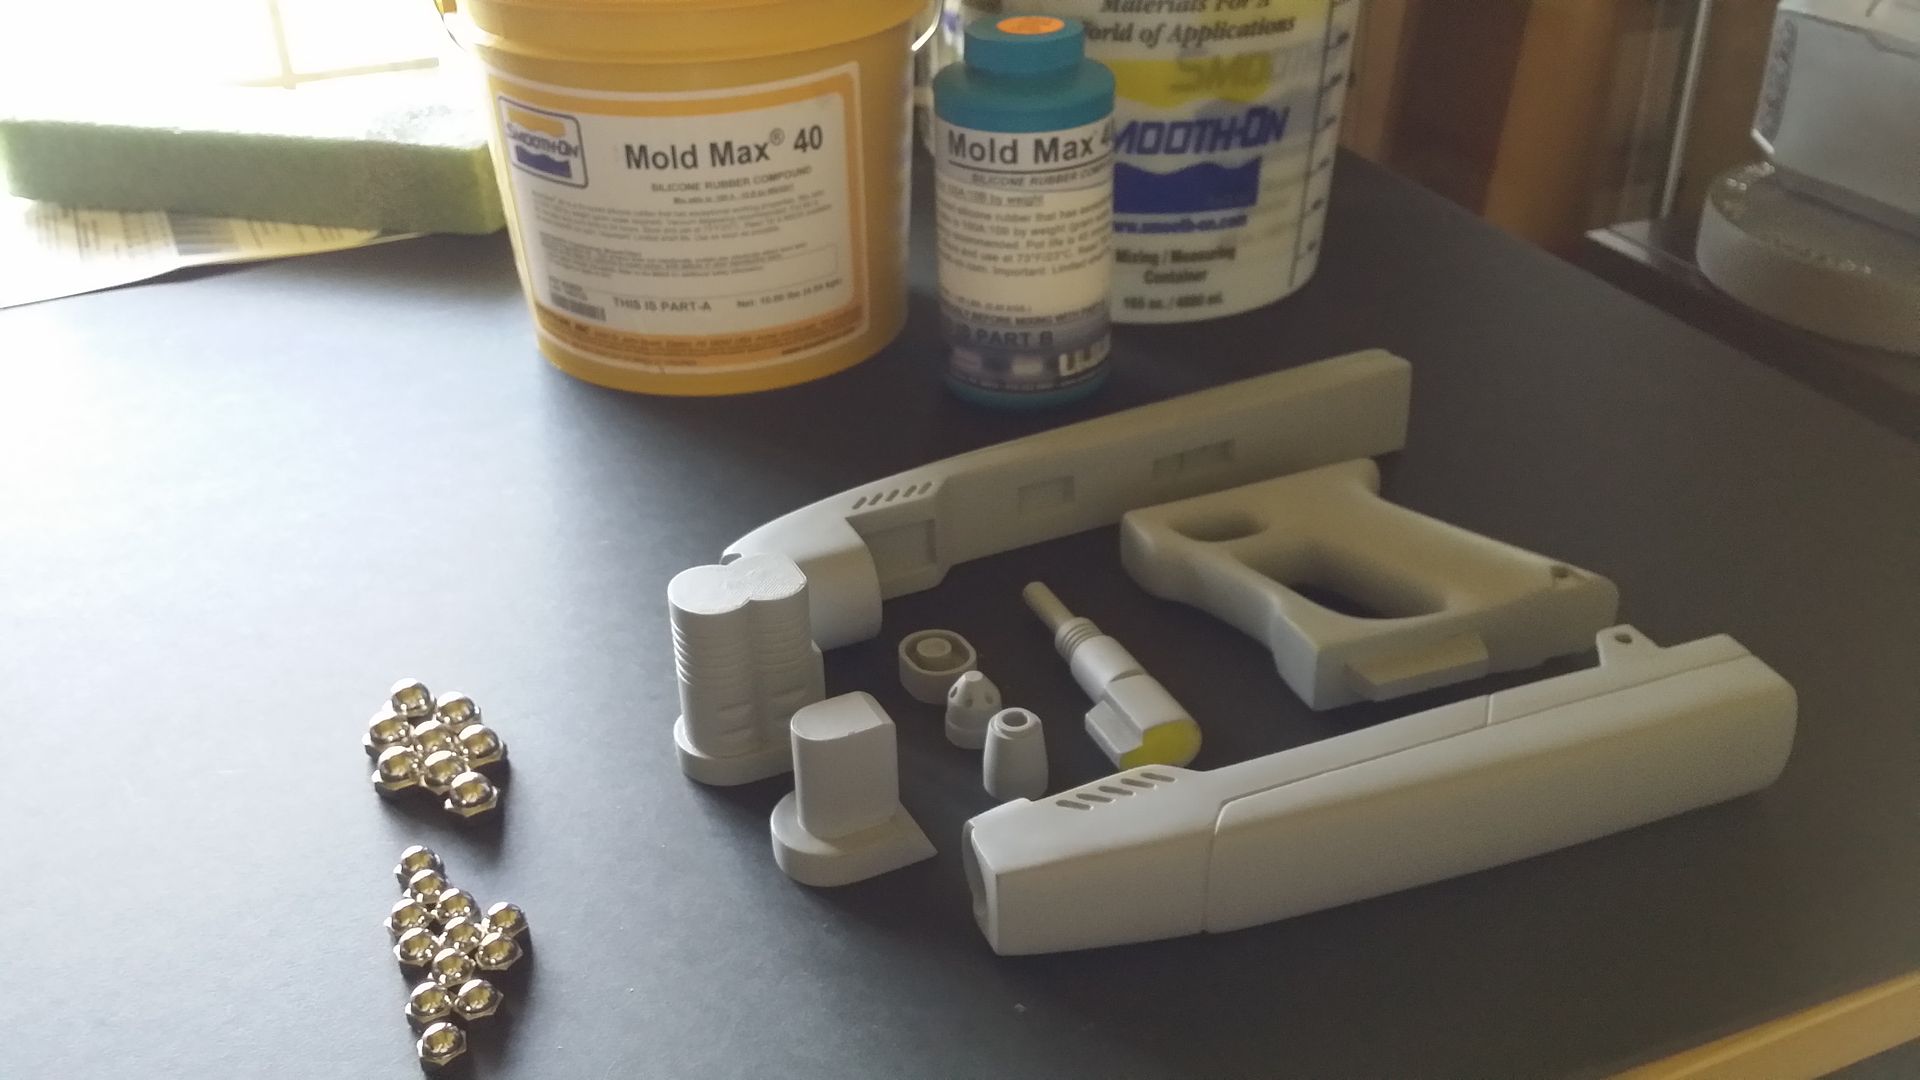
I'd forgotten to adjust the e_steps per mm on my printer for this white pla I got, so it was slightly underextruding and caused some janky sags on a few of the overhangs, mostly underneath the round parts. Since I'm going to fill and sand it anyway, I'm not too concerned.

.3mm resolution, 10% infill, white PLA, ~4 hour print

UnewvcE.jpgDSRQXBB.jpgUGB1KKu.jpg

This was by far the most complicated thing I've printed so far, but I was getting so tired of little trinkets and calibration pieces I wanted to go all-out on something awesome. I also haven't played with support material too much, so learned a lot on that end as well.

Again, thanks a ton to Helagak for the models, they look great and print wonderfully. What a world we live in where an enthusiast on one part of the planet can create these wonderful objects and another enthusiast somewhere else can watch his creation come to life in their own living room!

Edit: I forgot to mention that I DID adjust the models to the suggested .88xxxx scale and comparing reference photos with the chin piece I printed, scale seems spot on! Can't wait to finish printing this beast!
 
Last edited:
Generally with any pep file there will be some pieces pulled way off to the side. This is even more true with foam pep files. This pieces are considered unnecessary. They were dragged off the print area on purpose by the unfolder.
 
What a world we live in where an enthusiast on one part of the planet can create these wonderful objects and another enthusiast somewhere else can watch his creation come to life in their own living room!

Devin, that looks great! Glad you like it! I hope you used the new 0.88xxx scale the original files are a bit too big and I haven't got around to recalling everything. Good luck dude.
 
Is your 3d print file in inches?
umm wat? i do all my sizing and such in inches. but its automatically changed to metric by netfabb. 3d printers only deal with mm.
*edit for explination*
When i bring the file into netfabb it will give me the dimentions in mm. something like 180.55 mm for width.
I then convert that to inches on paper, figure out what size i need, do the math to get the correct scale, apply the scale. and netfab will show me the new size (maybe its now 192.42mm.) (these numbers are just examples!)
I then convert the new size back into inches just to make sure the scale applied the way i want. and let it roll.
so technically its all in metric. but i do my calculation in inches. (I just cant imagine the size of metric units! haha)
 
Are there two versions of the file for card stock? The one I downloaded has tons of little strips that make the sides but I've seen other peoples WIP photos where the sides (around the temples) are one solid piece. Sticking all the strips together is driving me insane. If anyone has the simplified version I'd be eternally grateful.
 
Hi guys! First off, just wanted to give a HUUUUUUUUUGE THANK YOU to Helagak for all this. This is pretty much exactly what I've been looking for. Just a few questions since I'm a complete noob to the whole Pepakura and helmet building thing.

1. If I decide to go Pepakura print, what is the cheapest way to reinforce it? I've done a bit of research on resin but some have said it's toxic? I want to avoid that if possible.
2. For foam, around how thick a sheet should it be? Also is there any alternative to a heat gun?
3. Finally, 3D printing seems to be the easiest route, but I don't have a printer so I'll probably have it printed by some businesses that have a 3D printer. If the price is around $1 per cm3, around how much can I expect to spend on it? (hopefully someone out there who has had it printed can give a guesstimate?

I've never done pep or 3D printing, so I'm making a foam helmet. I'm using the big rolls of floor mat foam you can find at some home stores, etc. I believe it's around a half inch thick. You can also use the "puzzle piece" square foam mats - as long as one side is smooth (I've seen ones that were textured on both sides). You can use thinner foam (from craft stores) for detailing (that's what I'm planning, but I just finished cutting out my main pieces and haven't even started putting it together yet so I'm not at that point yet!).

For this helmet you may not need a heat gun, since there aren't any really extreme curves. A hair dryer might work if you think you need one. Unless you mean for sealing the foam before painting? I've never finished and painted a foam piece before so I can't give any advice on that!

I just meant for shaping it, but yeah, I really hope you're right and that I don't need a heat gun, but I will give the hair dryer a try. Thanks! :)
 
This thread is more than 6 years old.

Your message may be considered spam for the following reasons:

  1. This thread hasn't been active in some time. A new post in this thread might not contribute constructively to this discussion after so long.
If you wish to reply despite these issues, check the box below before replying.
Be aware that malicious compliance may result in more severe penalties.
Back
Top