You are using an out of date browser. It may not display this or other websites correctly.
You should upgrade or use an alternative browser.
You should upgrade or use an alternative browser.
Star Destroyer #3
- Thread starter ringa
- Start date
ringa
Well-Known Member
beautiful work Ringa. I haven't been much of a fan of the ANH Destroyer, but you certainly are changing my opinion. I hope you find those L'Eggs eggs for the main engines.thumbsup:thumbsup
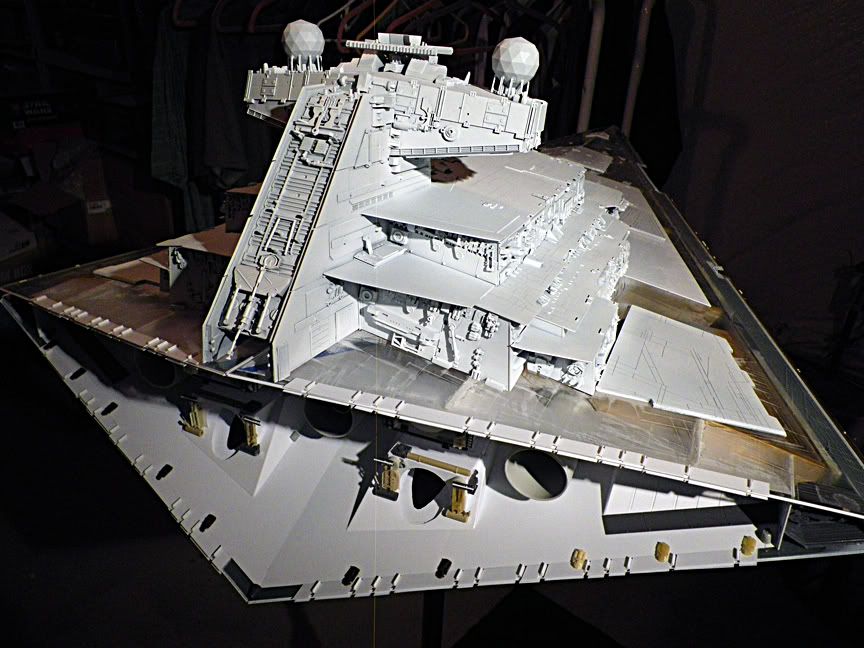
Thank you! Glad you have a changing opinion of this ship. I've always liked this version the best. When ESB came out in 1980, I was already a big fan of the star destroyer from the first film. In Empire, when the first thing you see is the 8-footer, I remember being disappointed, "Hey, they changed it!" I knew right away that the proportions were noticeably different, and I always thought the details were overkill. It grew on me over the years, but I still think that when it comes to the SD details, 'less is more' works better IMO. It just looks more like a 'battleship' to me. Maybe it's because all those battleship kit parts are more prominent on the 4-footer.
Oh, and I have L'Eggs eggs waiting to be detailed. I'll probably be starting that very soon. First, I'll be doing the measuring cup engines, since I have spaces ready for them now.
ringa
Well-Known Member
As amazed as I am at the painstaking attention to detail, I am equally amazed at where you guys get your reference material from! Phenomenal work on both counts!
Thanks! Right now I'm feeling the 'pain' in painstaking, as my back is killing me from bending over the model to glue all these tiny parts on it!
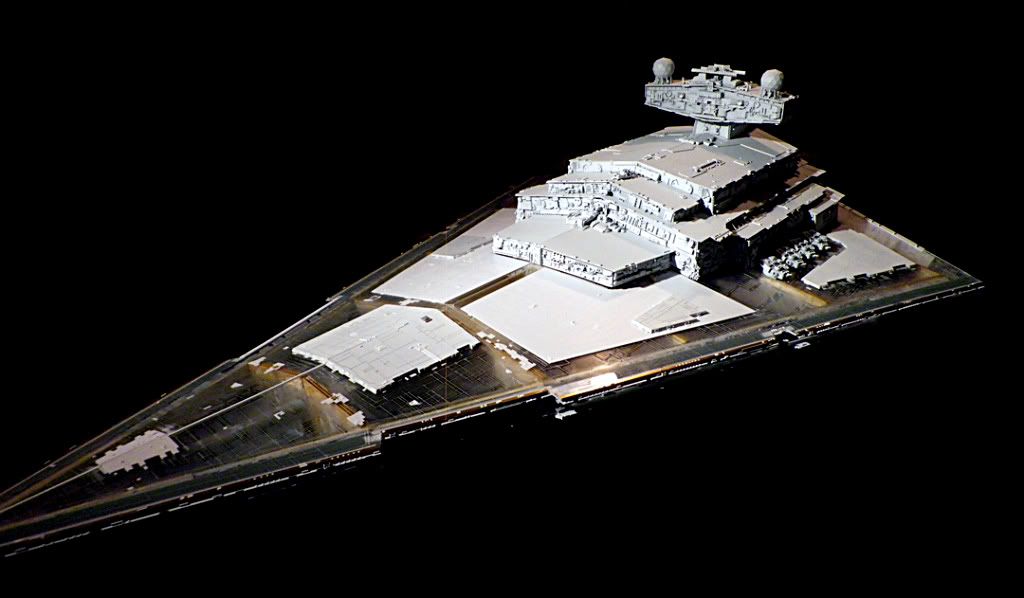
The best reference materials for this ship are all over the internet from all the people who have taken countless photos of the thing. The folks here are second to none when it comes to part ID. I'd have far less original kit parts on mine if it weren't for the people here, so thank you to everyone who has helped!
LastBattlestar
Well-Known Member
Looking better and better, Rick! Your time and patience on the build is really paying off.
Those engine bulbs look interesting. Wombat and I have been talking about something like those for our Galactica builds. Any info?
Mike
Those engine bulbs look interesting. Wombat and I have been talking about something like those for our Galactica builds. Any info?
Mike
ringa
Well-Known Member
Thanks guys!
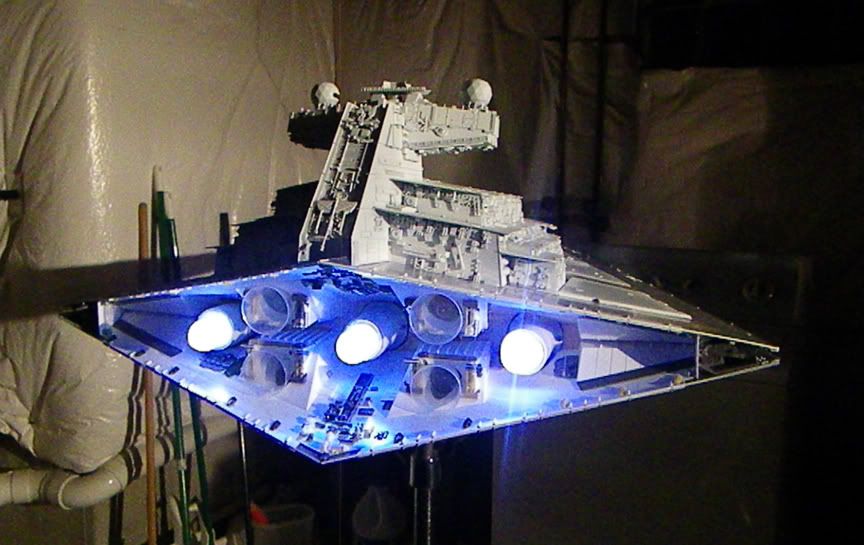
Mike, those bulbs are made for LEDs. They were originally novelty LED 'light bulb' key chains that I actually found in a display on the counter of a convenience store when I gassed up my car. I chose them because they can be taken apart and modified easily, and they have the 'look' of the original model's bulbs, yet without the intense heat. I made customized sockets to fit the tubes. As you can see, they are working out really well.
Mike, those bulbs are made for LEDs. They were originally novelty LED 'light bulb' key chains that I actually found in a display on the counter of a convenience store when I gassed up my car. I chose them because they can be taken apart and modified easily, and they have the 'look' of the original model's bulbs, yet without the intense heat. I made customized sockets to fit the tubes. As you can see, they are working out really well.
ckwanwoo
Sr Member
Awesome Rick,
I was surpised how you have the same thinking with me for the underside dome and this bulb as well???
Actually, I also used some bulb of keychain for my ISD 2 years ago.
http://www.therpf.com/f10/making-anh-star-destroyer-33301/index7.html
thanks Eric.
I was surpised how you have the same thinking with me for the underside dome and this bulb as well???
Actually, I also used some bulb of keychain for my ISD 2 years ago.
http://www.therpf.com/f10/making-anh-star-destroyer-33301/index7.html
thanks Eric.
Last edited:
jedimaster
Sr Member
Beautiful stiff Rick. You nailed that back end. I have the back end 95% identified o you'll be ok.
I'm sorry Jason but this made me laugh.
lol:lolringa
Well-Known Member
Thanks guys!
–––––––––––––
Eric, that's cool we both had the same ideas. Great minds think alike! Actually, I was wondering where I was going to get LED lights in a bulb when I was pumping gas for my car. I went to pay at the counter and there they were! I bought 3 of them. It's a good thing I saw them when I did because they sold out and I haven't seen them since!
––––––––––––––
Jedimaster, you know you're a geek when someone has to point stuff like this out for you.:lol
Thatoneguy
New Member
Wow this is just an awesome build I would say excellent job. I feel like I'm not showing you the respect that you earned. For once I feel that my vocabulary is inadequate. Though I think Darth Vader would say Most impressive.
My reaction to the pics :eek
My reaction to the pics :eek
ringa
Well-Known Member
Hey Rick,
Rebuilding the bridge for my devastator is nearly done.
I can't wait the completion of mine.
However, now I was faced with some rock because my wife hate the rebuilding...:cry
thanks Eric.
I wish you all the best on the new build, Eric!
I understand about how your wife feels about it. She probably says that you already spent a lot of time and money to make a star destroyer, and now you want to do it again? Then you have to explain that you came so close to making the model perfect, so now you want to take that knowledge and do it better. Am I right?
My wife, though she supports my projects, she can't wait for this one to be done. It does take a LOT of time to scratch build a star destroyer. However, I do make a point to spend quality time with her. She is more important than a studio scale model.
Good luck my friend!
ringa
Well-Known Member
I would say you got your point across very well. Thank you very much!Wow this is just an awesome build I would say excellent job. I feel like I'm not showing you the respect that you earned. For once I feel that my vocabulary is inadequate. Though I think Darth Vader would say Most impressive.
My reaction to the pics :eek
ringa
Well-Known Member
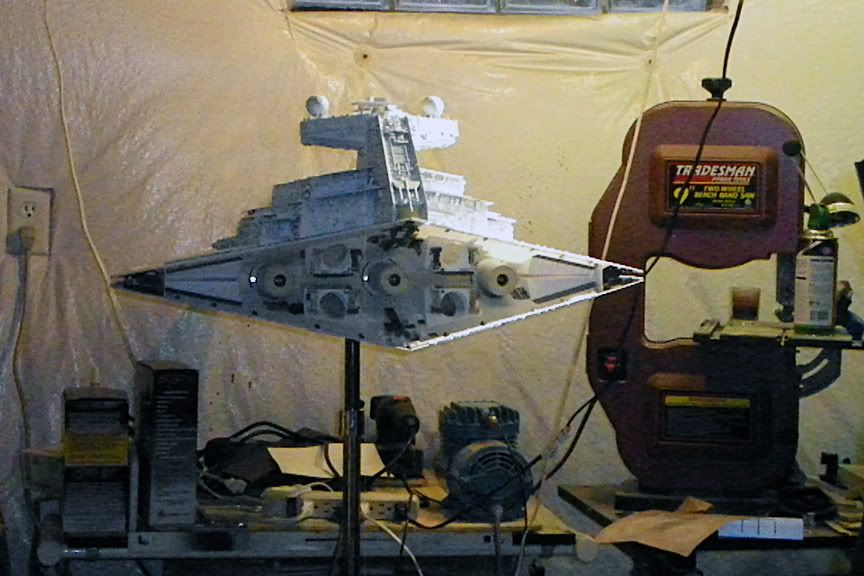
Working on the engines. The one part I am missing is the Sealab flaps (3 per egg). If anyone has parts or castings of these that they would like to help me out with, I would like to purchase them. I wasn't sure I was going to put them on because they are so hard to get, but, I decided they are a 'signature' aspect of the ANH model, and would like to include them.
Of all the areas on the original star destroyer model, I always wondered why the 3 main engines looked so rough compared to the rest of the model. Now I know why!
I've spent most of this week and last weekend making engines out of L'Eggs eggs. If there was to be one part of this model that would become my least favorite, I think I found it.
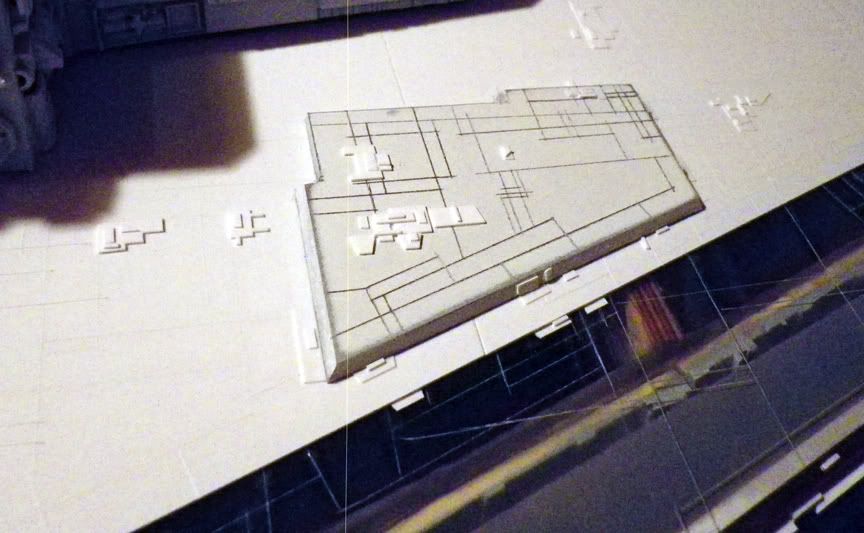
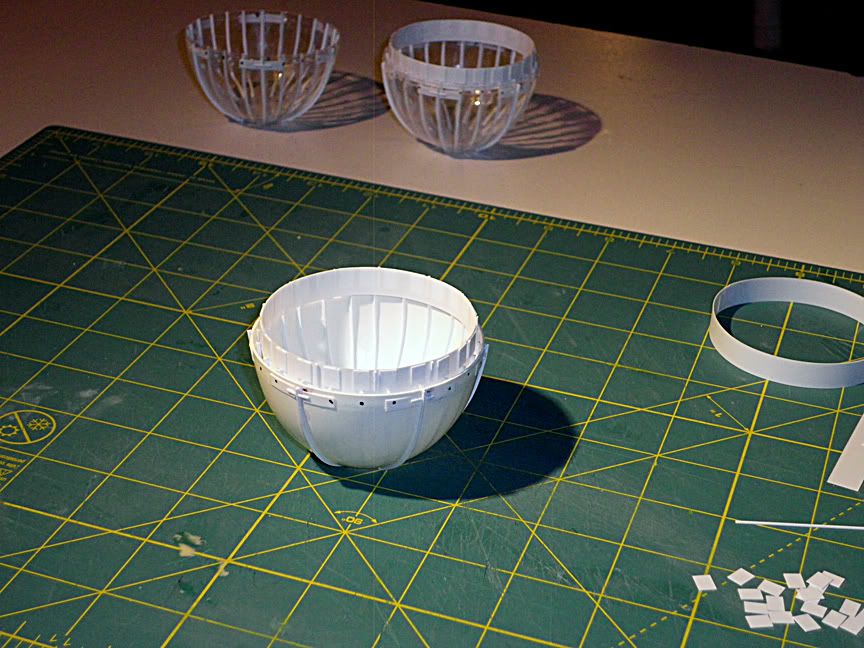
You have to glue the ribs (small 'T' beams) on the outside and inside of the eggs. The six that go on the outside weren't so bad, but if there's any place that these T beams do NOT want to be, it's inside an egg! Since there has to be 24 of them per egg, that's a lot of practice to get it right. I got better at it with each egg.
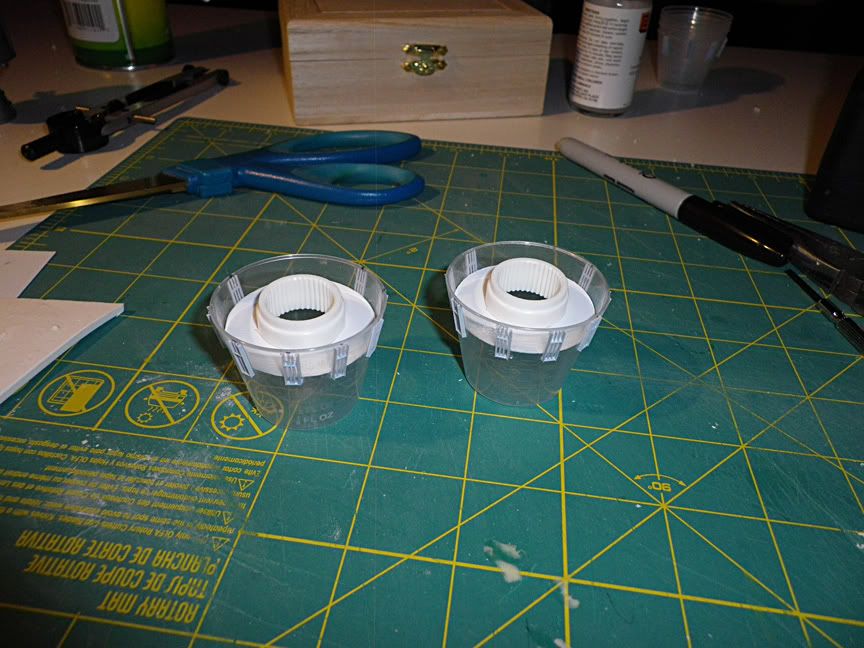
Then there's the extension ring. I was never sure if this was a found object until I studied closeup photos of them. They were definitely scratch built. I completed two out of three tonight, then I just had to take a break.
Since L'Eggs eggs are vintage and hard to come by, I am just using the ones I was able to get; one white one and two clear plastic ones. The clear ones won't look good until they are painted because the clear plastic gets foggy from the glue.
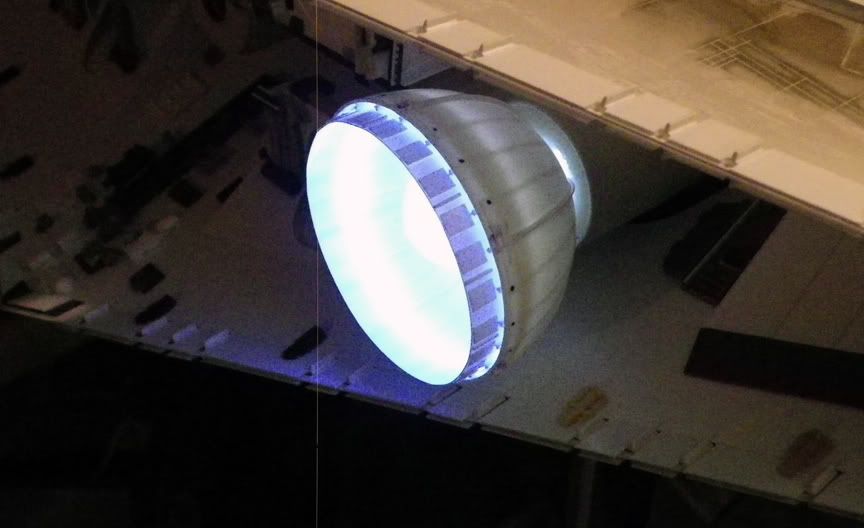
I did do a lighting test with the white egg. As hard as it was to make, it all becomes worth it when the lights are inside!
More work to do, so I will post photos when I get the chance.
Of all the areas on the original star destroyer model, I always wondered why the 3 main engines looked so rough compared to the rest of the model. Now I know why!
I've spent most of this week and last weekend making engines out of L'Eggs eggs. If there was to be one part of this model that would become my least favorite, I think I found it.
You have to glue the ribs (small 'T' beams) on the outside and inside of the eggs. The six that go on the outside weren't so bad, but if there's any place that these T beams do NOT want to be, it's inside an egg! Since there has to be 24 of them per egg, that's a lot of practice to get it right. I got better at it with each egg.
Then there's the extension ring. I was never sure if this was a found object until I studied closeup photos of them. They were definitely scratch built. I completed two out of three tonight, then I just had to take a break.
Since L'Eggs eggs are vintage and hard to come by, I am just using the ones I was able to get; one white one and two clear plastic ones. The clear ones won't look good until they are painted because the clear plastic gets foggy from the glue.
I did do a lighting test with the white egg. As hard as it was to make, it all becomes worth it when the lights are inside!
More work to do, so I will post photos when I get the chance.
Similar threads
- Replies
- 22
- Views
- 1,122
- Replies
- 10
- Views
- 1,204
- Replies
- 17
- Views
- 1,898