You are using an out of date browser. It may not display this or other websites correctly.
You should upgrade or use an alternative browser.
You should upgrade or use an alternative browser.
Star Destroyer #3
- Thread starter ringa
- Start date
punkpigpen
Member
It's genius. amazing work!
ringa
Well-Known Member
Thanks for the comments, everyone, I appreciate them.
Off hand, I can say that most of them are 1/700 scale.
As far as tips, I'll post them as they come to me. Building this model definitely creates interesting challenges, that's for sure.
Could you share with us what scale(s) you used for the battleship parts?
Off hand, I can say that most of them are 1/700 scale.
As far as tips, I'll post them as they come to me. Building this model definitely creates interesting challenges, that's for sure.
Dunno - I'm hoping for a Blade Runner display, actually.
But if we do, I'll just have you bring this monster, rope it off, and BANG - instant display")
You rule.
But if we do, I'll just have you bring this monster, rope it off, and BANG - instant display
You rule.
Thanks, Jason! WonderFest 2012 is the plan, if I can figure out how to transport it. This is much bigger than my other two. Not going to be easy.
Will you guys be doing another studio scale display?
star-art
Sr Member
Dunno - I'm hoping for a Blade Runner display, actually.
You rule.
If you don't have a studio-scale display, I'm not going. LOL That was a highlight of WF for me. You should make it a new tradition!
Looking great Rick, can't wait to see this finished.
ringa
Well-Known Member
Dunno - I'm hoping for a Blade Runner display, actually.
But if we do, I'll just have you bring this monster, rope it off, and BANG - instant display
If that's the case, I'm sure I can come up with a way to display it on its own. I'll appropriate some creativity to the matter.
.DarthSteak
New Member
Any thoughts about putting out plans? Loved the pictures, didn't check out the text supposed to be doin something else right now. Just a complete list of parts, maybe different models instead of original to match, pricing, ect
ringa
Well-Known Member
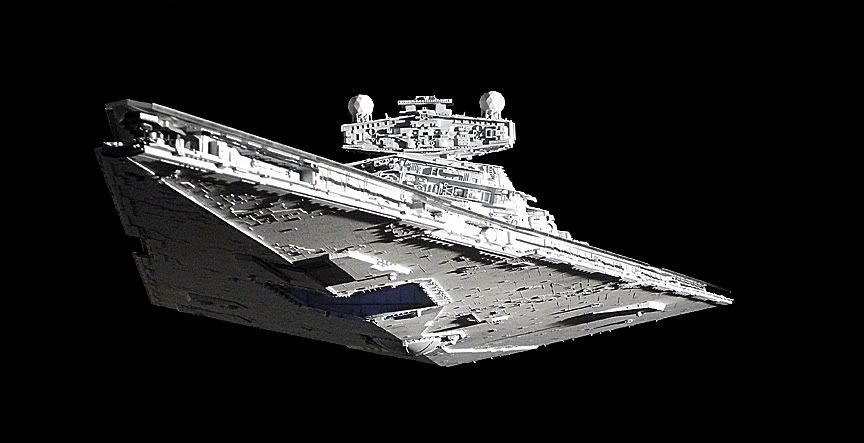
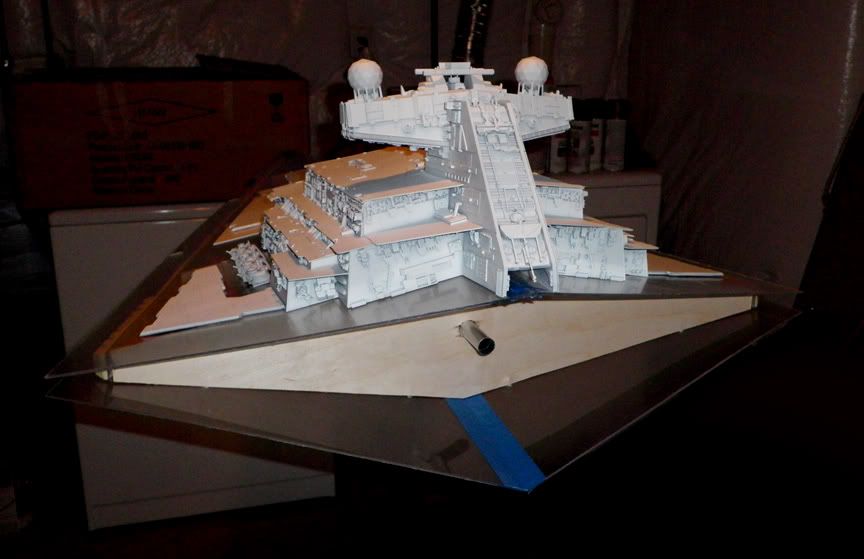
Thanks everyone! It means a lot to me when I read people's comments, especially the ones that mention how close it is to the original's proportions.
The reason that means a lot to me is because the proportions are more important to me than getting every last detail accurate. I've said this before, details on a star destroyer are like an impressionistic painting. They are different on every rendition of the ship that ILM made for the trilogy. Details on this ship have one purpose... to cast interesting shadows. I've always believed that it's the proportions that make or break it. Even though I want it to look as much like the original filming model as I can, having every last kit part is not important to me.
Also, being this is my third attempt at an SD, I've been researching this since I built the first one in 2003. Through MUCH study of photos and videos of the real model, and through trial and error, I feel I've come very close this time. I don't believe it is perfect, but to get any closer I would have to have hands on access to the real thing.
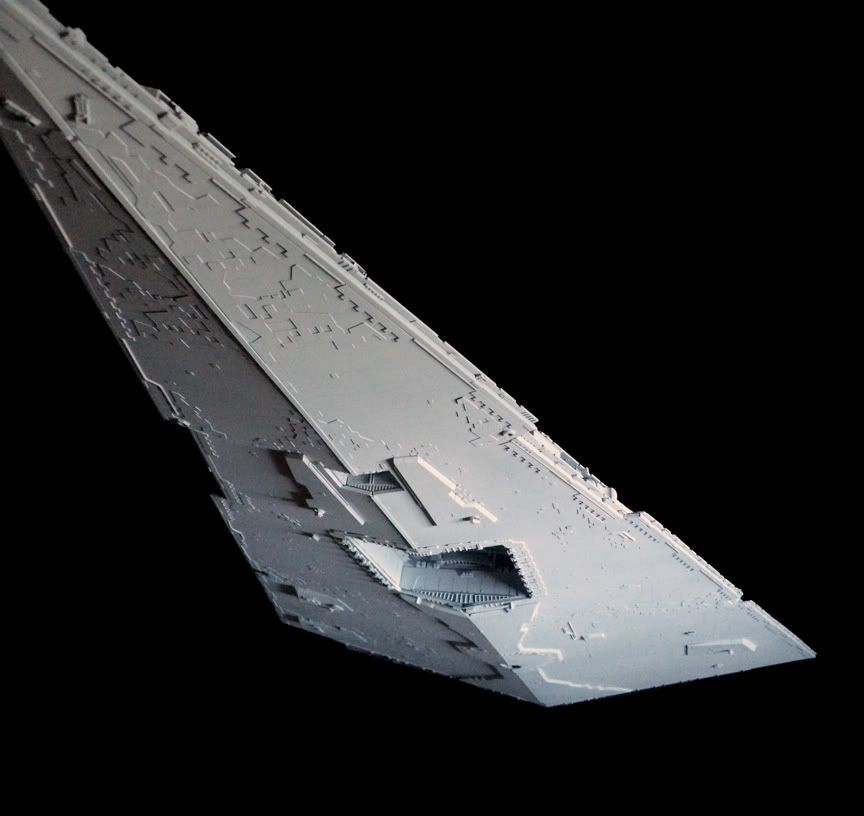
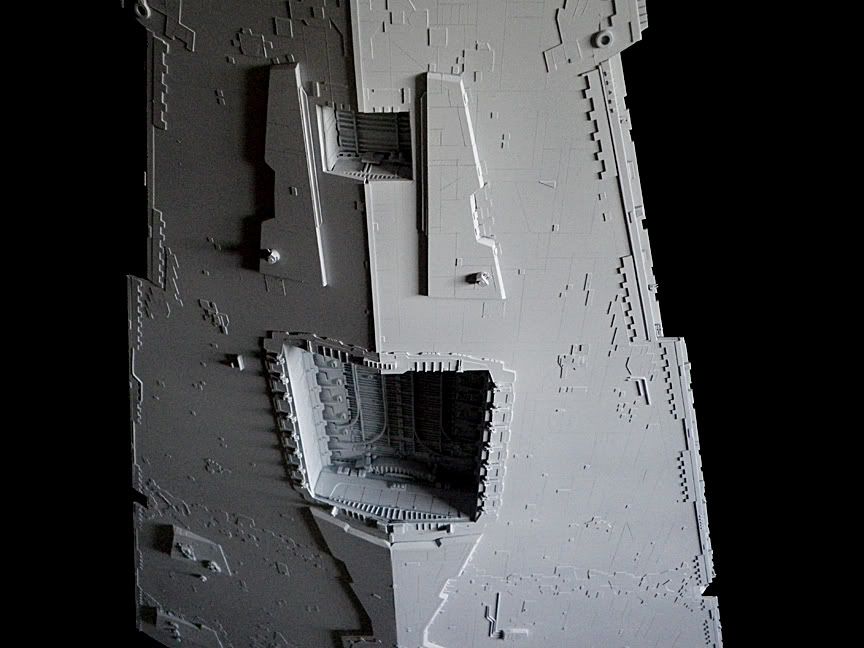
Anyway, I've made huge progress on the top hull. ALL the panel lines are now complete. I've started work on the edges... the U-channels, rails and details so fine they're not much bigger than grains of salt. Still more to do.
I don't have any new photos yet, but for now here is a shot I took along with the one of the front of the ship that I posted on page 6 of this thread. When I took this shot, I had not yet done the panel lines nor the edges on the top hull...
The reason that means a lot to me is because the proportions are more important to me than getting every last detail accurate. I've said this before, details on a star destroyer are like an impressionistic painting. They are different on every rendition of the ship that ILM made for the trilogy. Details on this ship have one purpose... to cast interesting shadows. I've always believed that it's the proportions that make or break it. Even though I want it to look as much like the original filming model as I can, having every last kit part is not important to me.
Also, being this is my third attempt at an SD, I've been researching this since I built the first one in 2003. Through MUCH study of photos and videos of the real model, and through trial and error, I feel I've come very close this time. I don't believe it is perfect, but to get any closer I would have to have hands on access to the real thing.
Anyway, I've made huge progress on the top hull. ALL the panel lines are now complete. I've started work on the edges... the U-channels, rails and details so fine they're not much bigger than grains of salt. Still more to do.
I don't have any new photos yet, but for now here is a shot I took along with the one of the front of the ship that I posted on page 6 of this thread. When I took this shot, I had not yet done the panel lines nor the edges on the top hull...
Randy13
Sr Member
To me, the most intimidating part of building an ISD would be getting the proportions right. I am not an expert model building but I know what I like and on something like this, if the proportions are off, then it doesn’t matter how much detail one would put into it because it will still look off. Looking at the pictures you have so far, your proportions do look spot on and I can’t imagine it being any closer to the real thing. I check this thread everyday especially while I’m at work because looking at this always puts a smile on my face. Such a great job.
ringa
Well-Known Member
Thanks Randy. I'm glad you're enjoying this.
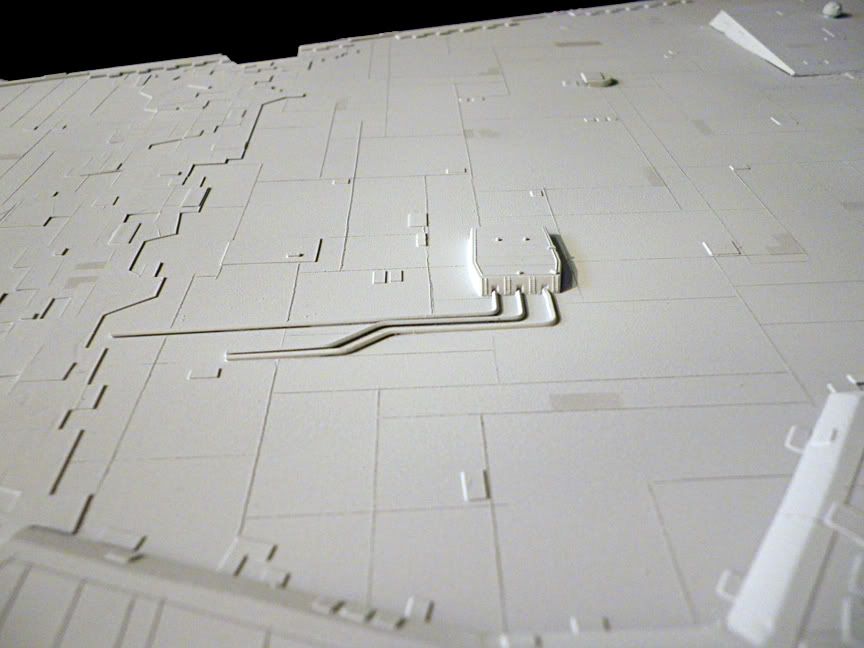
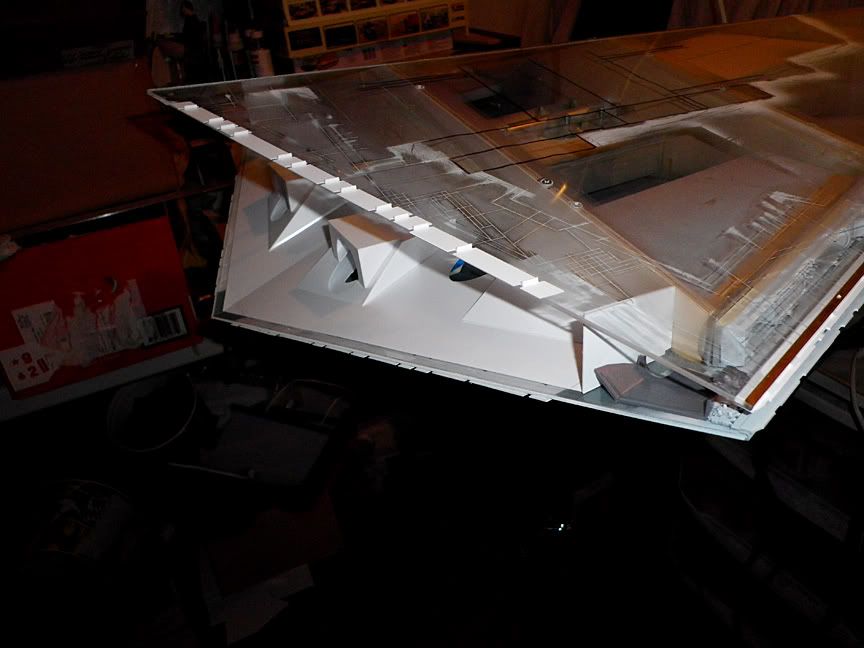
I've been detailing the rims on the top hull. Progress has slowed because I need to start working on the engine area before I can permanently attach the top hull. However, I can't start the engine area until I can find suitable engine shafts for the L'egg's Eggs. So, until I can discover what was used, or something similar, progress is slow for now.
So for now, here are some closeup photos of the bottom hull details...
ringa
Well-Known Member
It's about time I updated this thread.
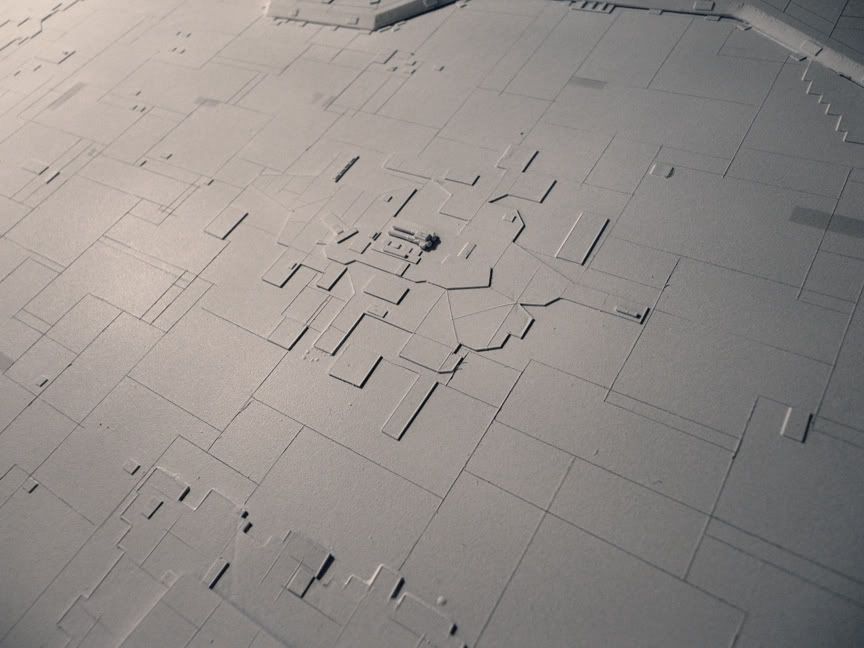
In my last progress post, I had finished the panel lines and moved on to detailing the top hull trench edges. I've since moved on to the engine area.
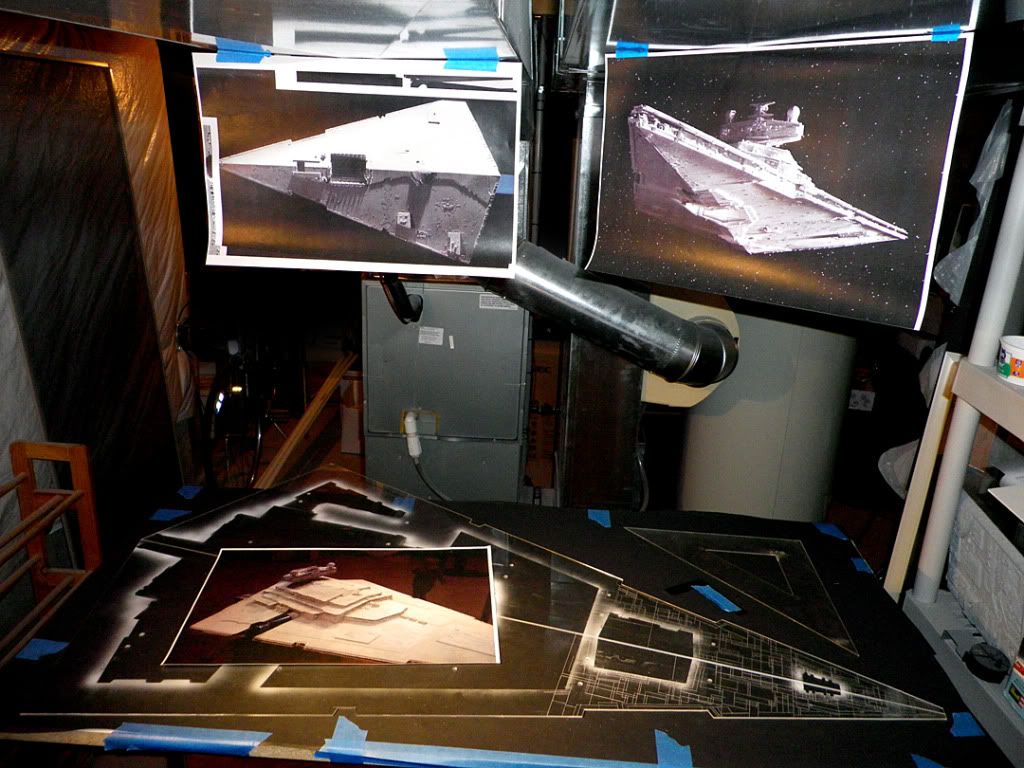
This first photo is a shot of my work area. It's small and confined, but it gets the job done. At the time this was taken I was just starting the process of scribing panel lines.
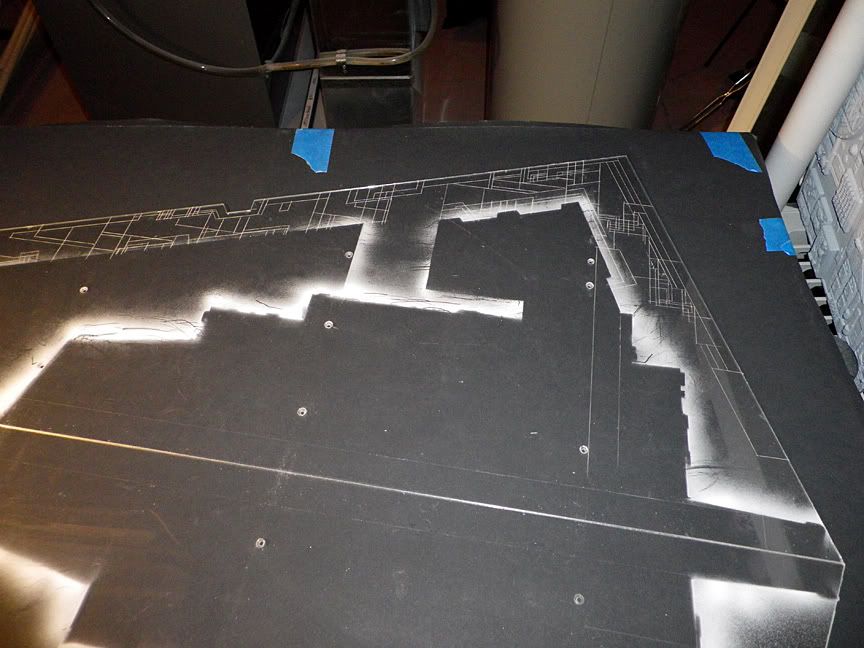
In this photo I had made progress down the starboard side. You can see how the misting of paint around the pieces really helps in the placement of lines...
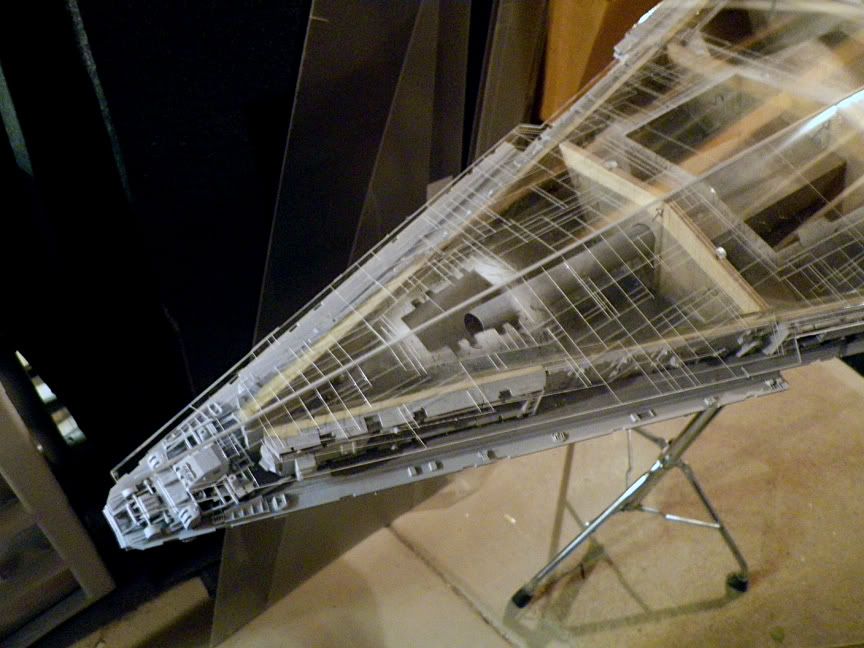
Here is another test fitting...
When I originally posted this next photo, I wrote that it wouldn't be long before the engine area was detailed. Well, it took a lot longer than I thought for me to get to this point.
FINALLY, I was able to start on the engine area! One of the things that held me up here was that I thought I needed the 3 main engine shafts before I could begin. I'm still without them, but construction goes forward.
I want to give a huge THANKS to Charles Adams for creating the patterns for the engine area. He and I have been consulting and collaborating on the dimensions of the original filming model for a long time. While I was working on the other areas of my model, he had painstakingly worked out the engine area patterns. This is a MUCH appreciated time saver for me. Here is a test fitting of the lower half so far...
 /IMGP0958.jpg[/IMG]
Here 's how the measuring cups fit...
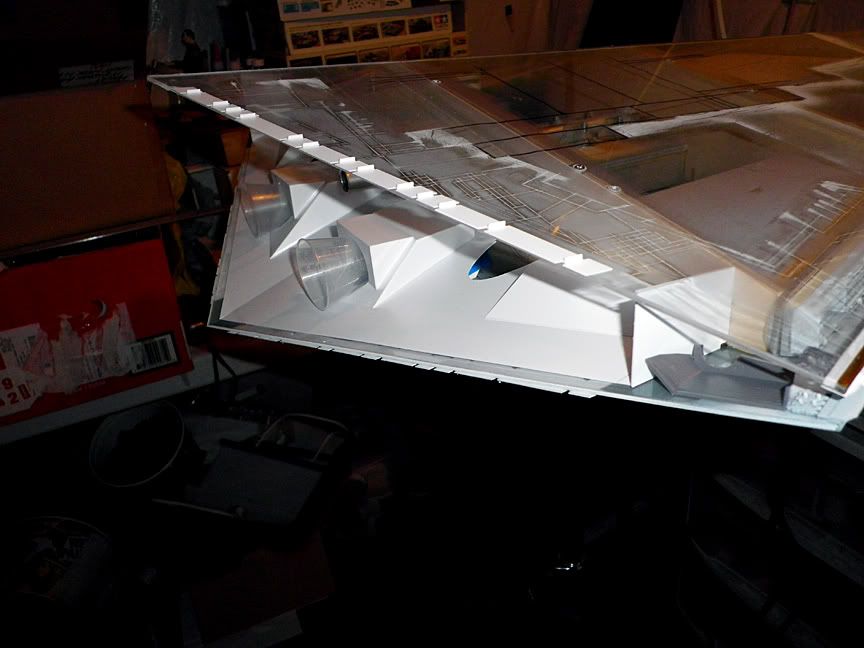
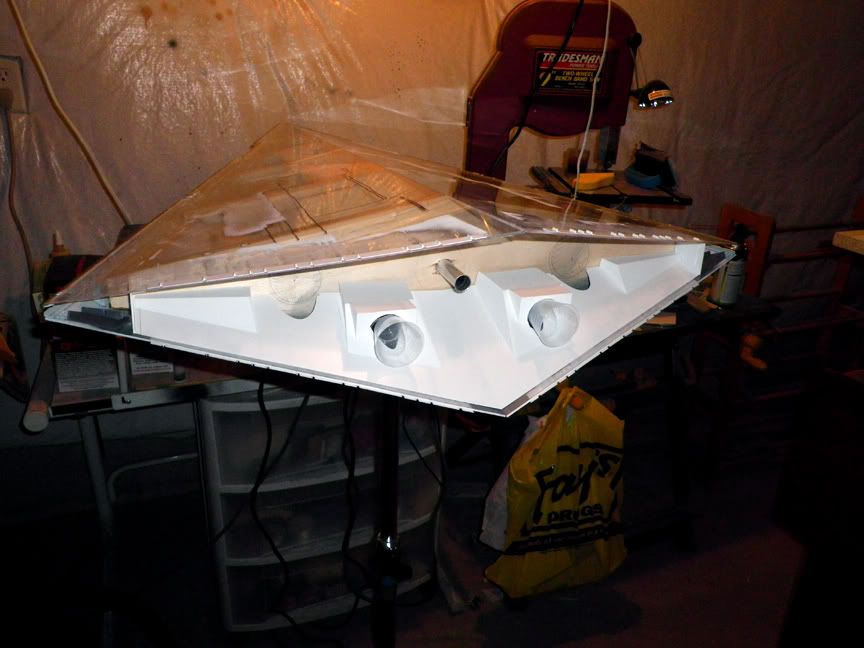
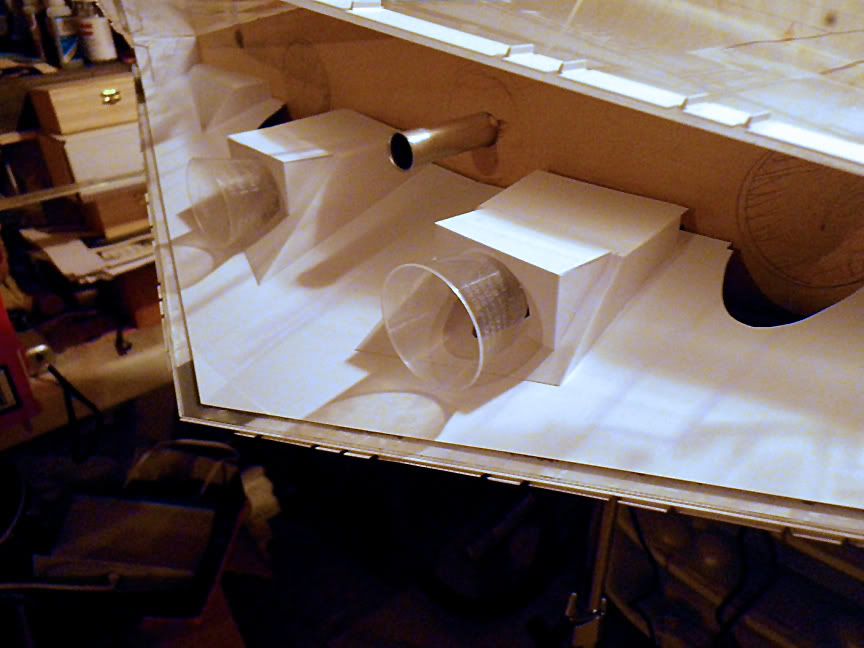
The bottom half has come this far, now I have to do the top half.
In my last progress post, I had finished the panel lines and moved on to detailing the top hull trench edges. I've since moved on to the engine area.
This first photo is a shot of my work area. It's small and confined, but it gets the job done. At the time this was taken I was just starting the process of scribing panel lines.
In this photo I had made progress down the starboard side. You can see how the misting of paint around the pieces really helps in the placement of lines...
Here is another test fitting...
When I originally posted this next photo, I wrote that it wouldn't be long before the engine area was detailed. Well, it took a lot longer than I thought for me to get to this point.
FINALLY, I was able to start on the engine area! One of the things that held me up here was that I thought I needed the 3 main engine shafts before I could begin. I'm still without them, but construction goes forward.
I want to give a huge THANKS to Charles Adams for creating the patterns for the engine area. He and I have been consulting and collaborating on the dimensions of the original filming model for a long time. While I was working on the other areas of my model, he had painstakingly worked out the engine area patterns. This is a MUCH appreciated time saver for me. Here is a test fitting of the lower half so far...
Here 's how the measuring cups fit...
The bottom half has come this far, now I have to do the top half.
Last edited:
-... . .- --..
Sr Member
Man, that's all kindsa cool.
And I love sneaking peeks at other guys' shops. I'm in the basement too. There are few things worse than working on some tiny greeblie cluster and the flipping end-of-cyle buzzer on the dryer goes off...
And I love sneaking peeks at other guys' shops. I'm in the basement too. There are few things worse than working on some tiny greeblie cluster and the flipping end-of-cyle buzzer on the dryer goes off...
ringa
Well-Known Member
Man, that's all kindsa cool.
And I love sneaking peeks at other guys' shops. I'm in the basement too. There are few things worse than working on some tiny greeblie cluster and the flipping end-of-cyle buzzer on the dryer goes off...
You've been to my house?:lol
Similar threads
- Replies
- 22
- Views
- 1,127
- Replies
- 10
- Views
- 1,206
- Replies
- 17
- Views
- 1,899