I'm actually starting to get a little momentum and I absolutely love working on this project. I just picked up some Bluetooth sound suppressing ear muffs and it's the best investment I've made in ages. I can grind away on stuff and listen to music at the same time.Good move and looking forward to your next update")
You are using an out of date browser. It may not display this or other websites correctly.
You should upgrade or use an alternative browser.
You should upgrade or use an alternative browser.
Rocketeer Cirrus X-3 Rocket Pack Build
- Thread starter QCWolf
- Start date
That's the plan! The engines and nacelles are wired for lights already and I have a really nice soundboard and speaker kit from Valor ready to install. I just need to figure out how to mount it inside.Dont forget lights & sounds in the end!!!
I had a day off this week and was able to get the harness frame attached. I used something called "elevator bolts" because they have a round flat back and allow the engines to slide inside the nacelles without impediment. I'd never heard of them but they were exactly what I needed. I also re-sprayed the entire pack with a couple coats of filler primer because I've nicked up the exterior pretty good lately. I'm also prepping the helmet for paint.


Attachments
Hurd Drafting L
Member
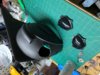
Looking good bud! Where oh where did you get those super badass lenses and lens rings?
gnolivos
Sr Member
Hi QCWOLF, been following your work, Im glad I found this thread. have you figured out what paints to use for the gloss black undercoat, as well as the top chrome and bronze coats? I like the work that el_rocketeer has done, and have wondered what he uses. I never got a reply from him on that one topic.
Thanks for sharing all your hard work!
Thanks for sharing all your hard work!
Hi QCWOLF, been following your work, Im glad I found this thread. have you figured out what paints to use for the gloss black undercoat, as well as the top chrome and bronze coats? I like the work that el_rocketeer has done, and have wondered what he uses. I never got a reply from him on that one topic.
Thanks for sharing all your hard work!
Thank you for your kind words and your interest. Your timing is actually very good with the paint question. This project has stalled over the holiday season but I'm ready to get back into the swing of things. I have a friend in the auto repair industry and he gave me the contact info of another guy who does the spray chrome thing. I'm going to consult with him to get some ideas and I'll be sure to post my findings. On a side note, asavage had his pack chromed and he said that it was a bit too shiny.
I love screen accuracy as much as the next person, but when I make a thing, I like to make it my own in some way. I might end up going full chrome. Who knows?
Hurd Drafting L
Member
Hey Fellas, El-Rocketeer here! The paint I use is a very inexpensive gloss black as a base coat(rattle can from home depot) and the top coat is Spaz Stix ultimate mirror chrome airbrush paint. I use 0000 steel wool to give the gloss black the "brushed" treatment. Then apply that top coat in very light coats!
Hey Fellas, El-Rocketeer here! The paint I use is a very inexpensive gloss black as a base coat(rattle can from home depot) and the top coat is Spaz Stix ultimate mirror chrome airbrush paint. I use 0000 steel wool to give the gloss black the "brushed" treatment. Then apply that top coat in very light coats!
Awesome info! Thanks for the tip!
gnolivos
Sr Member
Thanks Hurd for the info. I dont have a proper compressor and airbrush setup, so will likely find a decent can-based paint.
QCWolf: I personally wouldn't go with chrome. Many have stated that an aluminun finish is more screen accurate and possibly more pleasing to the eye imho as well.
I have heard good things about this paint:

QCWolf: I personally wouldn't go with chrome. Many have stated that an aluminun finish is more screen accurate and possibly more pleasing to the eye imho as well.
I have heard good things about this paint:
Silver Metallic Spray Paint, Sterling Champion Sprayon 8.5oz Can
Brilliant Metallic Silver Finish. For use on new surfaces and to restore worn or dull surfaces For use on picture frames, furniture, crafts, ornamental pieces, and more Use on wood, metal and plaster. Ideal for baskets, paper mache, picture frames, lamps, light fixtures, crafts, ornamental...
www.noahsupply.com
QCWolf: I personally wouldn't go with chrome. Many have stated that an aluminun finish is more screen accurate and possibly more pleasing to the eye imho as well.
I've been thinking about this a lot lately and I agree with you. Shiny chrome isn't the look I want. I'm going to go for a more aluminum look.
Thanks for asking! The rods themselves are actually just 1/4 inch aluminum rods from the hardware store. I used a die set to make the threads on the ends. As for the "Rod Ends", I think I got them from Grainger. It's been so long ago now that I don't remember, but if you do a search for "Rod Ends", you'll find a million sources. When it comes to their size, I don't exactly remember. I bought two different sizes and went with the one I liked better. I'm sure someone here on the RPF knows the screen accurate sizing, but I just went with what I thought looked right.Can You provide info on those control rods? Source? Thanks!
That's a great question! I bought all the supplies for this project so long ago I'll need to double check before I answer. I just looked at a bunch of reference photos and tried to match the original prop while still making things easy on myself. I'll take a look at what I have and get back to you.Thank you! Found the ball rod ends in 1/4-28 and also the rods. What did you do for those thick washers on the sides of the rod end?
Have you made any more progress, I'm really enjoying your thread as i am getting ramped up to start my pack.
I sent the pack out for painting last week. Sometimes I just need to get out of my own way and let a professional handle things. I could easily have painted the thing but a buddy of mine paints cars professionally so he's going to take a crack at it. I'll post pics when I get it back.
Similar threads
- Replies
- 26
- Views
- 2,294
- Replies
- 14
- Views
- 2,875