Revell AT-AT upgrades WIP

Hi Jun, glad to see you here! Your build has been a big inspiration and I've stolen liberally from your work. ;) Every time I almost decide to skip some work I remind myself that you did it. ;) Can't wait to see an update on yours. If you're interested I can send you casts of my chin guns, just PM me.

Good to hear my work influences a fellow modeller. But it work both ways. Seeing your work pulls me back to finish mine. Your offer is tempting. But I will try it first on my own.
At the moment the only lingering problem I can see is the "flexible" neck. Let us know if you have any idea on this. Keep up the good work.
 
Ooh yeah! More AT-AT goodness!!! Subscribed, the Baloo head is looking fine! The main thing that bugs me with the Revell (apart from everything) is the hip joints are the wrong shape and don't fit closely enough to the chassis. The final result is that it looks like a monster truck with jacked up suspension. Great work!!!
 
Thanks! What exactly bugs you about the hips? They look ok to me but I've been pretty zoomed in on the greebles and perhaps not looking at the overall proportions. They look like they are about the right distance from the main body, with the smaller circle end about 2/3 covered by the side armor panel with then vents.

Jun - No solution from me on the neck, mine will be fixed. I suppose casting in some polyurethane rubber might work.
 
I hope Jun doesn't mind me posting this:

ATATHip.jpg

To me the Revell hips appear to be too long and thin. I just think it throws the whole look off. Might be my OCD though...
 
I guess I do remember seeing that now that you posted the pic. Uh oh, I don't want to rebuild those! I'll take a closer look and consider it. Thanks for the pic!
 
Time for an update. In real life I'm 95% done with construction. I need to finish a couple fiddly things, decide whether or not to rebuild the hips, and then shoot primer. But in the mean time, here are pics of some work that's been done for a while.

More pics of the body. I re-scribed everything, fixed up the door on the left, removed and corrected the door on the other side, and added lots of little details. The rectangular vent thingies littering the sides are also from the Tamiya Flak. It only comes with 4 so I made a mold and cast tons of them, they'll be all over every model I build from here on out. ;)

Revell_AT-AT_side1.JPG Revell_AT-AT_side2.JPG Revell_AT-AT_side3.JPG Revell_AT-AT_sidevents.JPG

The Flakvierling part on top of the body was scratchbuilt before I got my hands on the Tamiya kit, I think it's a pretty good match and the scale came out surprisingly close. The large vents on the top/front are cut from vent parts from an old tank kit. Rather than trying to cut perfect holes for them in the kit plastic I cut out the whole section and replaced with styrene sheet for better precision and appropriate depth. The details on the rear cutout probably took 2 weeks, but I'm really pleased with how it turned out, very accurate to the original model.

Revell_AT-AT_top1.JPG Revell_AT-AT_top2.JPG Revell_AT-AT_top3.JPG Revell_AT-AT_vents.JPG

Finally here's the neck I came up with. I spent probably 4 days on the little round details alone, they're so tiny! This is a prescription bottle wrapped in fishing line with styrene for the framework. I attached a bit of PVC to the end which will connect to a hole cut in the body. Rather than trying to articulate it I will just attach it at a slight angle to give the head position a bit of drama.

Revell_AT-AT_neck.JPG
 
Excellent work, Pedro. Looking good. Have you got to the legs yet? What I was thinking of using for my neck is a mini slinky toy with fabric glued inside. I haven't got there yet, so I don't know if it'll work.
 
Thanks! I do have the legs about done, will post pictures soon.

I tried the slinky route, Danikin72 here on the RPF did a diorama with 2 AT-AT's using slinkies. I bought the same slinkies he used and while they're the correct size I felt that the ribs were too narrow and didn't stand out enough. The slinky now belongs to my baby. ;) But a plastic slinky might work if you can find the right size. The fishing line was surprisingly easy to do, but obviously not flexible.
 
Last edited:
I see your point about the narrow gaps. Hmmm. At least I bought mine from the dollar store, so it won't be a total loss. For your 'fishing line' trick, could you wrap the line around a flexible/rigid foam with a pill container within it, glue it as you go and then after it's dry, pull out the container?
 
Umm...maybe? Whatever you glue the line with would have to be flexible enough too. I used CA so that wouldn't work. But maybe that rubberized CA or epoxy. I'd be more inclined to build it hard and make a cast in flexible polyurethane that's tinted the right color.
 
I also read somewhere that a pre-heater hosing would work. You just need one with the right diameter.

Update: I measured 1.25"
 
Last edited:
A quick google search reveals that you can get that hose in 1.25" i.d., which is probably too large. 1" might work if you can find it.
 
1" then. I took a wild guess on the diameter. Then you'll just have to match the groove spacing. I found some 1" hoses/piping at automotive sites. I wouldn't think it would matter if it's made of aluminum.
 
In building a new window for the head it ocurred to me to use a clear window instead, then I started thinking about the inside and remembered that the Revell Tie Interceptor came with a pretty nice pilot figure in about 1/72 scale....so I made a quick mold, cast a couple, and came up with this. The paintjob is a bit sloppy but they are rather tiny, and you don't see much through the slit of a window. No, I won't be adding lights. ;)

Revell_AT-AT_cockpit1.JPG Revell_AT-AT_cockpit2.JPG Revell_AT-AT_cockpit3.JPG

And here are the legs. Most of the detailing is just styrene sheet, the only real bit of cleverness was using some photoetched screws set into drilled holes. These are intended for Gundam models but work out nicely here. I just built the 1 foot and cast the other 3, I'm lazy that way. If I decide that the pose needs any of the feet lifted off the ground I'll build the bottom detail, not sure about that yet. Also the ankle mounts and ankle "bumps" are resin, more laziness.

Revell_AT-AT_leg1.JPG Revell_AT-AT_leg2.JPG Revell_AT-AT_leg3.JPG Revell_AT-AT_leg4.JPG
IMG_2641.JPG IMG_2642.JPG IMG_2643.JPG

This just about does it for parts, though I may find something else to do after the first primer coats. Time for painting soon!
 
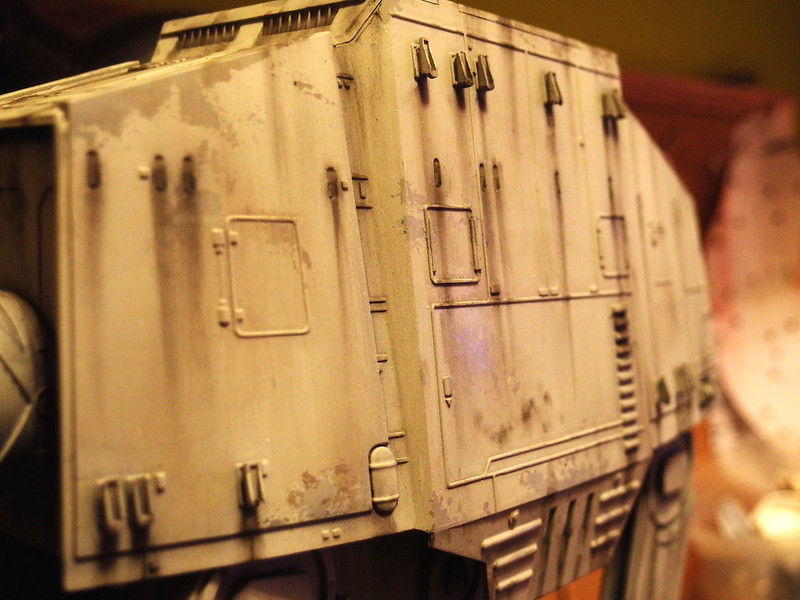
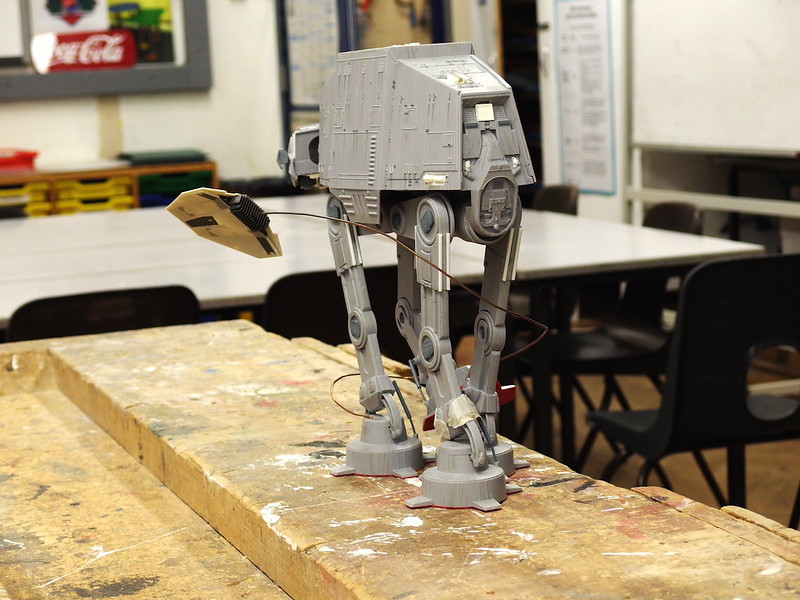
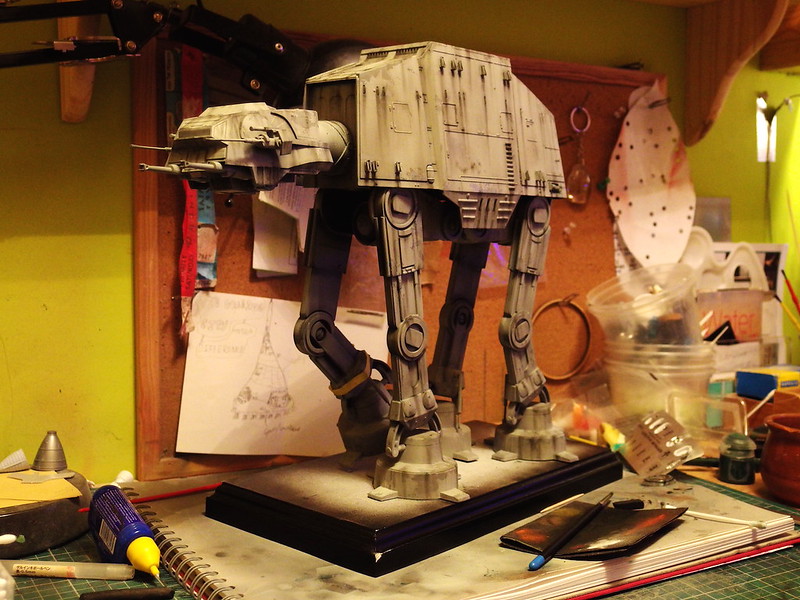
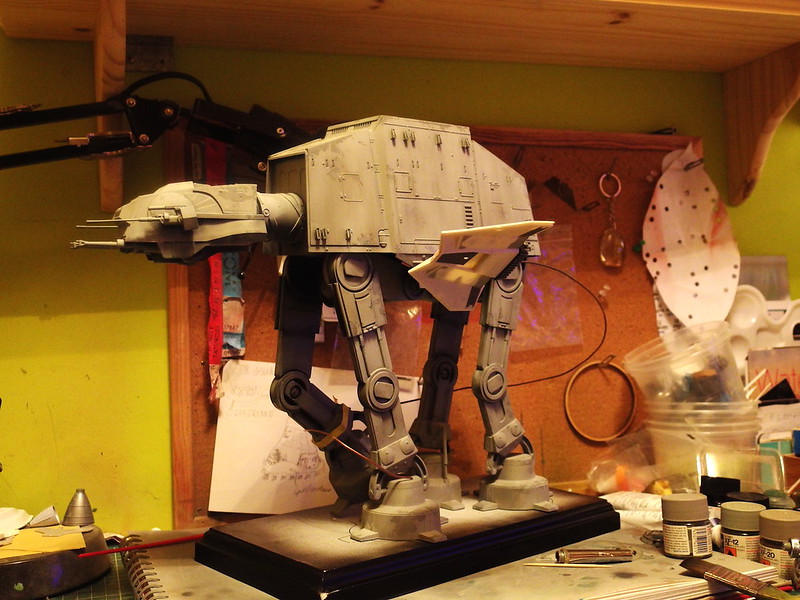
Your work is incredible!! I have just been working on this same kit for a client, I almost feel ashamed in comparison to yours. I used the 1/35 Flak 38 which looks fairly okay but the 1/48 Flak 38 was a great idea and getting the barrels in metal? Superb! If I ever get a chance to pick another one of these lovely kits up for myself your thread will be first point of reference :love

15968718411_b61154b651_c.jpg


15351075593_123e6a4148_c.jpg


15944934256_e5e4b9f6d8_c.jpg


15783397930_316ab02837_c.jpg


Thankfully the commissioner of the build is not interested so much in accuracy, but good paintmanship and a presentable display model.

Did you use the aftermarket resin parts from starship modeler?
 
Thanks Haystack! Your model actually looks amazing, even with the raised panel lines. Really nice paint job! I hope mine comes out that good, I'm much better at building than painting realistic stuff like this (too many Gundam models under my belt). I have that little Snowspeeder too, and am trying to decide how to incorporate it into the diorama. Crashed? Flying? We'll see. I'm also digging your Falcon build, one day I'll get out my 20+ year old kit and re-do it. One of these days...

I'm really happy with the metal barrels, glad I could find the right ones! You can't see in the pics that well but the detail is amazing, and I have no problem going idealized rather than accurate. Of course this was supposed to be a cheap build and I spent more on the barrels than the whole rest of the kit! No aftermarket AT-AT parts, everything else is scratchbuilt. I just prefer to build once and cast than try to replicate parts 4 or 8 times. I'm using this heat and mold plastic I got on Amazon which works surprisingly well to make simple molds and is re-usable and thus nearly free!
 
I forgot to post before, a few days ago I added some cast texture to the side armor plates on the body. I think one of the guys doing a studio scale AT-AT mentioned doing it and pointed out the texture on the studio model, which I had assumed was just an aging failing paint job in the pics on Modeler Magic. But I like the look of it, so I used some Mr. Surfacer 500 stippled on the sides using one of those stiff disposable brushes. I was nervous to start but it came out pretty nice I think.

Revell_AT-AT_texture1.JPG Revell_AT-AT_texture2.JPG
 
You call this an upgrade?! A complete 'overhaul' is a far better word to describe what you're accomplishing here :wacko

Chaim
 
Your work is incredible!! I have just been working on this same kit for a client, I almost feel ashamed in comparison to yours. I used the 1/35 Flak 38 which looks fairly okay but the 1/48 Flak 38 was a great idea and getting the barrels in metal? Superb! If I ever get a chance to pick another one of these lovely kits up for myself your thread will be first point of reference :love

https://farm8.staticflickr.com/7568/15968718411_b61154b651_c.jpg

https://farm8.staticflickr.com/7535/15351075593_123e6a4148_c.jpg

https://farm9.staticflickr.com/8629/15944934256_e5e4b9f6d8_c.jpg

https://farm9.staticflickr.com/8669/15783397930_316ab02837_c.jpg

Thankfully the commissioner of the build is not interested so much in accuracy, but good paintmanship and a presentable display model.

Did you use the aftermarket resin parts from starship modeler?

Hey Haystack Hair,

Which snowspeeder are you using in your diorama? Was it from a separate kit?
 
Back
Top