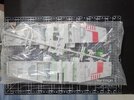
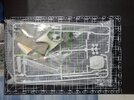
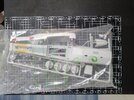
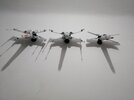
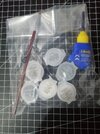
Revell 1/29 X-Wing

Rulebreaker

Member
Hello,

i was comparing prices, and my comic store has/had two of them in stock, i bought the first and later i bought the other one too.
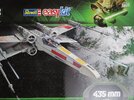
IMG_20240802_143939.jpg
i payied 90 each, amazon has it for 120, some are even selling them for +150 each
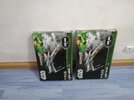
IMG_20240805_171217.jpg

when unboxing, it looked a little like a used kit, but i think that the "workers" who painted them, giving not to much attention to the parts...
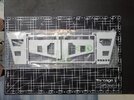
IMG_20240802_143629.jpgIMG_20240802_143653.jpgIMG_20240802_143727.jpgIMG_20240802_143750.jpgIMG_20240802_143806.jpgIMG_20240802_143825.jpgIMG_20240802_143837.jpg
its a simple kit, with small effort it can be turned into something good

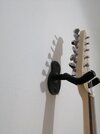
my biggest Problem currently, were should i put it, so i thoughed maybe it fits to my guitar wall mount
IMG_20240805_171028.jpg

yes it does
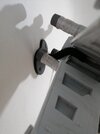
IMG_20240805_171039.jpgIMG_20240805_171045.jpg
its a tight fit, but the soft sponge is holding it softly and strong
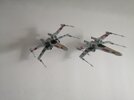
IMG_20240806_173211.jpg
pew pew

One i will keep Red 5 the other one gets a Blue Leader painting and washing
it looks a little like those old kenner/hasbro things with better proportions here and there, but with a good dirty washing it can "shine"

to do list
* simple engine lightning, without wiring drama
* new paintjob/washing
* torpedo "tube" looks bad
* a better Pilot figure, some love to the cockpit
* replaceing the "guns", some are bend, and getting bend saging down from gravity
 
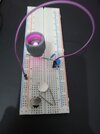
i was already experimenting with the engine lights, have not found a perfect satisfiyng solution
Pink led, manufacturer says 3V, i thought if i take one LR44 it will light double the time because it only has 1,5V
but its doin nothing, with one LR44, so i have to take two annoying coin cells

other coin cells
* 2020 to thick doesnt fit into the engine
* 1616 does fit, but has only half the "mAh"(capacity) of the others
* cr123a, huge but fits from the diameter, but would need removal of at least on peg and hole

My Key idea is/was Version 1
wiggle the engine half open and insert the unit, i would be satisfied if it lights 3 days, this is the usual exhibitition(comic con here) time
* one Led
* one resistor
* one battery(but two batteries are drama, and the batterie needs to be easy to remove)
* one switch
* one pcb, where everything is soldered on
* one spring (holging the unit in place)
drop in, without any drama,
so u basicly turn on the light, by pressing the whole unit in, on the led, then it lights
the current build has a 4k7 Ressistor this limits the current to around 1mA, and this should light the led for around 130 hours
i started on Saturday 10 August at 19:15 and its still lighting
IMG_20240810_191830.jpg
Version two has a 1616 Socket for the batteries, cheap and easy to remove

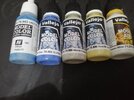
i ordered and got colors, but i'm still waiting for the surface primers
IMG_20240816_223123.jpg
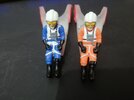
i tried painting the left guy and i painted the helmet white on both, some decals would be great
IMG_20240816_222853.jpg
its a little blue, maybe a black wash will make it darker
i think my pencil is to big to get those fine lines, the oem kit has
the coverage of the blue on orange was superior, so i thoughed i could also overpaint the red and yellow...
IMG_20240816_222901.jpgIMG_20240816_222946.jpg
it looks bad and after two thin coats with pencil u can still see the red and yellow, maybe i should sand it down and prime it
on reality it looks much worse

i ordered
VAL70962 17ml 70962 Flat Blue MC056 Matt (maybe mix it with some grey or black to get the "R1 blue" seen on Blue Leader
VAL70943 17ml 70943 Grey Blue MC061 Matt (maybe with some grey it can be used for Red 5 Cockpit frame)
VAL70806 17ml 70806 German Yellow MC012 Matt (looks very good/close to the "R1 yellow" seen on Blue Leader)
33013491906_0f36a750d9_h.jpg


VAL70986 17ml 70986 Deck Tan MC110 Matt (looked light grey/gray ish to me, but now i see that it is indeed tan)
VAL70950 17ml 70950 Black MC169 Matt
VAL71279 17ml 71279 Insignia White Matt (Base color)

VAL77720 32ml 77720 Gunmetal Gray
IMG_20240816_223014.jpgIMG_20240816_223029.jpg

and some putty, some areas here and there, and the "fighter number stripes" are all recessed
IMG_20240816_223208.jpg
 
A small update
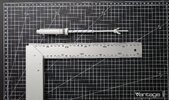
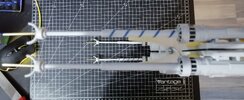
i tried to improve the "cannons/guns/barrels" since they are always falling down or snaging from gravity
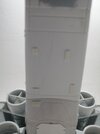
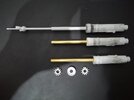
i cut the end of the "barrel" and tried to drill a 4,2mm hole as centric and perpendicular as possible, after i succeeded i also did it to the other barrels
1.jpg2.jpg

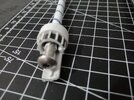
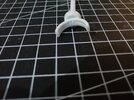
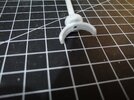
then i drilled as perpendicular as possible to the cooling/heat sinks and taped M5 threads into barrels and heat sinks
3.jpg4.jpg5.jpg

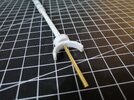
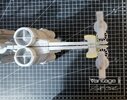
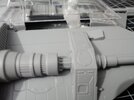
after it looked promising i also cut off the tip of the barrels, since it was cone-icaly and no hole, i cut them off and proseeded as with the barrel before, trying to drill a hole perpendicular and centric as possible and inserting a 2mm brass tube
6.jpg7.jpg8.jpg9.jpg

in the end it, its not perfect but done
10.jpg11.jpg
 
Most of the time people are building "the same" "Pyro version" but with a diffrent "flight number/call sign" eg red leader, red 2, 3, 4, 5, 6, Blue leader and so on

but what kind of X-Wing is that?
0.jpg


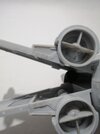
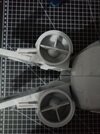
the heat sinks on the guns look like (toy) gears?
3.jpg


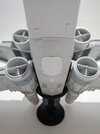
the droid stripe has diffrent details/greebls, specialy instead of the usual yamato parts, there are harrier jet nozzle halfes
2.jpg


and the fuselage/hull end plate has not a sherman tank as usual, but something diffrent, looks like a m48 or somthing like that
with diffrent greebles, and the wing inner engines are much more detailed
1.jpg
 
It’s a bigger, more detailed version of Luke’s xwing that was made for Return of the Jedi but I don’t think it got any screen time in the final movie. I’m not even sure it was ever shot. I don’t know why, It’s a shame. Some people here probably have more info
 
Supposedly that is the one Fine Molds based there X-Wing on while Bandai based theirs on the smaller ANH hero model (Red 5 I think)
 
It’s a bigger, more detailed version of Luke’s xwing that was made for Return of the Jedi but I don’t think it got any screen time in the final movie. I’m not even sure it was ever shot. I don’t know why, It’s a shame. Some people here probably have more info
It was originally a side project one of the ILMers was making, then someone decided it would be a good model for a planned shot where Luke would take off from Dagobah and pass by very close to camera, so they finished it up. Then they cut the scene before it was filmed since it was unnecessary and they already had such a huge workload.
 
whats better than two x-wings? three x-wings, found another x-wing, for only 60 bucks.
6.jpg7.jpg
this time, the parts were still in their sprues, i also think that its a little lighter than the other two :unsure:

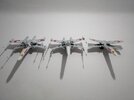
since now i have 3, i'm planing to have seven, i saw two more for 60 each, and i saw other users here to make this with the their bandais

red leader, r2, r3, r4, r5, r6
blue leader

so buying 3d printed parts it not an option, because i would need to multiply everything times seven...
so its more efficient to make the parts/improvements on my own - by the way its not rocket sience!

so i tried further improveing the guns, and i printed to see if it works, but i think cnc machined heat sinks would be better
brass.jpg
waiting to get the 4mm tubes, i hate waiting, 90% of our time is waiting...

i also added the cargo door, its alittle canted to the left, for some reason the revell glue doesn't glue well on its own kit :unsure:
cargo.jpg
so i had to super glue it in place

and i improved the upper fuselage, i dont like haveing three seperate parts, at first i tried glueing them together with super glue, but it didn't wont to hold, so i needed styrene supports on the inside, this made the aligning also much better.
8.jpg
 
To answer my own question, i have been messing around with the numbers, and my conclusion is, the best and sinful ratio is

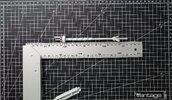
5:4:3 for the guns

i shortend the thick tube a little, so it should match the pyro good

in 1/29

"1" unit is around 12,75mm

5=63,75mm ->64mm
4=51mm
3=38,25mm ->38mm
5 4 3.jpg


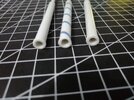
why was this needed? the brass tubes from amazon get delivered in 300mm length, but the middle one ist over 150mm long, so i needed a shorter tube, so i can get two parts out of one 300mm tube
 
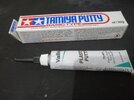
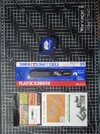
i have ordered the tamiya engraveing tool (camouflaged advertising) and its realy nice
to help with straighter lines i also bought some labeling machine tape
1.jpg
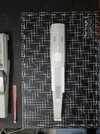
first i cleaned the surface from the x-wing
2.jpg
then i eyeballed the position of the tapes
3.jpg
then i used the tool, and it looks "most impressive"
4.jpg

i tried it before with a sharp new cutting knife, but its doesn't create such nice chips or even visible lines
5.jpg

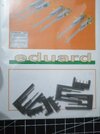
i also bought a set of resin printed M2 Brownings, 6 guns for 8 bucks
6.jpg
but they dont looks so good, compared to a vanila kit
7.jpg

the revell kit has them more or less already on the kit installed, but u barely see it
8.jpg
glued in place, its an "improvement"
9.jpg
 
i bought the revell snow speeder from 1/29, i also have the 1/52 version laying around
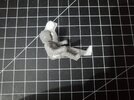
actually i wanted to have some pilots, here are they side by side
1.jpg


what can u see?
yes both 29 guys are not the same size! :rolleyes:

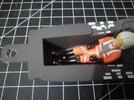
when u put the pilot into the x-wing cockpit, u can see, that the legs are to short to reach the pedals, at first i didn't think about it, it was wierd, but i ignored it
2.jpg

now i bought that 1/29 snow speeder just to realize, that the pilots are diffrent and smaller,
so i compared with the smaller 1/52 snow speeder.

1/52 snow speeder pilots are actually 1/80
1/29 snow speeder pilots are actually 1/45
1/29 x-wing pilot is 1/38 tie pilot too 1/38

"nah, no one will see it, just make the head a little bigger to compensate"...
probably the head has the correct scale, but they forgot the scale the body too

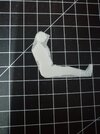
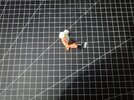
i printed a silhouette of a correct scaled 1/29 Pilot
3.jpg

the "1/29" snow speeder pilots are to short in both directions
4.jpg
the "1/29" x-wing pilot is also to short
5.jpg

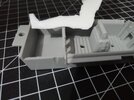
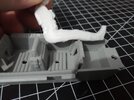
anyways, i tried some fitting into the snow speeder
7.jpg6.jpg
but they are to tall, the canopy can't close
8.jpg
so i have to adjust the position, when pointing the feet outward
9.jpg
the pilot can sit further forward
10.jpg
but needs to have the legs angled downward
11.jpg

the 1/29 snow speeder is the same kit, with the same parts and flaws of the 1/52 kit and the guns are also pointing outward
cockpit is bad, pilots are bad, fitting is bad, some flash, feels like a 1980 kit, the material is also a little gummy/soft
b1.jpgb2.jpgb3.jpg

it even has colors, 5 shades of grey/gray, but no orange for the pilots... but maybe u can mix orange somehow magicaly with only grey/gray colors :unsure:
for an 8 bucks kit it would have been okaish, but i paid 45 with shiping :(
 
Yeah, I have no clue what Revell is using to scale things or even what source reference materials they are using. They come up with some really bizarre scaling as well as head scratching inaccuracies (like the head of the AT-AT for example)
 
Back
Top