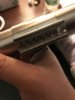
Honestly greg, my vintage strip has .25 of a millimeter before the “pool” under the bubble strip
My bubble strip actually sticks out side the clamp a little, I would have had to cut into the “pool” to make it fit flush, I just split the difference
You can’t see by eye but can fill by finger nail
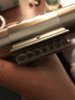
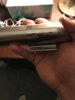
My current configuration does not cut into the pool, since that’s what the reference SEEMS to show. But I’m not sure. The Elstree is definitely set up like this.
...but might the hero strip have had the pool cut into?