Got some more work done. Ordered some dummy rounds, which will hopefully fit properly.
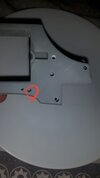
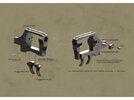
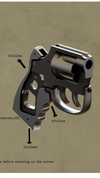
I also noticed in my reference photos that some of the hardware included in my kit doesn’t seem to match the real prop. Grub screws instead of slotted, cap screws instead of button-head. Might need to swap a few out.
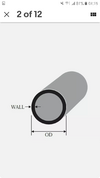
And the vertical tube covering the big screw attaching the clip housing to the barrel seems a bit too small in diameter, compared to the reference.
I also have a more accurate LED and switch setup on the way, as well as a fillister head slotted screw to replace the printed Weaver knob replica.
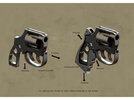
I also noticed in my reference photos that some of the hardware included in my kit doesn’t seem to match the real prop. Grub screws instead of slotted, cap screws instead of button-head. Might need to swap a few out.
And the vertical tube covering the big screw attaching the clip housing to the barrel seems a bit too small in diameter, compared to the reference.
I also have a more accurate LED and switch setup on the way, as well as a fillister head slotted screw to replace the printed Weaver knob replica.
")