Looper Blunderbuss - Pics of Painted Slushcast Kit on pg. 18

Re: "Looper" Blunderbuss Shotgun - WIP pics begin on Page 3

UGGGH-date:

101_0223_zps056c3773.jpg

Lines etched. I do NOT wanna do this again.

101_0222_zps542c7fd3.jpg

For the most part, I got them down smooth...but I still have some filling to do to get it perfect. I'll put down a layer of Spot Putty and when my new shipment of Apoxie Sculpt comes in, I'll sculpt in my more egregious errors.

Never again. This was SUCH a PITA (thanks for the term, Volpin!)

-Jonaas
 
Re: "Looper" Blunderbuss Shotgun - WIP pics begin on Page 3

That's looking amazing. Can't wait to see the movie.
 
Re: "Looper" Blunderbuss Shotgun - WIP pics begin on Page 3

This is looking great.
I like apoxie sculpt, great stuff.
 
Re: "Looper" Blunderbuss Shotgun - WIP pics begin on Page 3

That's looking amazing. Can't wait to see the movie.

Thanks for the kind words, guys!

The funniest thing with this build was taking it on made me break a rule I had for myself: Don't replicate props from movies you haven't seen/movies you don't like. But because of Looper's high pedigree (Rian Johnson, Shane Carruth, JGL, Willis) I said eff it. But of course, there's no way in HELL I would be able to bring the blunderbuss to opening night.

So while I was filling in the bevels last night, I stupidly dropped the front section of the front endcap onto the kitchen floor :cry The damage wasn't TOO bad, just a few cracks to fill...but it definitely set me back a few hours. I'll be spending the day smoothing out all that Spot Putty. Pics to follow.

-Jonaas
 
Re: "Looper" Blunderbuss Shotgun - WIP pics begin on Page 3

Haha. Yeeeeah. I can imagine that wouldn't go well. It'll still be an incredible display piece.

Of course, I can't WAIT until this puppy is hanging over my TV...but I still wanna build it with enough heft that I can bang it around a bit. My son was born two weeks ago, so I just KNOW that if he gets a hold of it when he's older, it better be able to stand up to abuse :lol

Time for Monday Night Updates:

101_0242.jpg

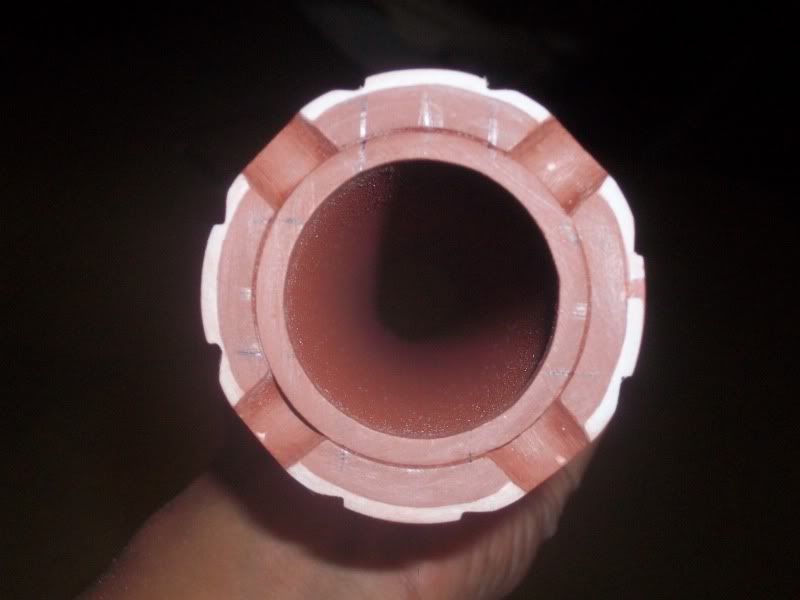
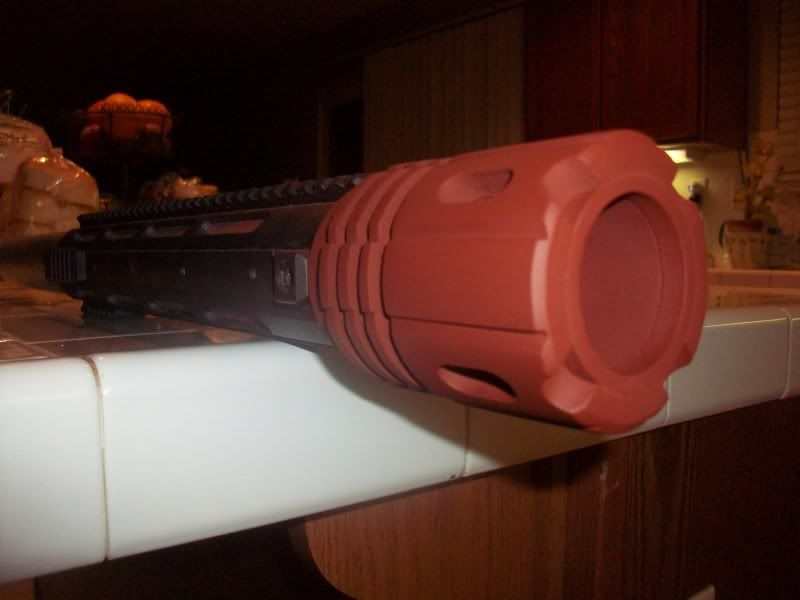
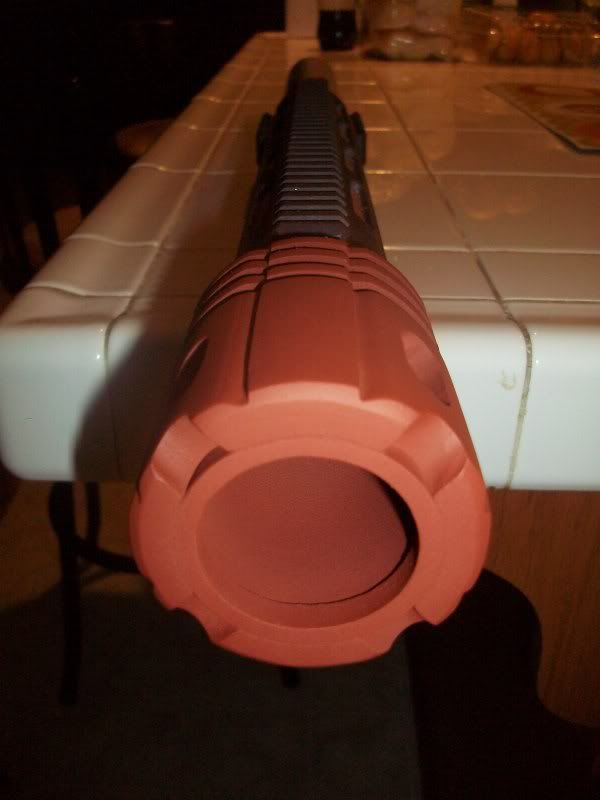
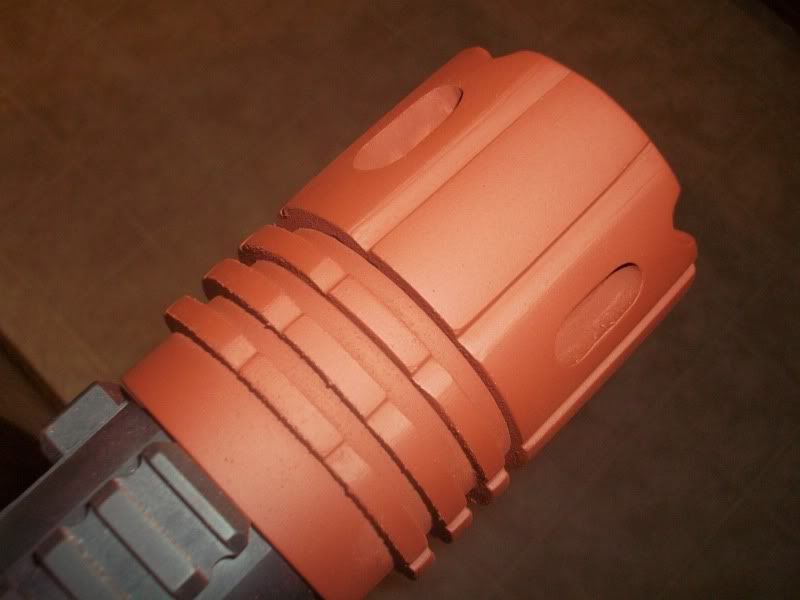
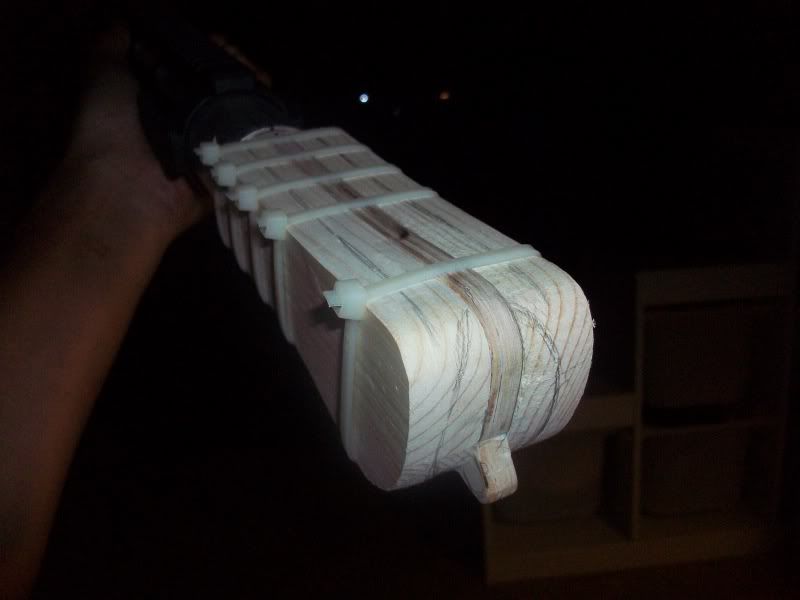
The front endcap is 95% done. All the cuts were made and are ALMOST exact (some alignment issues with two of the bevels, but nothing that you can really notice).

101_0237.jpg

Right now, I'm still in the process of priming/sanding/filling repeat until every edge on this puppy is as sharp as I can get it. Still, I think I'll be able to call this section done by tomorrow night.

101_0240.jpg

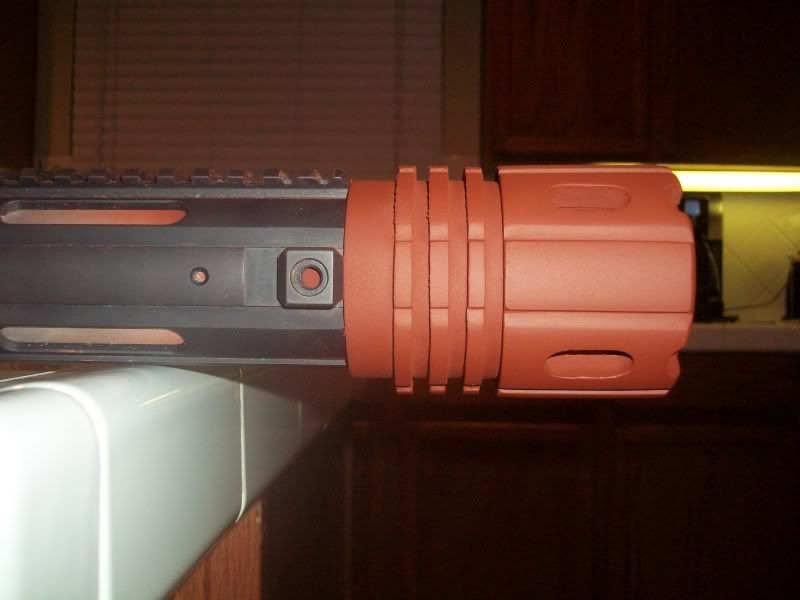
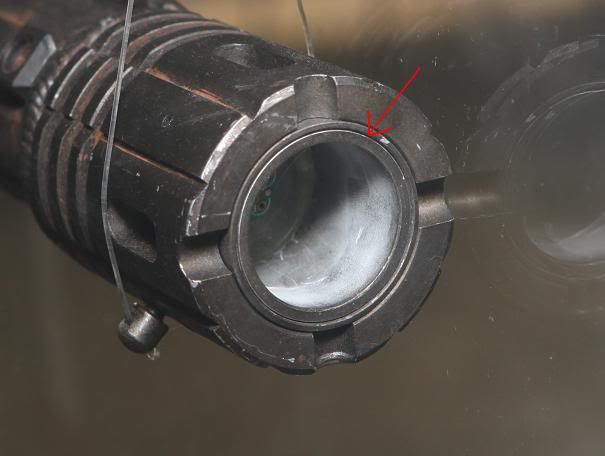
I've yet to add that groove I was talking about in the middle barrel, but I wanna make sure I'll be able to to it really well with minimal Spot Putty clean-up. Anyone got any tips on how to carve a uniform curved line?

101_0248.jpg

After the edge clean-up, all I have left to finish on the front endcap is the weld line. Now, I know I've hemmed and hawed at having to sculpt the weld line and I've spent a considerable amount of time testing out a bead of caulk as as substitute...but the more I look at the caulk weld line, the more unhappy I am with it. A fresh batch of Apoxie Sculpt came in this morning and I'm currently sculpting out a test weld line. I think I came up with a technique that cuts down the sculpting time immensely, so if all works out, that's how I'll be spending Tuesday's working time. Just in case, I have the final caulk weld lines piped out and curing as we speak.

Also, I've just put up an Interest Thread in the Junkyard. It may seem premature, if there's interest in a kit/cast of the blunderbuss, it will affect how I put the rest of it together. I don't want to have to tear the finished piece apart with a hacksaw if X amount of people want parts for their own builds, y'know?

Thanks for reading!

-Jonaas
 
Last edited:
Re: "Looper" Blunderbuss Shotgun - WIP pics begin on Page 3

What if you used a pipe cutter to make that round scribed line? Obviously don't cut all the way through but it will give a nice straight even line. Or you can just last down tape and go by hand which its a PITA.
 
Re: "Looper" Blunderbuss Shotgun - WIP pics begin on Page 3

You could cut a couple disks out of thin styrene and glue them on the end to cheat that look...
 
Re: "Looper" Blunderbuss Shotgun - WIP pics begin on Page 3

I wouldn't sweat that detail. It's a great build.
 
Re: "Looper" Blunderbuss Shotgun - WIP pics begin on Page 3

I wouldn't sweat that detail. It's a great build.

Totally agreed, you're doing a great job as is.
...but if it really bothers you enough you'll find a solution. hehe.
 
Re: "Looper" Blunderbuss Shotgun - WIP pics begin on Page 3

I wouldn't sweat that detail. It's a great build.

Yeah, I think you guys are right. If anything, I'll save that bit for the very end if it's still bugging me.

So the front endcap is nice and smooth and all I have to do is sculpt in the weld line. Today was family time for me, the wife and our son, so I haven't done much work on it yet. I'll wait until they're off to bed before working on the gun again.

Of course, family time notwithstanding, I was still able to pick up some materials for the remaining sections of the build :love Last night, I drew up some rough blueprints for the pump/slide, the rear endcap, the grip and the trigger/triggerguard. Common sense would dictate that I make the rear endcap next, as it would be fairly simple and I already have all the materials I need to finish it...but I need to step away from the PVC for a while.

That being said, I picked up a couple sheets of thin plywood (which I will be laminating together to form the grip frame) and a 3/8" thick sheet of basswood (which, along with some Apoxie Sculpt will become the pump/slide). The grip frame will be next...I just want to cut down the aluminum tubing already so I can visualize the final blunderbuss better. Updates soon, folks!

-Jonaas
 
Re: "Looper" Blunderbuss Shotgun - WIP pics begin on Page 3

Time for updates!

101_0261.jpg

Seeing as one night I was on Daddy Duty so my wife could catch up on her sleep, I couldn't spend time in my workshop and instead drew up some rough blueprints of the remaining pieces. I eyeballed the proportions and sizes based on source photos. The pump/slide still needs a bit of work, but I imagine I won't be able to correct the size until I get it started and can compare the proportions three-dimensionally. The grip/grip frame drawing looked pretty spot-on to me, so it became my next sub-project.

101_0307.jpg

Though I originally imagined I'd use aluminum for the grip frame, I decided to save myself some grief and use wood instead. I used laminated sheets of thin plywood to form the "spine" of the frame.

101_0308.jpg

At first I wondered how I would mount the grip frame to the blunderbuss securely, but then it came to me: I would sandwich the frame spine with two shaped pieces of pine and wood glue everything in place to form a block...

101_0309.jpg

...then I'd square off the edges nice and even...

101_0312.jpg

...and FINALLY, round off the block to the inner diameter of the main body's aluminum tubing making what I've been calling a "grip plug." The grip plug will be inserted into the aluminum tubing and secured in place with screws. On the visible portion of the grip plug, I'll mount the rear endcap. If all works out, everything will slide into place with no visible gaps (to necessitate future molding or other upgrades).

101_0317.jpg

So that's it for now...tomorrow's a busy day, but if I have time, I'll further refine the grip plug and get started on the carved wood grips. Also, I'll stop by Lowe's to see if they have some thin aluminum bar that I can hammer into shape to form the trigger guard.

Thanks for following!

-Jack's Daddy
 
Last edited:
Re: "Looper" Blunderbuss Shotgun - WIP pics begin on Page 3

Just a quick pic update before I head to the theater to watch the the midnight showing of "Looper."

100_0324.jpg

The grip plug has been sanded down to the correct size and shape. It's currently friction fit with almost zero wobble to it, but I still want to give it a skin of Apoxie Sculpt to ensure there is absolutely no gap...and when all is said and done, it will be mounted to the aluminum tubing with 2 or 4 small bolts.

100_0322.jpg

Here's a full body shot of the gun so far. This will be the final length of the finished gun. It measures just under 2 feet long. The current weight of the piece is 2 lbs 5 oz, so I imagine that the resin casts I'm offering shouldn't weight more than a pound since they're going to be slush cast.

If the movie turns out as awesome as I'm expecting it is (according to some friends I have in NZ who've already seen the flick) I imagine I'll come home at 2AM rarin' to put some more work in on the gun. The carved grips are next and possible the trigger guard.

Thanks for reading!

-Jonaas
 
Re: Looper Blunderbuss Shotgun - WIP pics begin on Page 3

so, was the movie any good? hehe. I want to see it....when I get a chance.
 
Re: Looper Blunderbuss Shotgun - WIP pics begin on Page 3

Haha, no 2am session.
No, the movie looks kind of interesting.
I'm really impressed with the makeup they did on Joseph Gordon-Levitt.
 
Re: Looper Blunderbuss Shotgun - WIP pics begin on Page 3

maybe the movie sucked so much that he feels no need to continue with the build :lol

No effing way! I got out of the flick around 230 AM and then spent an hour outside my house with my buddy talking about how amazing the flick was. Seriously, it's almost a perfect film, and if you have some time this weekend, check it out.

Also, the blunderbuss was featured prominently in the flick, so I was able to glean more details to put into MY blunderbuss. These details include the proper position of the slide and the break-action feature. Hopefully, all that will come in time. For now, I'm focused on finishing the gun's grip.

100_0325.jpg

I cut out two identical profiles of the grip frame in 1/2" pine. After clamping these profiles onto the grip frame, I sanded all three edges smooth and even.

100_0326.jpg

The zip ties were used to hold the three sections together while I marked off where I plan to cut the grips. Once I'm back in my workshop, I'll snip off the zip ties and affix the grips to the grip frame with a temporary adhesive. After that, I'll use my razor, Dremel, and hand sander to carve the grips to their proper shape and thickness.

The wife knows how giddy I am over the flick and she just fed Jack and put him back to bed. That means I have at least 3 hours to work on the blunderbuss before Daddy Duty resumes. As soon as this post is up, I'm headed to my workshop.

-Jonaas
 
Last edited:
Re: Looper Blunderbuss Shotgun - WIP pics begin on Page 3

Excellent work so far! :thumbsup
I'm looking forward to seeing how this turns out and also what it looks like on the big screen :)
 
Back
Top