Re: "Looper" Blunderbuss Shotgun WIP
Time for updates!
After I got out of work this morning, I stopped by Lowe's to pick up two 1 1/2" PVC couplings to make my front and rear endcaps out of. The plan is to use the coupling as a base to attach all the little details onto. Inset details will be carved in with my Dremel. All unnecessary gaps will be filled with Apoxie Sculpt. On the original prop, the front and rear endcaps appear to be "welded" to the main body. I'll be sculpting the telltale weld lines with Apoxie Sculpt as well. The whole shebang will be attached to a pipe or dowel that will slide into the blunderbuss' main aluminum body.
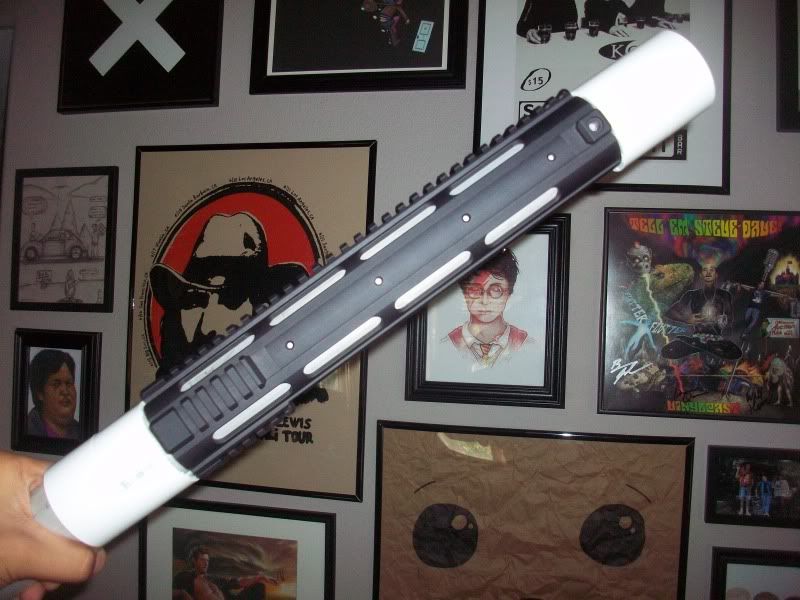
After Lowe's, I went to pick up my aluminum tubing. The entire ride home, I was a bit nervous: I wasn't sure if the tube would fit into the YHM-5005. Thankfully, it fit! It was a bit of a tight fit, but I got it through. I imagine I won't be able to separate the tube and the YHM-5005 without a bit of twisting and scratching, but it's all for the better. After I sand down the freed tube to get the scratches out, it'll be sufficiently thinned down enough to slide in and out of the YHM-5005 with ease.
After eyeballing proportions from the photos that I have of the actual prop, I'll figure out exactly how much aluminum tubing to cut and how much to keep. I'll have it trimmed down to size at Lowe's and while I'm there, I'll shop around for more pieces to use for the endcaps, the slide, and the grip.
Here I've marked where I plan to cut a slot into the YHM-5005 in order to necessitate the pump-action, a slot that will continue into the aluminum tubing after it's been threaded through. I've based this placement on both filmgrabs and Art's hi-res photos.
And now, a somewhat stupid question: Is there a way I can cut these slots cleanly and accurately using only handtools? And if so, then how?
Thanks for checking out my progress!
-Jonaas


