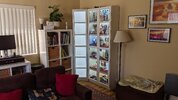
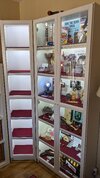
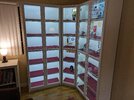
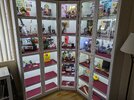
Just Getting Started...Please Critique My BILLY Props Display

Display looks great! Which LED Puck did you use to display the Dragonslayer Amulet?

Just one of these cheap ones at Amazon:


I put a small hole through a black-painted bottlecap to narrow the light, and also glued on a dowel to help prop it up. Then I stained all the wood to darken it; it doesn't look very good with the wood in the natural color.

PXL_20231001_153601535.jpg PXL_20231001_153549240.jpg

(I also ended up weathering the pewter further with a black wash.)

Works pretty well!
 
Well, after talking about it in this thread, I couldn't wait. BILLYs sometimes go out of stock, so I picked up a narrow one today!

So here it is, ready for lighting and shelf pads. Haven't aligned it properly and secured it against earthquakes (I'm in SoCal); will do that last, as I have to pull it out a few times for the lights.

PXL_20231002_011602845.jpg

Figure as I wire up the lights, I'll take some more pics for our folks who were asking.
 
Okay, some pieces came in, so I was able to get started.

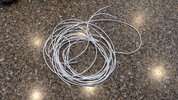
First off, I cut 22 lengths of 22-gauge wire to about 20" long, stripped the ends, twisted them and folded them over:

PXL_20231002_221741489.jpg

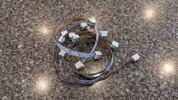
Then, I cut 6 lengths of LED strip at 11-1/2" each, and connected the wire-to-led connectors to each end (except for the top strip, which only needs a connector on one end). Notice I also added double-sided tape to the bottom of each connector:

PXL_20231002_221800108.jpg

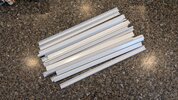
After that, I cut 11 lengths of cord hiders to 9-1/2" each. I used a miter hand-saw with my miter box, and each cut took less than 10 seconds.

Notice in the pic below that each piece is labeled (as pairs of top and bottom), with an arrow showing which way is the front. This is because my miter saw cuts are not perfect, and I'd like those on the back end. Also, since each pair (top and bottom) was cut together, I want them aligning perfectly, as they will be separated later. So this helps me keep track of which tops were cut with which bottoms.

I also put the included piece of double-sided tape on each of the bottoms.

PXL_20231002_225225477.jpg
 
Last edited:
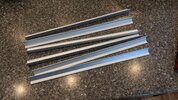
Today, my aluminum brackets arrived, so I cut 6 pieces at 13-1/4" each:

PXL_20231003_223437112.jpg

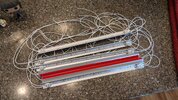
After that, I finished prepping each bracket with the lights as follows:
  • Stuck the led strips and the connectors to the brackets (except the top one...it connects on only one side).
  • Inserted 2 wires in each of the connectors.
  • Identified which side of the bracket will be stuck to the shelf (ugliest side).
  • Stuck the double-sided tape to the ugly side.
PXL_20231004_003350949.jpg

Notice also that I colored the ends of the positive wires with a red Sharpie. This will save a lot of time and troubleshooting later when I wire it all up!

Tomorrow, I think I might be able to finish, we'll see...
 
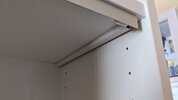
Also tonight, I stuck the cord hider bottoms to the undersides of each shelf. I then drilled a 1/8" hole at the back of each.

PXL_20231003_010925437.jpg PXL_20231003_010943659.jpg

I then peeled off the backing from the double-sided tape on the brackets, and stuck them in position as well:

PXL_20231004_005851066.jpg PXL_20231004_005920675.jpg

More tomorrow. Time to watch Ahsoka!
 
Okay, finished up today...

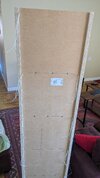
First, I inserted the hanging wires through to the holes in the back, and then placed the cord hider tops (covers) carefully over the wires:

PXL_20231004_181355301.jpg PXL_20231004_181541597.jpg

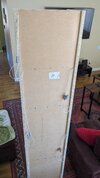
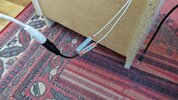
You can see the wires hanging out the back, here:

PXL_20231004_191542859.jpg

Next, I joined the wires using the wire connectors:

PXL_20231004_200349344.jpg

Then, I joined the last wires at the bottom to the power adapter that came with the LEDs, using the same connectors:

PXL_20231004_200819453.jpg

After pushing the shelf back into position and securing it with a bracket to the bigger shelf on the right (which is secured to the wall), it looked just about ready!

PXL_20231004_211543060.jpg

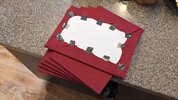
But it needs a finishing touch. I made these shelf pads by wrapping maroon cloth around pieces of foamcore board (cut to 14-3/16" x 10-1/8"), and secured them underneath with Gorilla tape:

PXL_20231003_204507906.jpg

And done! A blank slate ready for some props!

PXL_20231004_212116796.jpg
 
Okay, finished up today...

First, I inserted the hanging wires through to the holes in the back, and then placed the cord hider tops (covers) carefully over the wires:

View attachment 1747730 View attachment 1747731

You can see the wires hanging out the back, here:

View attachment 1747732

Next, I joined the wires using the wire connectors:

View attachment 1747733

Then, I joined the last wires at the bottom to the power adapter that came with the LEDs, using the same connectors:

View attachment 1747734

After pushing the shelf back into position and securing it with a bracket to the bigger shelf on the right (which is secured to the wall), it looked just about ready!

View attachment 1747735

But it needs a finishing touch. I made these shelf pads by wrapping maroon cloth around pieces of foamcore board (cut to 14-3/16" x 10-1/8"), and secured them underneath with Gorilla tape:

View attachment 1747729

And done! A blank slate ready for some props!

View attachment 1747736
Very nice- the sight of all of that unfilled display space would make me giddy. I'm sure you're rubbing your hands together in anticipation of how to fill it- I would be!
 
Hi all:

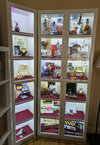
Figured it was time for an update. I moved some things around, added a bunch more, and very happy so far!
PXL_20231106_165443155.jpg

Starting with the larger bookcase, I added a bunch more Back to the Future items: OUTATIME license plate and Delorean key, clock tower photo, Marty's disappearing family photo, and taped the "Biff's" matchbook to the back wall. Also, there's the torn Superman III photo booth strip, and Seinfeld's Tweety Pez dispenser.

PXL_20231106_165503745.MP.jpg


Second shelf has nothing new.

PXL_20231106_165514089.MP.jpg


Third shelf, I added the Pym particle vial, WWII compass with Peggy Carter's picture, and Tomorrowland pin. Nothing major.

PXL_20231106_165524223.jpg


Fourth shelf, now has a Rebels Sabine patch and Fantastic Beasts notebook. The Shannara items I moved to the smaller shelf.

PXL_20231106_165555967.MP.jpg


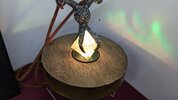
On the fifth shelf, I moved out some things to other shelves. Getting a little bare! I added a Moana Heart of Tefiti that is illuminated from below with one of those LED pucks.

PXL_20231106_165609562.jpg


And bottom shelf, I moved out the Babylon 5 PPG and Link, but added the How to Train Your Dragon book pages and Ghostbusters ESP cards. I think I now have enough Ghostbusters stuff to display it all together now on its own shelf, so some rearranging is in order!

PXL_20231106_165624693.jpg


And now for the smaller bookcase, here's the first shelf. Those are the crystal shard, Jen's flute, and Essence Vial, all from The Dark Crystal. The shard and essence vial are both wired for permanent lighting now.

PXL_20231106_165658440.jpg


Second shelf, I moved in the Roy Hobbs rookie card and Dune ring, added a Sarah Connor burnt photo and a Doom Eternal key card that I spattered with "blood." On the right side is the Hellraiser Lament Configuration puzzle box, and a couple paper props from the Hellraiser movies.

PXL_20231106_165703628.jpg


On the third shelf, I moved in the Shannara book props, adding Allanon's letter as a paper prop for the background, plus a Shannara commemorative coin I received. On the left are the watch and key from Knight Rider, the Lord of the Rings one Ring, and Squid Game and Morty Adventure cards.

PXL_20231106_165709440.jpg


On the fourth shelf, I moved in the Morley cigarette box over, and added several new X-Files badges & IDs (including a Simpsons version). On the left, I moved in the Constantine brass knuckles. The lighter and shotgun shells are new.

PXL_20231106_165715214.jpg


The fifth shelf is still empty, and the six shelf has the Babylon 5 items.

PXL_20231106_165721660.jpg


Still lots of space to go! Happy to answer any questions of any of these items. Much more to come, I think I'm about 60% full.

Thank you for your indulgence,
Bill
 
Last edited:
So, a lot's happened with my display since the last update! My wife got me ONE MORE DISPLAY CASE as a Christmas gift! What support! :love:

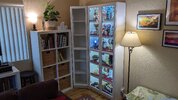
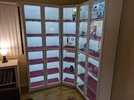
I was able to redistribute the stuff in the bookcase that was previously there, and now I have a full BILLY corner unit. So I wired it up for light and and gave it the same base-boards as the rest! (Most props removed in the pic below.)

PXL_20231225_061740894.jpg

If you look closely, you'll also see something new in the empty shelves that I did over the holiday...

PXL_20231224_161914160.jpg

That's right! Every shelf is wired for USB power! Details on that in the next post.

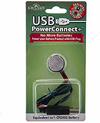
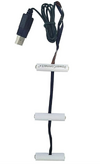
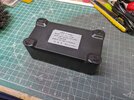
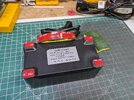
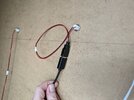
In the meantime, I want to point out this technique I discovered after much hunting and looking online: Many props that are battery powered can be easily converted to 5V USB plug-in, using these adapters:

1705529767037.png

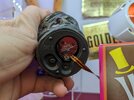
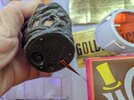
That's a CR2032 battery which has a flat ribbon cable attached to it, with a 5V USB on the other end. Here it is in use for my Dark Crystal Essence Vial:

PXL_20240117_222128185.jpg PXL_20240117_222005988.jpg

Amazon's version doesn't have the flat ribbon, which I feel is necessary to be able to close the battery cover. But it's all over the place for other online sellers. It costs about $10 shipped. I bought mine from Country Christmas Loft.

And yes, there are adapters out there for AA and AAA batteries (in multiple configurations) as well!

1705530356927.png

This allows me to leave my battery-powered devices running without using up batteries!

More details coming soon.

Bill
 
Time to share my process for wiring all three shelves with USB power!

My requirements were as follows:
  • Three ports per shelf (big bookcase)
  • Two ports per shelf (small bookcase)
  • They should try to blend in as much as possible.
  • They should be as small as possible (therefore USB-C).
  • Low-power cables are fine.
  • No soldering, no bare wires. Plug and play only!!!
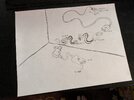
After some thinking, I searched through AliExpress for low-cost solutions (I would need to be buying very many connectors to power a grand total of 48 ports!), I came up with this sketch of the parts I wanted to use for each port:

PXL_20231219_185822489.jpg

On the backside of the bookcase, each USB-C port was connected using the following parts:
(prices include shipping)

USB-C (female) to PH 2.0 (male) connector with cap and locking nut - $0.75 each (x48) = $29
PH 2.0 (female) connector to standard USB (male) - $2.00 each (x48) = $96
Standard USB (female) to standard USB (male) 1.5-meter extension cable - $1.40 each (x48) = $68

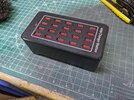
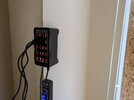
All of the 1.5-meter cables would be plugged in to a pair of 20-port 100-watt hubs:

Multi Port USB Charger 20 Ports HUB 100W - $21 each (x2) = $42

That only accounts for 40 ports, but I had a couple smaller hubs lying around the house.

In the shelf itself, I picked up a dozen (to start) of these white right-angle USB-to-USB-C adapters.

15cm USB3.1 Type-c OTG cable 90 Degree Right angle USB C to USB2.0 Female - $1.75 (x12) = $21

The lower profile right-angle shape should make it easier to hide cords from view.

TOTAL COST: about $260, or $5.35 per port.

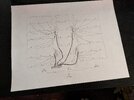
This is my wiring diagram chickenscratch:

PXL_20231219_185851123.jpg

This would give me the ability power 2-3 items per shelf with a port just a few inches away!

Next post is the how-to.

Bill
 
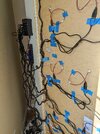
To get started, I needed to make the 20-port hubs safely "mountable" on the side of the shelves. Knowing that the shelfes would be at a 45-degree angle to each other, I was left with plenty of space to follow the above diagram.

PXL_20231219_185917720.jpg

The feet were stick-on rubber pads. I removed them and filled the four recesses with 5-minute epoxy:

PXL_20231219_185932631.MP.jpg

And then, after scuffing the cured epoxy, I covered the feet with a very strong double-sided tape.

PXL_20231219_215147404.MP.jpg

And then I mounted the hubs on either side of the central shelf (as indicated in the above diagram), along with a couple extra hubs I also had available:

PXL_20231224_162025569.jpg

Everything was plugged into a power strip, and then a Wyze light timer.

Next up, I measured and drilled holes for each of the USB-C ports, and attached them by hand-tightening the nut on the back.

PXL_20231224_161854342.jpg PXL_20231224_161925315.jpg

And then I attached the PH 2.0 to USB cable:

PXL_20231224_161953297.MP.jpg PXL_20231224_162400538.jpg

The rest of the "plug and play" operation followed my diagram:

PXL_20231224_171701590.jpg

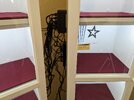
Notice how, for each shelf, I "braided" the three cables before plugging them into the hug, to reduce tangles. Not full cable management, but much better than full loose wires!

PXL_20231224_195054461.jpg

It was important to test the connections every few minutes, so I had a light handy every step of the way!

As I began to push the shelves together, the wire groups can be clearly seen. Again, braiding each shelf made a difference!

PXL_20231224_225236051.jpg

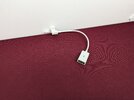
And in the shelf, here's one of the adapters attached:

PXL_20231224_174838224.jpg

And the shelves, finally moved in to place. With their silicon caps on, you can barely see the ports!

PXL_20231225_061740894.jpg

A final test, and all 48 ports are working! And they're good for MORE THAN JUST LIGHT-UP EFFECTS!


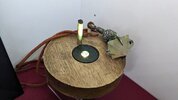
I picked up a couple of these cheap turntables from Amazon to add some motion to the overall display:
2-3 turntables is enough; don't want to overdo it!

And so this is the current state, still very much a work in progress. I'm up to over 180 items, and still lots of space!

PXL_20240201_221046496.jpg

Considering I'd like to go higher density of items in each shelf, I estimate I'm about 50% full.
I will follow up with shelf-by-shelf photos soon.

Thanks for reading,
Bill
 
So, a lot's happened with my display since the last update! My wife got me ONE MORE DISPLAY CASE as a Christmas gift! What support! :love:

I was able to redistribute the stuff in the bookcase that was previously there, and now I have a full BILLY corner unit. So I wired it up for light and and gave it the same base-boards as the rest! (Most props removed in the pic below.)

View attachment 1780067

If you look closely, you'll also see something new in the empty shelves that I did over the holiday...

View attachment 1780074

That's right! Every shelf is wired for USB power! Details on that in the next post.

In the meantime, I want to point out this technique I discovered after much hunting and looking online: Many props that are battery powered can be easily converted to 5V USB plug-in, using these adapters:

View attachment 1780069

That's a CR2032 battery which has a flat ribbon cable attached to it, with a 5V USB on the other end. Here it is in use for my Dark Crystal Essence Vial:

View attachment 1780076 View attachment 1780075

Amazon's version doesn't have the flat ribbon, which I feel is necessary to be able to close the battery cover. But it's all over the place for other online sellers. It costs about $10 shipped. I bought mine from Country Christmas Loft.

And yes, there are adapters out there for AA and AAA batteries (in multiple configurations) as well!

View attachment 1780077

This allows me to leave my battery-powered devices running without using up batteries!

More details coming soon.

Bill
I've been looking for a battery eliminator for 2450 coin batteries with zero luck. I'm looking at Country Christmas Loft's website and I don't even see the 2032 model. My searches turn up zero results at Amazon as well. All I can find are AA/AAA replacements. I suppose if I could find a AA or AAA version of the remote control votive "flickering candles" I use (for shelf lighting and inside my Indiana Jones stones), I could then rig them up instead.
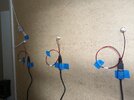
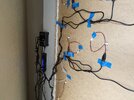
IJ Display with lit stones and candle lighting using flickering remote votive candles (same candles insert into the stones through a rubber stopper opening on the bottom of the stones:

IJ candles.jpg
 
Back
Top