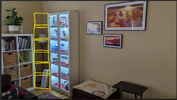
Just Getting Started...Please Critique My BILLY Props Display

Absolutely, and thanks for checking in!

I have taken to heart all the comments from this thread, and made a bunch of changes. In addition, I consolidated props from other rooms (and my car even: Han Solo dice), and ordered a few more props as well to round things out. Basically, the positive reinforcement I got from the responses in this thread have inspired me to make it better!

I will be providing updated pics of the whole display in the next few days...still waiting for a couple more small items to arrive. But it will always be a work in progress, and I'll look forward to keeping this thread updated. In the meantime, check out this thread as an example of something I was inspired to try:


Thanks all again for the words of encouragement!

Bill
 
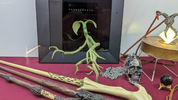
Additionally, my wife suggested adding something "organic" to the collection to make it feel less cold. Although I'm being very strict about "actual size" props being in the collection (and therefore no action figures), there are certainly small "characters" that at full size still qualify, in my book:

1694190594227.png

I also had in mind a Hellboy 2 "tooth fairy"; I purchased the 3d model, so I'll have print one up and paint it.

(Baby Groot is another option.)
 
Additionally, my wife suggested adding something "organic" to the collection to make it feel less cold. Although I'm being very strict about "actual size" props being in the collection (and therefore no action figures), there are certainly small "characters" that at full size still qualify, in my book:

View attachment 1737661

I also had in mind a Hellboy 2 "tooth fairy"; I purchased the 3d model, so I'll have print one up and paint it.

(Baby Groot is another option.)
Fantastic Beasts and Where to Find Them
 
I have the really small hand size version. They refer to it as a desktop display but it is far too fragile to be outside a case. It would be pressed flowers if I put it on my desk.
 
Hi all:

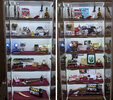
I wanted to first say thanks again for the advice, compliments, and inspiration, especially the suggestions to add paper props! Those really help tie things together. I have made significant additions to the cabinet! I consolidated items I had in other rooms (and my car), I ordered a few more things, and last weekend I made a few props on my resin 3D printer!

Here's a before-and-after comparison:

PXL_20230912_164809260.jpg

If you'll indulge me, I'd love to take you through shelf-by-shelf and show what was changed/added (I apologize if it's long-winded, but I'm excited!):

PXL_20230912_164828457.jpg


On the top shelf (a little above my eye level) I didn't do too much. I brought up the "Free Guy" name tag from the second shelf, as it seemed to work better here. I added the "Save the Clock Tower" flyer prop in the back, and I think it works nicely.

PXL_20230912_164842069.jpg


On the second shelf (eye level), I retired the silly Mario blocks, and brought in my 3D-printed Star Trek III phaser that I had in another room. I moved the Joker's "laughter" card closer to the other Joker cards, and moved out the Free Guy tag and the Tomorrowland pin.

I added no less than FOUR paper props to the back, and moved the Llama Potion forward and down. The Inception top and the Spaceballs "Schwarz" ring I purchased from zenix. The TNG combadge just came in from eBay.

PXL_20230912_164854032.jpg


On the third shelf (a hair below eye level), I added Scott Lang's new book (came in hot from Amazon), and added some more height to some of the Marvel props. To the John Wick stuff, I added the black and white photo of him and Helen (from his library book in JW3), and the bloody pencil, which I made myself (thanks stussy!). The 1971 Golden ticket I moved to the back (might mount on the back wall later), and the 2005 Golden Ticket I moved down to another shelf. The Roy Hobbs rookie card just came in from eBay, super cheap!

PXL_20230912_182148099.jpg


Big changes on the fourth shelf! After I moved out the Fallen Order lightsaber, Constantine brass knuckles and Squid Game card, I fleshed out the Harry Potter items by adding the digital photo frame with the animated Wanted Poster of Sirius Black. I also added a print of Harry's acceptance letter, and switched out Cedric's wand for the Elder Wand. I'm waiting for a "Fantastic Beasts" journal to arrive from eBay. The Han Solo dice came from my car, and the Kamino saber dart and Baby Yoda ball both came from zenix.

The DL-44 is a repaint (with some mods) of the Disney Parks blue and orange blaster. It's a bit rough (a little over-weathered especially), but it was one of my first replicas that I made, so it's sentimental. ;)

The Bowtruckle "Pickett" is from Amazon. My wife suggested I needed some things that were more organic (she's right), but I WILL limit myself to life-size figures ONLY!

PXL_20230912_164939031.jpg


Okay, total revamp of the fifth shelf too. Under the Fight Club stuff, I added a folded printout of Jack's/Tyler's rules. I made my own version of the "Morty Adventure Card" based on a copy I purchased from zenix, and I put the Squid Game card over there. I moved Eddie Munson's guitar pick necklace over, and made the Pick of Destiny last weekend on my 3D printer to go with it. I added some new Matrix items harvested from the Free Paper Props section here at the RPF. I made the Morely Cigarettes pack from an online template that I modified a fair bit (thank you YenChih Lin), and quick-printed a couple Mulder and Scully business cards to go with it (I want to find/make some good FBI ID badges in the near future).

The Dune Atreides ring came from zenix, and the Nostromo patch is hot and fresh from NostromoCrew (thanks, it's BEAUTIFUL!!!!). I added some relevant paper props to the back and moved the 2005 Golden Ticket here.

PXL_20230912_172216387.jpg


And finally, on the bottom shelf: since I don't want people to get on their hands and knees, I'm keeping only big things down there that are easy to see from above. The Ghost Trap and Dragon's Tooth I pushed back a little. Leia's blaster came from another room (Rubie's repaint), and the Fallen Order lightsaber and the Constantine brass knuckles live down here now. The Babylon 5 PPG came from another room (I painted the resin cast from JOATRASH FX). The Babylon 5 hand-link I 3D-printed and painted last weekend, to complement the PPG.


So that brings the grand total count to something close 90 props! I couldn't be happier about how it's coming together, and I'm so grateful to the RPF prop community for its contributions of props and advice!

That said, I would love any further critiques/suggestions/insults you'd like to offer. Tell me what doesn't work. It can only get better!

(Also, feel free to ask questions about any individual props. I like talking about them, and want to share the love. So many of these items were made by people here!)

Thanks all!

Bill
 
Last edited:
Hi all:

I wanted to first say thanks again for the advice, compliments, and inspiration, especially the suggestions to add paper props! Those really help tie things together. I have made significant additions to the cabinet! I consolidated items I had in other rooms (and my car), I ordered a few more things, and last weekend I made a few props on my resin 3D printer!

Here's a before-and-after comparison:

View attachment 1738932

If you'll indulge me, I'd love to take you through shelf-by-shelf and show what was changed/added (I apologize if it's long-winded, but I'm excited!):

View attachment 1738911

On the top shelf (a little above my eye level) I didn't do too much. I brought up the "Free Guy" name tag from the second shelf, as it seemed to work better here. I added the "Save the Clock Tower" flyer prop in the back, and I think it works nicely.

View attachment 1738912

On the second shelf (eye level), I retired the silly Mario blocks, and brought in my 3D-printed Star Trek III phaser that I had in another room. I moved the Joker's "laughter" card closer to the other Joker cards, and moved out the Free Guy tag and the Tomorrowland pin.

I added no less than FOUR paper props to the back, and moved the Llama Potion forward and down. The Inception top and the Spaceballs "Schwarz" ring I purchased from zenix. The TNG combadge just came in from eBay.

View attachment 1738913

On the third shelf (a hair below eye level), I added Scott Lang's new book (came in hot from Amazon), and added some more height to some of the Marvel props. To the John Wick stuff, I added the black and white photo of him and Helen (from his library book in JW3), and the bloody pencil, which I made myself (thanks stussy!). The 1971 Golden ticket I moved to the back (might mount on the back wall later), and the 2005 Golden Ticket I moved down to another shelf. The Roy Hobbs rookie card just came in from eBay, super cheap!

View attachment 1738933

Big changes on the fourth shelf! After I moved out the Fallen Order lightsaber, Constantine brass knuckles and Squid Game card, I fleshed out the Harry Potter items by adding the digital photo frame with the animated Wanted Poster of Sirius Black. I also added a print of Harry's acceptance letter, and switched out Cedric's wand for the Elder Wand. I'm waiting for a "Fantastic Beasts" journal to arrive from eBay. The Han Solo dice came from my car, and the Kamino saber dart and Baby Yoda ball both came from zenix.

The DL-44 is a repaint (with some mods) of the Disney Parks blue and orange blaster. It's a bit rough (a little over-weathered especially), but it was one of my first replicas that I made, so it's sentimental. ;) )

The Bowtruckle "Pickett" is from Amazon. My wife suggested I needed some things that were more organic (she's right), but I WILL limit myself to life-size figures ONLY!

View attachment 1738914

Okay, total revamp of the fifth shelf too. Under the Fight Club stuff, I added a folded printout of Jack's/Tyler's rules. I made my own version of the "Morty Adventure Card" based on a copy I purchased from zenix, and I put the Squid Game card over there. I moved Eddie Munson's guitar pick necklace over, and made the Pick of Destiny last weekend on my 3D printer to go with it. I added some new Matrix items harvested from the Free Paper Props section here at the RPF. I made the Morely Cigarettes pack from an online template that I modified a fair bit (thank you YenChih Lin), and quick-printed a couple Mulder and Scully business cards to go with it (I want to find/make some good FBI ID badges in the near future).

The Dune Atreides ring came from zenix, and the Nostromo patch is hot and fresh from NostromoCrew (thanks, it's BEAUTIFUL!!!!). I added some relevant paper props to the back and moved the 2005 Golden Ticket here.

View attachment 1738916

And finally, on the bottom shelf: since I don't want people to get on their hands and knees, I'm keeping only big things down there that are easy to see from above. The Ghost Trap and Dragon's Tooth I pushed back a little. Leia's blaster came from another room (Rubie's repaint), and the Fallen Order lightsaber and the Constantine brass knuckles live down here now. The Babylon 5 PPG came from another room (I painted the resin cast from JOATRASH FX). The Babylon 5 hand-link I 3D-printed and painted last weekend, to complement the PPG.


So that brings the grand total count to something close 90 props! I couldn't be happier about how it's coming together, and I'm so grateful to the RPF prop community for its contributions of props and advice!

That said, I would love any further critiques/suggestions/insults you'd like to offer. Tell me what doesn't work. It can only get better!

(Also, feel free to ask questions about any individual props. I like talking about them, and want to share the love. So many of these items were made by people here!)

Thanks all!

Bill

Beautiful display! And I’m glad you like my Nostromo shoulder patch :cry:
 
Amazing collection that is displayed excellently Bill. i wish i was as tidy. So easy to see all your props laid out nicely and not cluttered. Brilliant mate. Nice [pencil by the way.;) :love::love:
 
Looks good! I wish Adam had done a more indepth look at how he did the Billy Bookcases in his cave. I'm trying to visualize how all that tape running up the doors would all connect.
 
Looks good! I wish Adam had done a more indepth look at how he did the Billy Bookcases in his cave. I'm trying to visualize how all that tape running up the doors would all connect.

I can share with you how I did mine (which is more Norm's style). I'm very happy with it. I don't like Adam's style, because when you open the doors to show off, the lighting goes away. Mine stay lit the exact same, whether doors are open or not. Lemme take some pictures and I'll post today or tomorrow.
 
Okay, so I had a little time, so here's the breakdown:

First, I want to point out that being able to see things properly lit while the doors are open is crucially important to me. The door frames of the BILLY bookcase block a good 4" of display space in the center of each shelf. So when someone comes over and takes an interest. I ALWAYS open the doors (which also happens to activate the motion sensor for my Sirius Black photo frame).

Second, I am terrible with soldering, and I don't trust tape-splicing. But any holes I poked needed to be invisible, so that means splicing. I went with mechanical splicing options, which you'll see below. I trust those more.

With that all said, I sourced everything from Amazon:
  1. LED Strip: Self-adhesive 12v strip for $16: Amazon.com
    I cut each strip to a little shorter than the bracket, leaving space for connectors. (about 27-1/2").

  2. Wires: Simple 22-gauge silicone wire for $10: Amazon.com
    We're dealing in low voltage here.

  3. LED-to-Wire Connectors for $12: Amazon.com
    These allowed me to make a solderless connection from my wires to the LED strips. Just insert and tighten the screws!

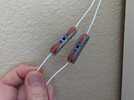
  4. Wire-to-Wire Connectors for $10: Amazon.com
    These allowed me to re-connect wires I had to cut without soldering. Just insert and click!

  5. Aluminum Channels (6, 29" long) for $17: Amazon.com
    These meter-long brackets were a bit too long, so I had to cut a few inches off these with a hacksaw. I did NOT use the included light diffusers, because I like the "sharpness" of individual pinpoints of light on the items in the bookcase, and it makes things show a bit more "shiny". The come in black for a black BILLY.

  6. Cord Hiders (12, 9-1/2" long) for $22: Amazon.com
    I looked for the slimmest I could find, so I had to buy 2 packs (hence the total cost of $22). I also cut them to 9-1/2" long with a hacksaw. Very easy!

  7. Slim 3M Double-Sided Tape for $10: Amazon.com
    You can use hardware if you prefer. I prefer not to add holes when not necessary. :)
TOTAL COST: $97.
If you are good with soldering, you can save $30.

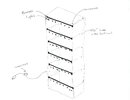
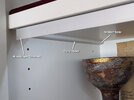
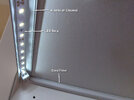
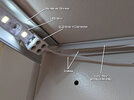
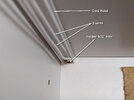
I planned a "zig-zag" of wiring, starting at the top-left. The lights are mounted across the underside front. The 2 wires then go from the right-front, straight backward, through a small hole in the back wall. Then they go down, come in through a hole in the top-right of the next shelf, forward to the lights, exit the lights on the top left, and straight back through a hole in the back-left. And then downward, repeating the zig-zag.

BRWDCA2662D2233_0000003828.jpg

Obviously, it's best if you do this before anchoring the shelf to the wall! I didn't, so I had a lot of fishing with a coat-hanger!

Some pictures:

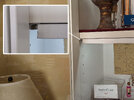
PXL_20230927_165730020.jpg PXL_20230927_165755956.jpg PXL_20230927_170001167.jpg PXL_20230927_165910017.jpg PXL_20230927_170033192.jpg PXL_20230927_174943056.jpg

The order of operations:
  1. Cut everything to length and strip the wire ends.
  2. Prepare the 6 lights:
    1. Cut 4 pieces of wire, about 20" each.
    2. Cut a bracket to 29"
    3. Cut a ~27-1/2" strip of LED tape.
    4. Attach the LED-to-wire connectors to each end of the LED strip.
    5. Put some 3M double-sided tape on the backs of the connectors.
    6. Stick the LED tape to the brackets, leaving 1/2" on each end.
    7. Stick the connectors to the bracket as well, so they won't hang down.
  3. Prepare and mount the cord-hiders:
    1. Cut 11 cord-hiders to 9-1/2" long (not 12, the top shelf only has one)
    2. Stick the cord-hiders (sticky sides only) underneath each shelf, centered front-to back.
  4. Drill a 1/8" or 5/32" hole in the back wall, right where the cord-hider will hide it.
  5. Mount the brackets to the underside of each shelf:
    1. Use the thin 3M tape or the included brackets.
    2. Center the brackets left to right.
    3. Mount the brackets about 1/8" back from the front of the shelf.
  6. Run each set of wires to the back, through each hole.
  7. Snap the cord-hider tops on.
  8. Connect each wire (using the wire connectors), to the correct wire from the next shelf down (I mark mine with a Sharpie)
  9. Secure each wire connector to the outside back wall of the bookshelf with tape, so they won't move around when you push it back to the wall.
  10. When you get to the last wires, connect them to power cord that came with the LEDs. You can even use the dimmer!
Well that should be about it! Hope this helps!

Bill
 
Last edited:
There's some great info in there, thank you! I noticed while filming a prop overview yesterday that the puck lights I had looked like they were flickering on camera. Never experienced that before it was nuts.
 
just seen your display case update pics and wow, what an improvement. Your collection looks great now, well done.

If you are looking for X-Files ID badges I can recommend SCTCARTS his store is WYNOTproductions on Etsy. They are the bet you can buy.
 
just seen your display case update pics and wow, what an improvement. Your collection looks great now, well done.

If you are looking for X-Files ID badges I can recommend SCTCARTS his store is WYNOTproductions on Etsy. They are the bet you can buy.

Great, thanks for the tip, and thanks for the kind words!
 
It's a small but really diverse collection. I'm not a fan of 'behind glass' collections, but the doors give it exclusivity and accessibility...

I like it....!!..Well done..!!

I LIKE IT.PNG


I really should get my stuff organised into one place.... ;)


IMG-2622.JPGIMG-2623.JPGIMG-2624.JPGIMG-2625.JPGIMG-2626.JPG
 
Last edited:
I actually have a question, where did you get that amulet from dragonslayer?!!

The amulet and the tooth (bottom shelf) both came from another collector in the Junkyard here on the RPF who, I believe, originally got them from one of RelicMaker's runs from many years ago. I was very lucky someone was reselling last year!

Here are a couple references to the original build:


The amulet frame was cast in pewter, and the stone cut from fluorite. Real leather cord! To illuminate it, I placed it on top of an LED puck and set the color to yellow.
 
Last edited:
It's a small but really diverse collection. I'm not a fan of 'behind glass' collections, but the doors give it exclusivity and accessibility...
I like it....!!..Well done..!!

Thank you!

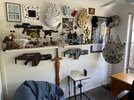
Yeah, I don't have much space, so this collection will be mostly small items and will probably get a fair bit more dense. The hard part is organizing so it doesn't look too chaotic or cluttered, but it creates a nice "Where's Waldo" effect as people pop in and recognize this or that. My teenager comes home from school and checks it out almost every day to see if I've added anything (which I have, updated pics coming soon). This is the living room, so I have to keep it bespoke. Hence the subtle Star Wars art on the right (see below).

Also, I'm with you on the "behind glass" collections...this is to help prevent the dust from collecting, which is bad here. But I always open the doors when someone begins to take an interest (which of course activates Sirius Black).

I do think I have just enough space to add a half-width BILLY at a 45-degree angle next to it, so I hope to be expanding just a bit!

1696132838361.png

I really should get my stuff organised into one place....

That's a beefy collection! Wish I could get away with helmets...But I am working on a Loki mask (from The Mask) that I hope to add...not a helmet, but close! Probably will do an Iron Man faceplate, too.

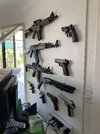
Also, being in the living room, I have to be more sensitive with my choices of guns & blasters. I try to only display the more sci-fi looking ones, so that I won't get the "is that real?" or "why don't you lock that up from your kids?" questions from visitors. My two teenage boys bring lots of friends (and their parents) over.
 
The amulet and the tooth (bottom shelf) both came from another collector in the Junkyard here on the RPF who, I believe, originally got them from one of RelicMaker's runs from many years ago. I was very lucky someone was reselling last year!

Here are a couple references to the original build:


The amulet frame was cast in pewter, and the stone cut from fluorite. Real leather cord! To illuminate it, I placed it on top of an LED puck and set the color to yellow.
I saw those and I actually do own the tooth. The amulet ive seen a few but they weren't exactly screen accurate. Looks awesome, good for you glad you have one
 
I saw those and I actually do own the tooth. The amulet ive seen a few but they weren't exactly screen accurate. Looks awesome, good for you glad you have one

Yeah, this amulet seems pretty accurate to me, except that it's slightly too large. But I think that came out of necessity, given the availability of fluorite octohedrons.
Close enough for me!
 
The amulet and the tooth (bottom shelf) both came from another collector in the Junkyard here on the RPF who, I believe, originally got them from one of RelicMaker's runs from many years ago. I was very lucky someone was reselling last year!

Here are a couple references to the original build:


The amulet frame was cast in pewter, and the stone cut from fluorite. Real leather cord! To illuminate it, I placed it on top of an LED puck and set the color to yellow.
Display looks great! Which LED Puck did you use to display the Dragonslayer Amulet?
 
Back
Top