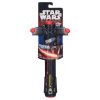
Frozens Kylo Ren WIP of a cosplay newbie

Frozen

Member
Hey guys!

I just recently joined this forum, because I want to do a Kylo Ren cosplay for comic con in June 2016.
At this point I have to say thank you to this great community for all the help and Inspiration I find here!
Also I have to warn you that english isn't my mother tongue, so there might be some spelling or grammar mistakes. forgive me for that! :)


I am completely new to cosplay, and had my first experience wir sewing recently when I made a prototype of the costume from cheap fabric.
I realized that it is quite hard, and needs a lot of practice and experience, so I decided to instead buy whatever I can from the soft parts, and mod it to enhance it a little.
I have a group in my city, that does lightsaber fighting shows. I want to join them as soon as possible, so man plan is to buy a complete costume,
and then add missing parts, and exchange the cheap stuff with better ones, that I make myself.
So my base is the Kylo ren costume from the costumebase. I will have a costume immediately, and can enhance it step by step, without much pressure.

When I read through this forum, I saw that there are a lot of people like me, who do this for the first time, or don't have a lot of experience. Feel free to hijack this thread. I will be glad to work together and help each other out.


I will post updates as soon as I get some new stuff delivered.


This is a list of all the parts needed with progress: updated January 27th

-Boots: Imperial Boots ordered
-Pants: waxed jeans
-helmet: ordered (black series) needs some modding
-gloves: john Fuquas gloves ordered
-belt: got my belt from PHProps
-neck seal: done
-balaclava: have it
-Lightsaber: force fx -> waiting for saber forge release
-pleated inner tunic: ordered Katja Von Design
-mid coat: ordered Katja Von Design
-outer coat: -> ordered Katja Von Design
-hood & scarf: ordered Katja Von Design
 
Last edited:
Dummy Lightsaber:

When I went shopping last week, I saw this really cheap Kylo ren lightsaber on the shelf. But for modding, the hilt looked quite good.
image.jpeg
For those who wonder, this is the "blade builder" version. It doesn't have any electronics. It's just the cheapest version.
I'm sorry, but I don't have WIP photos of this step, because I didn't think about doing a forum thread like this last week. So I can only describe what I did, but it was fairly easy.

So firstI got rid of the blades. Then I inserted a metal tube into the bottom, because there are holes that need to get filled. Also this gave the cheap plastic toy some weight.
Then I sanded all the lines where the two halves are put together with a sharp knife. This will get rid of the mold lines, and also fill the gap between the two halfs. that's why I used the side of a sharp knife, not a file or sand paper.
I screwed a D-ring to the side of the hilt. (I know it's not correct, but I'll explain later).
Next I primed the whole thing with a black spray primer. (citadel chaos black).
Then I repainted the whole thing with acrylic paints, and sealed it with matte spray sealing.

So why do I need this?
Because of the show fighting I will do in the Kylo Ren costume.
I won't do that with the force FX saber, this one is just for cosplay and conventions.
My show fight saber might not be a correct Kylo ren replica, maybe not even with cross guard, so at least I want to have a Kylo ren saber on my belt, when I do fighting shows.

And here is how it turned out:
image.jpegimage.jpegimage.jpeg
 
I would like to make some extendable lightsabers for a show my school is putting on, but these blades are ludicrously short. Do you think if I took the blade out of an old Darth Vader basic lightsaber it would fit into this hilt?
 
I would like to make some extendable lightsabers for a show my school is putting on, but these blades are ludicrously short. Do you think if I took the blade out of an old Darth Vader basic lightsaber it would fit into this hilt?

I can't tell you if it would fit, because I don't have a blade from another sabre. But I can tell you, that fitting a new blade in this won't be an easy conversion.
Does it have to be extendable? The Disney Store exclusive one has a little longer blade, and the ultimate Fx and Force FX do have the full size blade.
Here is a video for comparison:
https://m.youtube.com/watch?v=i8MiPKeuz8E

If you already have this one and want to fit in a new blade, the inner diameter of the hilt is about 30mm.
so you could get a polycarbonate blade, some tape or hot glue, and this should work fine.

Hope this helps :)
 
Hi Koenshi, thank you very much. I do miniature painting for many years, so this was actually an easy job for me.

I also ordered a Black Series helmet. It depends on where you are from. In the us, they have been widely available at the end of the last year, and are almost sold out right now.
In germany (and maybe other parts of europe) they start to be delivered this month, so it's no problem to order one. Keep your eyes open. There are often some friendly people posting here, when they find some of them available.
You can also join the Facebook group called Knights of Ren, to help you on your hunt for this helmet.
 
Today I started working on a the belt.

Found this nice stuff in my basement:
image.jpeg
This is a roll of floor dampening. It's a very dense black foam with a rubbery plastic coating, that looks like leather.
I've got tons of this stuff, so I started building a prototype belt.

I cut a 5 inch and two 12mm stripes from it.

image.jpegimage.jpeg

Now I have to wait for the resin belt buckle to arrive, before I can but the exact length, and sew it together.
 
Major update. Got my costume from costumebase today and wanted to do a short review of it.
There are also some great looking pictures of ehollywood in this thread: http://www.therpf.com/showthread.php?t=247329
But I want to show more, how it looks out of the box, and get into the details.
Lets get started!

I ordered the Basic costume + gloves, so no mask/helmet.
This is all you get:
image.jpeg


I'll start with the pleated undertunic.
It's made of cotton, and the black is dark enough, so no re dyeing. The fabric does stretch a little bit, so it's easy to get the arms correct. However, the fabric doesn't have the dotted structure. Also only the arms are pleated on the inner tunic. There is no torso pleating at all. The pieces that run over the legs are not pleated either. Instead they attached this to the pants, but I'll get to them next. If you want to enhance this, your only option is to pleat at least the leg part of the tunic. I
image.jpeg


So yeah, the pants... They're crap. If you take this serious, burn them. :p
They misunderstood how this costume is build, because they pleated the sides of the pants, instead of the tunic. It's ok for Halloween, but every one of us will most likely completely replace this part.
image.jpeg


The outer surcoat is made of a woven fabric that looks quite good on first sight. They got the shoulders and the overall form right. There are no seams at the hip, which is no problem, but the lower panels could be wider. The length is perfect. It goes right to the floor without shoes. The zipper is in the front, not on the side.
image.jpeg
The hood is quite big. It looks very Jedi/Sith like. Shouldn't be a problem to get over and helmet. They got this one good.
image.jpeg


The cape comes in form of a scarf like piece of fabric.
image.jpeg


Now let's get into detail with the fabric. It's a weaved fabric, that has a light shine to it. The pattern is 2 squares per centimeter, or 5,5 per inch.
Notice that it doesn't fray on the edges of the fabric like the real basket weave. Instead, they did sew a frayed stripe around the edge of the backside of the scarf.
image.jpeg


The belt belt is not made of leather. It' some hard rubber, but it feels like thick leather. It's got very big patches of Velcro sewn to it. This won't get loose! Unfortunately the belt buckle is not on the edge of the belt, but right in the middle. You could change that though. The two smaller leather stripes on the edges are missing. The are just indicated on the belt. The belt buckle is also made of a hard rubber material. What's interesting is, that it's made of two halfes, which does look light it could be working.
image.jpegimage.jpeg


The only thing that leaves almost no room for complaining are the glooves. They just look like they should, and we're very cheap. The only thing I don't like is that they are not made from real leather.
image.jpeg


So let's get to the conclusion. Should you get this costume? Depends on what you're looking for, and what you wanna do with it. Do you want to go on a costume party? Go for it! Need something for Halloween or carnival? Yeah, sure!
Do you want to cosplay Kylo Ren, go to conventions, or Star Wars fan meetings? Then you need to modify a lot imho. There are a few things, which are just wrong, like the pants. Also there is no midcoat in this costume set. But it can be used as a base for a good and realistic cosplay, especially when you don't find a better fabric for the hood and surcoat.
Do you want to go 501st approved? Forget this. Sure it's possible, but you would have to re-do so much stuff that is inaccurate or just wrong, that I feel it's better to look for something else. This is my personal opinion, and many people might not agree with me. There might even people, who get this approved without much modding, but I would' recommend.

Maybe I'll make some photos of me wearing the costume, when my wife comes home from work. If you want any more info or pictures, let me know. ;-)
 
Last edited:
I finished my neck seal. It was really tricky, but I finally got something I'm pleased with.
I made a lot of photos of the whole progress, but I'll only upload them if someone wants to see the complete step by step WIP how to make it.
Keep in mind, that I never used a sewing machine before, and had no idea what I did. So YOU can do it too! ;)
So here are pictures of the finished neck seal:
image.jpeg
image.jpegimage.jpeg
 
Epic neckseal!! Just been trying to figure how to make one too, love to see some instructions! Nice job
 
O.K. here is a little WIP of the neck seal:

I'm sorry, but I somehow lost some photos of the beginning. I drew some pictures. If something isn't clear, just ask.

First I measured around my neck, and the height. You will need these two measurements all the time, so write them down. You can give 1 - 2 cm extra to the height, if you want yours to sit tight on the jaw like mine.
Then I cut a piece of cloth in the length of the neck circumference x two times the height (add 2 cm on all sides for the seams)
Take a fabric that feels comfortable, because this will be on your neck, I used fleece from a blanket.
image.jpegimage.jpeg
Now sew the sides together. Then turn it to it's left side, so the seams are inside.
To make it stiff, and give it its form, I cut some 8mm thick foam, using the same measurements (circumference and height), and put it inside.
This will help keep it's form, but it's also soft enough to allow movement.
It doesn't have to be exactly the same thickness. Use whatever you have. If you use a fabric like neoprene for the base, you can skip this.

I bought some 10cm band of velcro, and cut a 10x10 piece from the side with the hooks, and 2 10x5 pieces from the fluffy side.
The two pieces will go to the ends of the neck piece, and the 10cm square will be the connector piece.
I made th connection on the inside, so the pleats go all around without overlapping.
You will also need a 14x14cm piece of you fabric for the connector.
image.jpeg
Fold the edges of the fabric inside, so it's 10x10cm too. Now lay the Velcro on the folds, and sew it together. Connector piece finished.
Next sew the 5x10 Velcro pieces to the ends of the neck piece.

Now I cut some faux leather into stripes. I wanted 2cm pleats, so I cut 4cm x the neck circumference.
image.jpeg
I recommend making them a few centimeters longer, and cutting them, after sewing.
Next I folded these leather stripes together on their long sides, to get the pleat, and sewed them along the bottom. This gives you 4 to 6 pieces like this:
image.jpeg

Start sewing them to the neck piece from the top to the bottom, making them overlap (I made them overlap 2cm). The topmost pleat has go 1 - 2 cm over the top of the neck piece, to hide it.
image.jpeg
You will need a strong needle here, sewing 4 layers of leather + fabric and foam.
After all the pleats are on the neck piece, trim the leather, that is longer than the neck piece, to get a straight line.
Next I cut a piece of fabric (height of neck x 3cm) for both sides, to hide the ends of the pleats. I sewed them to both ends. Only 1cm overlap here, because we don't want to cover the Velcro.
This is where we are now:
:image.jpeg
The neck piece is finished, next we make the shoulder piece.
 
Last edited:
First we cut 2 identical pieces of fabric. I used a cotton fabric for this.
Draw an oval for the neck hole in the middle. This should be oval, not round!
I measured a t-shirt, to see how broad it had to be.
image.jpeg

Next fold old it in half, and cut out the neck hole.
image.jpeg

If if you want to give it a round shape, fold the fabric in half again, draw your shape, and cut all four layers at once with some scissors.
image.jpeg

Now we completely unfold it, and sew the two pieces together around the outer edge.
This is what we have right now:
image.jpeg

Cut a straight line in the back, and sew this together too. Then turn the whole shoulder piece to the other side.
image.jpeg

This is part is done. To finish the neck seal, we will put all the parts together.

Lay the shoulder piece flat on the table like in the picture above. Put your neck piece together with the velcro, and put it on top. now look through it, to see if your neck hole is big enough. cut some more if needed. The inside of the neck piece should align with the hole.
Now open the Velcro, and lay the neck piece flat again, and then sew the shoulder piece to the neck piece ( the 2cm we gave extra, that should have no foam).
If you did the last step correct, the sewing lines should have the same length.
image.jpeg

And that's it. Hope you could follow the tutorial. If not, feel free to ask.

image.jpeg
 
This thread is more than 8 years old.

Your message may be considered spam for the following reasons:

  1. This thread hasn't been active in some time. A new post in this thread might not contribute constructively to this discussion after so long.
If you wish to reply despite these issues, check the box below before replying.
Be aware that malicious compliance may result in more severe penalties.
Back
Top