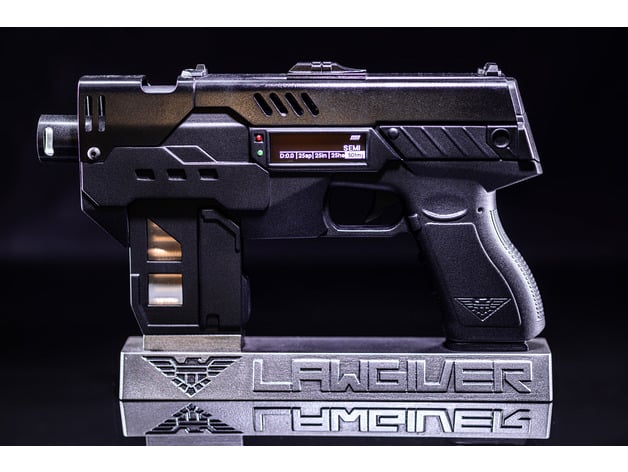
Dredd 2012 Electronics 3D Model and Build

Love the craddle and being a design set of mind your satisfy when ur happy with it. You have a fantastic collection love the lighted Fifth Element stones, the Lord Marshall Krull Galive key holder, Heck i even saw the glaive from the movie The Beast Master just fantastic! Just sweet collection for sure.
 
Love the craddle and being a design set of mind your satisfy when ur happy with it. You have a fantastic collection love the lighted Fifth Element stones, the Lord Marshall Krull Galive key holder, Heck i even saw the glaive from the movie The Beast Master just fantastic! Just sweet collection for sure.
DM me if you want any of the models, they're in my 'to release' pile but if you want to print any now they're all finished. The Medallion has a magnetic removable Key
 
Feedback would be MUCH appreciated on the video, it's pretty hard to film these and I'm trying to build up to filming the three lawgiver videos in a few weeks. Can you clearly see what I'm doing when I build? Would you like to see more details? Too many details? Just trying to dial it in before I blow my one shot at the big stuff. The lawgiver is only one of dozens of electronics projects I'm working on, though it's the only project I'm actively posting on here. I have already modeled, and mostly gotten working: light up 5th Element stones, Mando's blaster, SE-14r, E-11 (all three electronic and shown in this vid), Aliens pulse rifle with electronics and working action, Aliens motion tracker with working screen and tracking effects, self-driving R2-D2, R5D4, Aliens Helmet with working comms and Video recording, Aliens shoulder light with 1KM light range, Krull Glaive, bunch of looney tunes blasters, half dozen working (as in light up and battleable) lightsabers, half dozen electronic grenades from all over, Star Trek TOS Type 2 Phaser with detachable type 1, TOS desk monitor that shows working PC stats yadda yadda. I'll be giving all these away eventually but the Lawgiver is my baby right now so I'm trying to focus :D
It looked GREAT to me! The only thing I would say is to make sure your camera rig doesn't hide the "Like/Subscribe" sign!
 
kyds3k Thanks! I did notice the sign was hidden behind the jib, I'm going to move things around for the next vid so it's beside the P3D sign and those models are moved to the other side.
wayouteast Much appreciated :) Almost all the treasures are unreleased models, all the simpler ones are on my thingiverse page but there's models more complex than the Lawgiver that I'm holding off on until I do build videos for each one
Jamesfett Doing my best! I'm determining the speakers and testing the completed caddy/new wiring this weekend, and hopefully doing the follow up video to the one I just published where I'll settle the speaker debate and get the full sized R2D2 wired. Then I'm doing a small run of Lawgivers in tandem with the 3 'how to' videos. These things take a lot of evenings and weekends so I'll do my best, but there's a lot involved since this is just something I'm making up as I go along and not a kit build.

My goal (not a promise!) is 7 weeks for run, all three videos, and final model/code. The airsoft one is a bb gun lawgiver, I bought some conversion files for a glock gen3 and modded the files for a gen4 bb gun. It's fun but all the dimensions are way off.

Here's a progress update:
20220714_213157.jpg

Prints for filming/run.

20220715_174952.jpg
20220715_174959.jpg

Here's the new caddy wiring, as far as I got before I got rained on anyway (I only solder outside with leaded solder). Finished the basic soldering of the boards that are on the caddy, and a very easy power distribution junction (optional) that all the boards plug into, this is 100X better than before already. These are not the final speakers or final caddy interation, it's just what I'm using to size all the wires.
 
Last edited:
just some shaded renders to get a better look at it:

Dredd2012 FIX v21.png


Dredd2012 FIX v21a.png

showing the trigger and mag release, the mag catch is tapered so you can load another mag without pulling it back:
Dredd2012 FIX v21c.png

Front sight has a judges shield:
Dredd2012 FIX v21b.png


Speaker mount and electronics caddy hidden under the top, you have to remove two screws to expose it than it slides out. The hole in the front is for the microphone used by the voice recognition:
Dredd2012 FIX v21d.png

After you remove the magazine the bullets are on a tray that slides out so you can have empty mags:

Dredd2012 FIX v22.png

Glock mag is a screw cover with a power switch on the heel so you can recharge or swap the battery. I could have used a recharge port only but I felt it was important to be able to swap batteries on the fly:


Dredd2012 FIX v22sss.png


Cocking mechanism has an access port on top if you need to swap the spring, the two screw holes hide the microswitch that triggers the reload animation and sound. There's two steel rods that connect the two halves to make the mechanism smooth and robust:

Dredd2012 FIX v22fff.png

Trigger rests against a spring loaded 7mm momentary switch, the larger ring is for the nut on the switch allowing you to adjust the trigger pull:
Dredd2012 FIX v22saf.png
 
just some shaded renders to get a better look at it:

View attachment 1598564

View attachment 1598565
showing the trigger and mag release, the mag catch is tapered so you can load another mag without pulling it back:
View attachment 1598566
Front sight has a judges shield:
View attachment 1598567

Speaker mount and electronics caddy hidden under the top, you have to remove two screws to expose it than it slides out. The hole in the front is for the microphone used by the voice recognition:
View attachment 1598568
After you remove the magazine the bullets are on a tray that slides out so you can have empty mags:

View attachment 1598570
Glock mag is a screw cover with a power switch on the heel so you can recharge or swap the battery. I could have used a recharge port only but I felt it was important to be able to swap batteries on the fly:


View attachment 1598571

Cocking mechanism has an access port on top if you need to swap the spring, the two screw holes hide the microswitch that triggers the reload animation and sound. There's two steel rods that connect the two halves to make the mechanism smooth and robust:

View attachment 1598573
Trigger rests against a spring loaded 7mm momentary switch, the larger ring is for the nut on the switch allowing you to adjust the trigger pull:
View attachment 1598574
fanfreakingTASTIC!!!!
 
Hey Judges,

Just a quick update from the Lawgiver machine shop. I've been sweating away in the UK heat today, turning and milling the barrels into aluminium versions of the 3D model Chris (Props3D) created. The barrels aren't complete, but with temps supposedly hitting 40c in the next day or so, that's about the limit for my endurance. I'm off to hide in my nice cool office!

Here's a few pictures to give you an idea of what they look like:

PXL_20220717_145507945.jpg

Machining the locating slot in the barrel

PXL_20220717_144100771.jpg

The lens spacer fitted inside the barrel

PXL_20220717_154428184.jpg

Rinse and repeat

PXL_20220717_180614155.jpg

Milling one slot for the muzzle (notice the locator pin hole?)

PXL_20220717_183632821.jpg

Just a small selection for your viewing pleasure

Now the slot has been milled on one side, I just need to rotate 180 degrees and do the same again for the other side. Then drill out the fixing holes. I'll post more pictures as the project progresses, and I'll include (hopefully) some of the trigger CNCing next time.

Stay cool out there!

BeakZ
 
Hey Judges,

Just a quick update from the Lawgiver machine shop. I've been sweating away in the UK heat today, turning and milling the barrels into aluminium versions of the 3D model Chris (Props3D) created. The barrels aren't complete, but with temps supposedly hitting 40c in the next day or so, that's about the limit for my endurance. I'm off to hide in my nice cool office!

Here's a few pictures to give you an idea of what they look like:

View attachment 1598718
Machining the locating slot in the barrel

View attachment 1598719
The lens spacer fitted inside the barrel

View attachment 1598721
Rinse and repeat

View attachment 1598723
Milling one slot for the muzzle (notice the locator pin hole?)

View attachment 1598724
Just a small selection for your viewing pleasure

Now the slot has been milled on one side, I just need to rotate 180 degrees and do the same again for the other side. Then drill out the fixing holes. I'll post more pictures as the project progresses, and I'll include (hopefully) some of the trigger CNCing next time.

Stay cool out there!

BeakZ
Those look great
 
Rolled out a minor update this morning and finalized the power wires. If you're building along you'll have to reprint 'Dredd2012_RearMagazineSwitch_V12':
Having the buck converter flop around was wigging me out so I attached it to a 'wing' on the heel.
20220718_084616.jpg


The battery connector can sit safely alongside if you shrink it like in the pic, the power switch terminals should be shrunk too but this is just a temp install for fit. This Hosim 800mAh is now the official 'recommended battery', it just barely fits in all the best ways:
20220718_085525.jpg


I did make a lot of progress on the final wiring. I should have it done today or tomorrow along with the final update to the caddy. I went through 3 iterations to get something that would fit and allow easy removal. I settled with a 'U' shape that would allow you to run the wires from the reload/power/fire through the middle easily:
20220718_085914.jpg
 
Last edited:
Trying 'an update a day' to get this released final soon on thingiverse/github. I'm sorta committed to a limited run now too (all parts on order!) so I want to get it posted asap, but that means 100% final with demo video FIRST. This one below is made with the (hopefully!) final release models, if I can stop fiddling. Note that these are raw prints, no sanding or finishing.

One thing that may not be clear is that this build is almost entirely modular. I tried to make it glue free but there were 4 parts that couldn't be helped: The front of the frame since it was too big for a standard printer, the front raised side panel since it crosses the two body parts and covers most of the seam, the panel with the serial since the small text needs to be printed in super high rez, and the middle sight. The rest can be entirely taken down with only 15 screws.

So here goes (main boards are removed for clarity in these pics):

1. Entire Lawgiver assembled

20220718_214950.jpg


2. Level 1 takedown, every module retains it's function: the barrel still has it's lens, the cocking mechanism still works outside the frame, the trigger group still functions, power module in the heel stays together, and the electronics caddy has all the main boards (again, boards not in this one)

20220718_215549.jpg


3. Full disassembly. Everything here does not require glue:

20220718_220150.jpg


There's a few reasons to do this.

1. This was a very iterative model to make, keeping it all modular let me focus on improving each part on it's own, only the frame morphed over time
2. So much time goes into making these things, and accidents happen. This kind of PLA is super strong but even drop a metal blaster with this many small parts and see what happens. This lets you swap out only the damaged parts if something bad does happen, this ability to reprint damaged parts is a huge advantage of 3D printing that's negated if it's all glued together.
3. Sooo many electronics, and problems can happen over time. This let's you diagnose, repair, and/or replace any issue without having to rip the whole thing apart.
 
Last edited:
Trying 'an update a day' to get this released final soon on thingiverse/github. I'm sorta committed to a limited run now too (all parts on order!) so I want to get it posted asap, but that means 100% final with demo video FIRST. This one below is made with the (hopefully!) final release models, if I can stop fiddling. Note that these are raw prints, no sanding or finishing.

One thing that may not be clear is that this build is almost entirely modular. I tried to make it glue free but there were 4 parts that couldn't be helped: The front of the frame since it was too big for a standard printer, the front raised side panel since it crosses the two body parts and covers most of the seam, the panel with the serial since the small text needs to be printed in super high rez, and the middle sight. The rest can be entirely taken down with only 15 screws.

So here goes (main boards are removed for clarity in these pics):

1. Entire Lawgiver assembled

View attachment 1599200

2. Level 1 takedown, every module retains it's function: the barrel still has it's lens, the cocking mechanism still works outside the frame, the trigger group still functions, power module in the heel stays together, and the electronics caddy has all the main boards (again, boards not in this one)

View attachment 1599198

3. Full disassembly. Everything here does not require glue:

View attachment 1599199

There's a few reasons to do this.

1. This was a very iterative model to make, keeping it all modular let me focus on improving each part on it's own, only the frame morphed over time
2. So much time goes into making these things, and accidents happen. This kind of PLA is super strong but even drop a metal blaster with this many small parts and see what happens. This lets you swap out only the damaged parts if something bad does happen, this ability to reprint damaged parts is a huge advantage of 3D printing that's negated if it's all glued together.
3. Sooo many electronics, and problems can happen over time. This let's you diagnose, repair, and/or replace any issue without having to rip the whole thing apart.
Can’t wait to see one at 100pct complete
 
Still working on the wiring and power routing. I've shown it before but here's the V1 mess I have to shove in that tiny space (this fits btw, but only after a few shots of bravery juice (whiskey) and at least one broken wire:
20220719_213830.jpg


I decided I could 1 up the features with a tiny little space I had left up front opposite the Voice Recognition board so I made this mini junction box, shown here with all the plugs in but the screen (that's tomorrow's job):
20220719_213919.jpg


It was too tight so I sanded the terminals flat at the back, that did the trick:

20220719_214011.jpg


Here's it with everything but the screen and the DNA verification LEDs:

20220719_213849.jpg


Super happy with this, you can disconnect any device which makes uploading new code or training the VR a dream. Here's 2 shots of the electronics caddy and the body separated:
20220719_214123.jpg


20220719_214135.jpg


I'm also printing, collecting materials, prepping for a run after on the side. There's a fair number of parts/screw changes so I'll update Github on Thursday with a new parts list and there will be a new build of the code from Spidey74 with the correct pinout:

20220719_214625.jpg

20220719_214549.jpg

This natural PLA by D3D is something I discovered recently. The strength of Strong PLA with the sharpness of premium PLA. It's some kind of black magic.
 
Last edited:
Well, the man himself Michael VK has officially reached out to help with the details. First off, I'm pretty happy on how bang on the model is. He's sent over a few sketches on the DL before so that's helped a lot. But this is the first time he's sent over some of the original files. Here's his sights compared to the ones in my model (my Fusion models in black):

unknown (1).png


But the one SMALL thing he pointed out, that's absolutely killing me, is this:

Untitled-1.png


It's so small, but when I did the Glock trigger guard I angled it down because in the screenshots I used there was an angle between the magwell and the guard, and I assumed the magwell was the flat part. Apparently the shots I used from the movie were from a prop where the front had sagged! Gah! Something only the original designer would know. So many thanks to Michael!
(noticed I linked his name to his instagram account both times, hint).
edit: in my defense this sorta makes it more screen accurate since the one in the movie had the same off angle ;)

The other issue is the sag made it look like the magwell and the trigger guard were at different heights but they're actually parallel and flat to each other.
This is the problem with doing a run, I'm a week into printing frames all at the wrong angle, all my prints are at .15mm printed slow on Prusas with extra perimeters so it's 36hrs for each frame!. An the flip side at least it's fixed going forward, and everything else was bang on. Maybe I'll offer a discount or first shipping for those who are fine with it. I'll have pics of both soon.

Untitled-2.png

If you doing a build along like a bunch of folk are doing on the Props3D Discord I'll leave it to your discretion. But for now the new frame and magazine (had to move the mag release catch up 1mm) are finished and posted to thingiverse. New sights coming tomorrow, or later tonight..
 
Last edited:
Well, the man himself Michael VK has officially reached out to help with the details. First off, I'm pretty happy on how bang on the model is. He's sent over a few sketches on the DL before so that's helped a lot. But this is the first time he's sent over some of the original files. Here's his sights compared to the ones in the model (my Fusion models in black):

View attachment 1599777

So I'm going to fix the missing details and republish. But the one SMALL thing he pointed out, that's absolutely killing me, is this:

View attachment 1599778

It's so small, but when I did the Glock trigger guard I angled it down because in the screencaps I used there was an angle between the magwell and the guard, and I assumed the magwell was the flat part. Apparently in the screenshots I used from the movie were from a prop where the front had sagged! Gah! Something only the original designer would know. So many thanks to Michael!
(noticed I linked his name to his instagram account both times, hint). edit: in my defense this sorta makes it more screen accurate since the one in the movie had the same off angle ;)

The other issue is the sag made it look like the magwell and the trigger guard were at different heights but they're actually parallel and flat to each other. This is the problem with doing a run, I'm a week into frames all at the wrong angle, on the flip side at least it's fixed going forward, and everything else was bang on. Maybe I'll offer a discount or first shipping for those who are fine with it. I'll have pics of both soon.

View attachment 1599780
If you doing a build along like a bunch of folk are doing on the Props3D Discord I'll leave it to your discretion. But for now the new frame and magazine (had to move the mag release catch up 1mm) are finished and posted to thingiverse. New sights coming tomorrow, or later tonight..
This is one for the record books
 
Hey Judges,

I only had an hour in the shop tonight, which was mostly spent setting up the mill. Here's an in-progress shot of the aluminium barrel next to the original 3D printed version. The finish is rough on this (it is only a test piece).

PXL_20220720_202549294.jpg


Stay passionate,
BeakZ
 
Sweet! Can't wait to get them installed!

Down to the LAST component, the DNA check LEDs. The daughterboard with the audio chips and the LED wiring is less than half a mm, hoping I can find somewhere to put the connector. It's getting really tight inside but I do have the final pinout solidified. Looking very strongly like I'll have this final by Friday.
 
Final wiring and pinout is done! Spidey74 has pushed a code update to match and I've documented it in the readme, so if you're building along this is how the final wiring looks. The two bare wires are the speakers, I have 10 potential speakers in 2 potential configs (single and double). That's going to be it's own bag of fun:
20220720_174748.jpg

It looks a little messy laid out here but if fits together like a glove, this is also how far it will disassemble for servicing/upgrades.

Here's it with everything plugged in:
20220720_174952.jpg


Final models will be Friday, there's a bit of a dependency mess in Fusion360 I have to solve before reexporting all the the models clean.
 
Back
Top