Double Pipes!!! (Stunt lightsabers)

Wow, thanks so much! ID10T can you go into more detail about clamping in countersinks? I've had success countersinking the parts at once and have been getting a shiny smooth hole with both parts flush with these new zero bits

Also, some updates! I cleaned out the foam in this blade that over filled into the tang hole. I then used the existing little threaded hole to make a stand-in red button, I'm guessing that was its purpose during filming, wanted to see what it looked like. From the reports it seemed like just a threaded hole in the tube that led into the shroud area, not a blind hole straight into metal (the core). This is as low as I can go to be above the core anyway, it's a representation of the prop and I really like the look.
View attachment 1476252View attachment 1476253

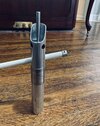
Oh yea.. the button? Look what I made!

View attachment 1476250


I believe this was a Larbel... an ooolllddd red button replica that just had paper towels stuffed into the housing. I machined an adapter to match the inner flanges of the button. After such a success... I thought I should be a true machinist and hold the adapter in the button mechanically, which means another set screw!

View attachment 1476249View attachment 1476251View attachment 1476248View attachment 1476247View attachment 1476246
Seriously tom you impress me more and more with the finish product and the limited tools you have.. very cool man

lol I remember the paper towel buttons!
 
It's looking good!

Just to create a clamping force with a countersink, you first do the normal countersink, to get the head flush (or how you want it to be), and then disassemble. On the inner (in this case) part, you then use the countersink to deepen the partial countersink on that part slightly. Depending on assembly tolerances, I like to have 0.003" clear. So if the parts fit together tightly, probably 0.005 would be good. If it's a slip-fit (which has .003 or more clearance already) you might go to 0.010 under on the inner piece. Or good old trial and error method.

What you want to do, is allow the threads to pull the piece up, rather than having the countersink bottomed out, which may not pull the inner piece up tight against the outer part. You need clearance for the countersink, and making it a bit deeper on the inner piece allows this.
iiiii get it now, I never thought the lower material would get pulled ... the side profile would just be a zigzag and the bolt would only touch the outer material. Now I see the tolerances we're talking!
 
Guys I made it again. I was REALLY happy with my last one. I’m picky though and I usually don’t have the means to do it over. I mean… okay I did this one like 4 times…

Anyway I loved that the bolts were the right size, but the red button was too high and the tang was ever so slightly crooked. Well I found that I had extra aluminum lying around.

Dann B made these cores. I sent him aluminum round and he faced them and then put a clean hole in the center. He did these for me ages ago and it turns out the Romans MPP I had planned was too big. You know what wasn’t too big? My leftover aluminum tube! So might as well DO IT AGAIN BUT BETTER

E23399F2-7C0B-4815-B246-31A67B56D9CB.jpegF4EA8422-F113-4AC7-91F8-A579DB2AFCA7.jpeg2AD991DD-A6B4-4F3F-B945-6CA45115C5D0.jpeg1111728F-E946-4006-8ED5-6EF525D95357.jpeg
The red button is now tapped into the core.

Some bigger shots:

D5A831C5-E0E4-4500-AF20-BE0BCAB955FC.jpegDB86ECBB-C931-4176-8CC3-BDC6FD2708A1.jpeg1AAE1D26-381B-4EAA-BE25-BADD37818456.jpeg570D05BC-11D3-463A-ABB6-4260EA3F3CDB.jpeg

the steel is hard to carve into with a file so my set screw groove is shallow for now.
Thanks to the member that sent cropped photos to us in the research thread!

ED570F84-D466-47D6-931E-80B4812835D6.jpegSABER_SWR.jpg
 

Attachments

  • B999805B-2A22-4DED-A54A-4DC3E35F18EA.jpeg
    B999805B-2A22-4DED-A54A-4DC3E35F18EA.jpeg
    2.7 MB · Views: 132
Last edited:
Back
Top