Deagostini Falcon. Anyone seen this?

No. The very large X-Wing (the Hasbro Hero Series made from that terrible plastic and had NO working features) that was from TRU was roughly 1/18 scale, almost the exact size for the action figures.

So that would make it larger than the Icons, CCboard etc? IIRC all of them were 1:24 while the big XWing toy from TRU was 1:12??
 
I received a survey from DeAgostini yesterday and one of the subjects was a 1/18 scale X-Wing. I do believe I may just have to have one of those :) I wonder if you will be able to make it correct for all the different squadron numbers?
 
Yup. That's a standard 3.75in figure at the bottom.

Hero-Series-X-Wing-Fighter-Star-Wars-Hasbro-023.jpg


1:18 would make it about 70 cm / 27.5 inches long.
 
Yeah definitely, the stand was more about R2 really anyway , I'd never seen the MR in the flesh so it was interesting to compare them
 
So is the consensus then, that this isn't a finished version of ous models ( and what it could look like ) ?....notice the turret guard too!
 
I'm fairly sure the finished one is the one they have used before to show the end product. The one next to it was made from production parts with no painting added.
 
So is the consensus then, that this isn't a finished version of ous models ( and what it could look like ) ?....notice the turret guard too!
HI gedmac66, as I said in post #3738 and Junk Pilot mentioned there are some tells that it isn't the Deagostini Falcon.

1) Cockpit canopy window frames do not look like either version that Deago gave us.
2) I don't see a seam line between the turret and and top jawbox, which would be evident where the top panel would be removable.
3) The stand and base are exactly like the Master Replicas
4) I don't see the Deago mounting points in the reflection in the mirror on the bottom.

I originally thought it was Steve's MR Falcon that he did with all the missing parts, such as the turret guard, but I'm pretty sure his and the one in all the Deago magazines has the Allied Van decal on the cockpit like the 5ft Falcon. So who knows? Maybe they removed it because it wan't accurate to the 32" filming miniature.
 
Cheers for clarifying kokkari. Regardless of it's provenance she's a fine looking lady... Can only hope to get mine looking half as good at the end of it all, but I must say , I'm thoroughly enjoying the journey so far ( up to issue #18 ) , and I'm not too stressed about the 100% accuracy of it all. For me it's more about the ' taste' than the exacting ' recipe ', know what I mean?
.
 
I'm sure that's his and is the one in the book pics. They've just removed the decal as you won't get it with the kit.


Ben
 
This a project that aimes to make for you perfect replacement parts for the DeAgostini Millenium Falcon at the highest possible standard.
Soon i will offer 2 upgrade sets for the DeAgostini Millennium Falcon.
SET 1
Contains photo etched parts which are special constructed engine ventilation grills.
On the original screen used 5 foot model of the Millenium Falcon they used KOOLSHADE material for the engine ventilation grills on the upper hull.
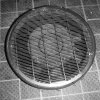
I tried to replicate this material in 1/43 scale. The result are realistic angled lamellas to show the typical look of the original (see pictures).
Parts:
• 6 big round grills (diameter: 42,5 mm)
• 1 small round grill for for the opening on the right side (diameter: 13,7 mm)
• 1 small round grill for for the opening on the left side (diameter: 13,25 mm)
• 1 small round grill for for the opening on the left side (diameter: 16,4 mm)
• 1 small long cockpit grill (length: 192,7 mm)
• various thin stripes to fix the lamellas for all grills in angled position
• 0,1 mm copper wire for fixing (sewing technique) the thin stripes in the lamellas
size of the photo etched: 0,1 mm x 235 mm x 120 mm
The lamellas have to be turned/angled with a tapered tweezers. Then you have to pull the pertinent small strips through the holes of the lamellas. At least you have to fix the stripes to the lamellas with the copper wire with a “sewing technique”. A video tutorial will follow soon.
Set 2
Contains the 6 big vents and rings of the engine ventilation. The parts are made of resin. The work is still in progress. Pictures will follow soon.
The engine ventilation grills of set 1 will fit perfectly to the parts of set 2. You don’t have to alter the original DeAgostini hull parts. You simply replace the original DeAgostini engine ventilation parts.
Pricing & Ordering
SET 1
- in production, available in around six weeks
- 60 Euro / 72 USD / 55 GBP (incl. Shipping)
(limited to 30 sets for now, will be then available after another six weeks again)
SET 2
- available TBA
around 40,- Euro / 44.- USD / 33,- GBP
Conditions:
I only send out with ensured shipping.
Payment has to be made with PayPal.
If you are interested please e-mail me at message@scifimodels.de
I keep you informed.
Stay tuned!
NICO (scifimodels.de)

1.JPG2.jpg3.JPG4.jpg5.jpg6.jpg7.JPG8.JPGView attachment Original 5foot (2).jpgView attachment Original 5foot (1).jpgView attachment Original 5foot (3).jpg

1.JPG


2.jpg


3.JPG


4.jpg


5.jpg


6.jpg


7.JPG


8.JPG


View attachment Original 5foot (1).jpg

View attachment Original 5foot (2).jpg

View attachment Original 5foot (3).jpg
 
Last edited by a moderator:
Has anyone had any panels crack yet? While painting the bottom I found that panel bp15 cracked and it actually looks like it cracked a little bit of the bottom of bp30. I've always been reasonably careful while handling it. The only exception is that I held it vertically balanced on the thrust vector places for about a minute while I sprayed some of the flat parts(yes, if I could go back in time I would not do that again). While I can glue support to the affected area, I have to admit that it makes me a bit nervous about how this is going to hold up long term.
 
Has anyone had any panels crack yet? While painting the bottom I found that panel bp15 cracked and it actually looks like it cracked a little bit of the bottom of bp30. I've always been reasonably careful while handling it. The only exception is that I held it vertically balanced on the thrust vector places for about a minute while I sprayed some of the flat parts(yes, if I could go back in time I would not do that again). While I can glue support to the affected area, I have to admit that it makes me a bit nervous about how this is going to hold up long term.

I haven't had that happen so far, but I did have a plate that was slightly damaged in shipping. While I was able to get a replacement sent, I did attempt a repair with Tamiya ABS cement, and it repaired it perfectly. It's as strong as it was when new. So that might be worth a try, or at least be worth keeping on hand.
 
Has anyone had any panels crack yet? While painting the bottom I found that panel bp15 cracked and it actually looks like it cracked a little bit of the bottom of bp30. I've always been reasonably careful while handling it. The only exception is that I held it vertically balanced on the thrust vector places for about a minute while I sprayed some of the flat parts(yes, if I could go back in time I would not do that again). While I can glue support to the affected area, I have to admit that it makes me a bit nervous about how this is going to hold up long term.

Are you sure the panel itself cracked or just the paint?
 
Back
Top