Sendel
Active Member
Prime Radiant replica — Foundation
by Bunnicorn Props
Hello there,
After countless hours of freeze-framing blurry shots over multiple years, I’ve finally committed to finishing my replica of the Prime Radiant from Foundation. I hope you’ll enjoy seeing the full process as much as I had fun with it. — I’ve had a blast digging into every little detail. For me, the best part of prop-replicas is uncovering things no one’s noticed, spotting tiny inconsistencies, or cracking the logic behind a new fictional language.

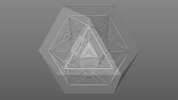
Version 30, rendered in Fusion 360
I know it’s tempting to grab ready-made sources or schematics, but I hope you’ll understand that this approach values the time and effort that goes into these builds. That said, feel free to use any techniques you see me using here!
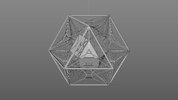
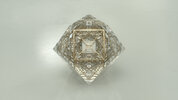
 On the left, my current model compared with the original prop on the right. 1x01
With Season 3 of Foundation just starting, it finally feels like the right moment to finish this project I started after the first season aired in 2021.
Originally, I paused because there weren’t enough high-quality reference materials. When Season 2 arrived, I picked it up again, but soon shelved it once more to focus on my life-size Stargate replica (more updates soon-ish). Now that my big project is nearing completion—and with everything I’ve learned—I’m ready to dive into more manageable builds.
My aim is to finish the replica by the Season 3 finale on September 12 (episode 10). The plan is to create a precise, bubble-free clear resin replica with detailed molded-in symbols (not laser etched). I’ll be using a resin printer, filament printer, and a pressure chamber.
If all goes well, I might consider a limited run later.
If you worked on this, you probably already spotted that the cage is not split in 2 halves in this visual. It's planned for later.
The design of this one is simpler than the others. It seems to be made of acrylic panels (or flat resin casts) assembled together. We can see reflects on the internal face of the last picture of this post. They are wrapped around a golden cage that is also simplified (more about this in part 3). I'm convinced there is a central core in it, but that's a subject for later.
It’s used in only a few scenes and not in really closeups shots. (spoilers - duh):

1x01
2. Hero curved version
This one is made of a solid pour of clear resin. If you look at the center top corner, you can clearly see it's not straight. All faces have a negative curvature. It may not be a voluntary shape, maybe it's because of how the mold was made. As the center is perfectly transparent, there is no clue of a core here.

2x01
3. Hero straight version
Same as the previous one, but this time if you look at the corners you can clearly see it's straight. Again, it looks like there could be a central core visible here. You can also see the two halves of the cage I was mentioning before.

2x01
4. Prototype version
This one has protruding faces: squares and triangles. Its body is transparent, the external faces are painted black/graphite with golden symbols. The sides between the main shapes are not straight, but all inclined. It's more obvious on the flat version.

2x06
5. Flat version
This one is self-explanatory, the design is flattened, including the cage that has more rounded internal angles here. What's funny is it's made of the same acrylic tiles used for the prototype version.

2x08
CGI
There are two CGI models used during the show until now. The second one was very helpful for the symbols.


2x01 2x08
Not completely related, but the opened version of the vault is based on a similar design.

2x01
As you may have noticed, I'm going for the curved hero version, but including the core. I like this one the most. I think it adds a bit of complexity to the object, and it may even help create a visual distortion when you look through it.
I’d love to hear what you think about the different versions. Which one do you prefer?
Anyone else building one or planning to? Let’s compare notes! For example: do you think the central core is a real internal element, or just a refraction illusion?
Bonus:
Here you can see the bottom of the simple version. It's white for some reason. It may be to diffuse light inside more efficiently for some shots.

1x10
Next week: Decoding the Language of the Angels — a deep dive into the Prime Radiant’s mysterious symbols, including the logic behind their shapes and placements.
Future posts will cover:
by Bunnicorn Props
Hello there,
After countless hours of freeze-framing blurry shots over multiple years, I’ve finally committed to finishing my replica of the Prime Radiant from Foundation. I hope you’ll enjoy seeing the full process as much as I had fun with it. — I’ve had a blast digging into every little detail. For me, the best part of prop-replicas is uncovering things no one’s noticed, spotting tiny inconsistencies, or cracking the logic behind a new fictional language.
Version 30, rendered in Fusion 360
A Quick Note
If you’re planning to make your own version of this prop, I encourage you to do your own research from scratch first—then come back and let’s compare notes. That’s how I do it, and honestly, it's the most rewarding way to spot new things.I know it’s tempting to grab ready-made sources or schematics, but I hope you’ll understand that this approach values the time and effort that goes into these builds. That said, feel free to use any techniques you see me using here!
With Season 3 of Foundation just starting, it finally feels like the right moment to finish this project I started after the first season aired in 2021.
Originally, I paused because there weren’t enough high-quality reference materials. When Season 2 arrived, I picked it up again, but soon shelved it once more to focus on my life-size Stargate replica (more updates soon-ish). Now that my big project is nearing completion—and with everything I’ve learned—I’m ready to dive into more manageable builds.
My aim is to finish the replica by the Season 3 finale on September 12 (episode 10). The plan is to create a precise, bubble-free clear resin replica with detailed molded-in symbols (not laser etched). I’ll be using a resin printer, filament printer, and a pressure chamber.
If all goes well, I might consider a limited run later.
Researches
The main Shape:
The core form is a cuboctahedron — a cube with its corners cut off, composed of 8 triangles and 6 squares. Once you know the length of one edge, you can calculate the rest, as all sides are equal.The Five Versions Seen On-Screen
1. Simple versionThe design of this one is simpler than the others. It seems to be made of acrylic panels (or flat resin casts) assembled together. We can see reflects on the internal face of the last picture of this post. They are wrapped around a golden cage that is also simplified (more about this in part 3). I'm convinced there is a central core in it, but that's a subject for later.
It’s used in only a few scenes and not in really closeups shots. (spoilers - duh):
- Jerril gives the PR back to Gaal 1x01
- Gaal tries to activate the PR 1x01 later Salvor relives this part 1x09
- Seldon is found dead 1x02 (there is an editing glitch here, the PR is both on the desk and on the floor)
- Salvor tries to activate the PR on Terminus 1x09
- Salvor looks at the PR before she goes away from Terminus 1x10
1x01
2. Hero curved version
This one is made of a solid pour of clear resin. If you look at the center top corner, you can clearly see it's not straight. All faces have a negative curvature. It may not be a voluntary shape, maybe it's because of how the mold was made. As the center is perfectly transparent, there is no clue of a core here.
2x01
3. Hero straight version
Same as the previous one, but this time if you look at the corners you can clearly see it's straight. Again, it looks like there could be a central core visible here. You can also see the two halves of the cage I was mentioning before.
2x01
4. Prototype version
This one has protruding faces: squares and triangles. Its body is transparent, the external faces are painted black/graphite with golden symbols. The sides between the main shapes are not straight, but all inclined. It's more obvious on the flat version.
2x06
5. Flat version
This one is self-explanatory, the design is flattened, including the cage that has more rounded internal angles here. What's funny is it's made of the same acrylic tiles used for the prototype version.
2x08
CGI
There are two CGI models used during the show until now. The second one was very helpful for the symbols.
2x01 2x08
Not completely related, but the opened version of the vault is based on a similar design.
Sizing the Radiant
I estimated the Radiant’s size based on a scene where it’s placed on an R60 Peli Case. I have the full box dimensions, but if anyone owns a real R60 and can measure the label area where the PR sits, that would help! I currently estimate the label area at around 97mm.2x01
As you may have noticed, I'm going for the curved hero version, but including the core. I like this one the most. I think it adds a bit of complexity to the object, and it may even help create a visual distortion when you look through it.
I’d love to hear what you think about the different versions. Which one do you prefer?
Anyone else building one or planning to? Let’s compare notes! For example: do you think the central core is a real internal element, or just a refraction illusion?
Bonus:
Here you can see the bottom of the simple version. It's white for some reason. It may be to diffuse light inside more efficiently for some shots.
1x10
Next week: Decoding the Language of the Angels — a deep dive into the Prime Radiant’s mysterious symbols, including the logic behind their shapes and placements.
Future posts will cover:
- Researching and replicating the golden cage and the core.
- 3d prints, silicon molds, cure clear resin in a pressure chamber.
- Possibly a custom display or box.
I’ll stream some of the process on Twitch: twitch.tv/bunnicornprops — follow if you want behind-the-scenes, resin disasters and breakthroughs!
Last edited:


