Cassian Andor (Andor Series) Blaster (MW-20 Bryar Pistol)

That looks so much like an old piece of metal that's been dulled through handling. Very well done, in my opinion!
Thank you! Seeing that video 100% convinced me that this gun was definitely not black. I kept thinking I was going too light, but now I feel it’s pretty darn close. Once I expose a bit more copper and get a nice dirty wash on there I’m hoping it’ll look even better.

I will say that the “copper” I used was probably too much on the orange side. Comparing it to the original you can totally see that the truly raw and exposed parts are like a BRAND NEW penny, not really orange. I will, however, retract my previous statement concerning the waste of time on the undercoat. Having all the variances in the finish wouldn’t have been achievable with drybrushing alone.

This is where I’m at now. Hoping to do the first wash tonight.
 

Attachments

  • 5F3936DE-8257-44A0-A6DF-0F70ADE001E3.jpeg
    5F3936DE-8257-44A0-A6DF-0F70ADE001E3.jpeg
    3.7 MB · Views: 105
Whelp, kinda had a disaster. Which is funny cause it was going so well I knew something would go wrong…

It all started with the oil wash. It’s been my personal experience that acrylic paint washes look like…paint. That’s it in a nutshell, imo, so I wanted to avoid that. I cannot deny the outcome. I think the results far exceeded my expectations. So what’s the problem you ask? It wasn’t drying.

Now I know very well that oils take more time to try, but this wasn’t even a true coat of paint, but a very thinned down wash. After 24 hours I was concerned. After 48, worried and after 86 downright annoyed. Knowing that oil paints dry more quickly under direct sunlight, I set the pieces outside for a few hours. Bad idea.

I’ve never worked with PLA before. Never even considered that it wasn’t as durable as ABS or other action figure/model/toy plastics ect. I was wrong. When I went to check on them a couple hours later the grips had warped to the point of curling and the trigger piece that meets the barrel had also become misshapen.

I brought the grips inside and was able to soften them up with some heat and press them back down flat. Same with the other piece, but it’s not the same. I have to force the pieces together now and you can see there’s some warping right down the middle section of the gun.

I’m a perfectionist, so now the gun is in a box in the closet. I don’t even wanna look at it atm or attempt to finish it right now. Considering buying another kit, but I dunno if I can go through that again. I spent A LOT of time on it. Way more than most of the pics I see online of other builds. I sanded the heck outta that thing to take those lines out and spent more money on primer and paint than I did the damn kit.

Oh well, lesson learned, I guess. Here it is before I banished it to the closet. It’s not perfect. The prop is darker in some places and mine is darker in others, but I’m really happy (mostly happy) with the results. Still needs a sealant, another wash, a second wash, some detail work, drybrushing and some polishing.

Good news is…the paint finally dried.
 

Attachments

  • 4C15D50E-2D2F-421F-9893-8C3CED410666.jpeg
    4C15D50E-2D2F-421F-9893-8C3CED410666.jpeg
    3.4 MB · Views: 128
  • 0A73146C-F0AA-4C79-848F-ADBE9589E3AC.png
    0A73146C-F0AA-4C79-848F-ADBE9589E3AC.png
    5.3 MB · Views: 141
Last edited:
Every project is a lesson and unfortunately not all of them survive :/ but kudos in the brilliantly close paint job! very nice indeed!
I'm just printing up a new version (to me) of this blaster so am deffo gonna come back here to recall your methods and to hopefully share my results.
 
Thank you for the kind words. I tell ya that PLA is weird. After I heated it up, and it happens in seconds, I could literally feel the layers inside squishing in my hands. It was like a croissant or something lol. How does this stuff even survive?! Forgot about me being an idiot and leaving it direct sunlight, I’m sure most people wouldn’t think twice leaving a prop in their car or something. And hour on a hot day and it would be ruined.
 
Thank you for the kind words. I tell ya that PLA is weird. After I heated it up, and it happens in seconds, I could literally feel the layers inside squishing in my hands. It was like a croissant or something lol. How does this stuff even survive?! Forgot about me being an idiot and leaving it direct sunlight, I’m sure most people wouldn’t think twice leaving a prop in their car or something. And hour on a hot day and it would be ruined.
PLA is typically used for 3D printing projects because it’s easy to print.

But when it comes to armor or handheld props that are going to see a lot of handling or experience high temps, most folks will go with PLA+, ABS, or PETG. Those materials can be more difficult to print but are generally more durable than basic PLA.

Sorry to hear your piece warped when it was so close to being done… that’s a rough one.

Sean
 
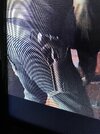
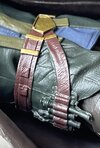
I'm so sad this happened! I'd be so frustrated if that happened to me!

There are four commonly used plastics in 3D Printing: PLA, PLA+, PETG, and ABS.

PLA has a very low melting point and glass transition temperature, almost no shrinkage, and no weird chemical reactions most of the time. It's also a very hard and rigid plastic. This means it's very easy to 3D print because the printer doesn't have to get as hot, you don't have to worry about it chemically bonding to the print bed, and you don't have to worry about the middle of the print cooling off and warping before you're done. Your prints will be as dimensionally accurate as your printer can manage. It's also very durable for a single-piece part. If I wanted a wedge to prop a door open, for example, PLA would probably last longer than the other options.

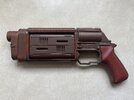
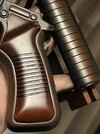
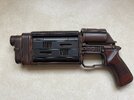
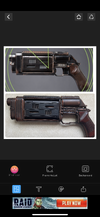
It has downsides, though. First, it will start to deform around 60 degrees C. Now, if you'd just left a bare bit of plastic outside you probably would have been fine but paint - especially dark coloured paint - will absorb heat. Almost certainly it's that combination of direct sunlight and dark paint that caused your specific issue. PLA is also very difficult to sand, as I'm sure you've discovered, because it's such a hard plastic. This means it's a lot more work to finish for painting. Finally, PLA doesn't solvent-weld well so joining parts involves gluing, which is inherently weaker and and complicates painting.

PLA+ is PLA with something added to it to try and mitigate one or more of PLA's downsides. The most common is the low deformation temperature; the next most common is the inability to solvent weld. But PLA+ is not a standard, so every manufacturer's PLA+ is different and it is completely impossible to make generalisations about PLA+.

PETG's melting point is higher than PLA's but still low enough that most printers can handle it, and there's no real risk of a PTFE lined hotend (which is very common, especially in Creality printers) turning into nerve gas. It is also low-shrinkage and thus low-warp, so it's almsot as easy to print as PLA. It has a much higher deformation temperature, up around 90 degrees C. It's not quite as rigid as PLA which makes it easier to sand, and it's just a tiny bit flexible which means it's a better choice for something that will be screwed or bolted together - the plastic flexes around the bolt rather than being chewed up over time.

PETG can be solvent-welded but this involved MEK, which is incredibly toxic and a controlled substance in many jurisdictions. PETG is also a little harder to paint, since many paints don't stick well to PET and you're more likely to find a spray paint that just never cures on PETG. (Not very likely, mind you, but more likely than with PLA.) Finally, PETG has an unfortunate tendency to fuse with both glass and PEI, requiring some extra work to keep it from becoming permanently attached to the print bed.

ABS has a much higher melting temperature, meaning that there is a real risk of a PTFE lined hotend becoming a neurotoxin. ABS is thus usually printed with all-metal hotends. ABS also shrinks quite a bit when it cools, which means you need to oversize things slightly to get them to be mechanically accurate, and also means that the middle of a print will shrink when the top and bottom don't, so you get all kinds of warping and splitting issues if the print bed isn't enclosed (and often heated). Also, ABS has much more aggressive fumes when heated, requiring a ventilated space. (In reality, all filaments release microplastics and toxic fumes, and you really should not spend all day next to a running 3d printer, but the effects of PLA and PETG are much less noticable. We probably won't know for 30 years which is actually the most dangerous.)

On the upside, ABS is easy to solvent-weld, which allows for very strong joins without foreign materials involved - which in turn makes it that much easier to paint. It's also relatively soft, making it much easier to sand smooth (although this also makes it a bad choice for inserting screws into.) And it's extremely temperature tolerant, with a deformation temp over 100 degrees C. In short, ABS is probably the most difficult of the main three types to actually print, but by far the easiest to join, finish, and paint if you're making something that needs to hide its 3d printed nature.


All of this is, I'm sure, cold comfort, but it may be of use to the next person. And in six months when you're ready to return to this project, perhaps this information will help.
 
Those pictures are after the warping? It looks fantastic to me! Seriously great job on that, Sir!
Thanks, man! The warping is just in the middle there. You can see the lines where the trigger assembly meets the barrel aren’t as straight as they should be is all. I guess I can live with it. I may get another kit just to have for sanity’s sake, but I really don’t wanna do that all again!

Vagabond Elf : Wow! Thank you (and masterjedi322 ) for the detailed explanation! That’s great information. I’m grateful. Now that I’m getting more and more into these prints, this is stuff I should I definitely know!
 
A week later and this piece with the heaviest wash is still technically not dry. I can still wipe away some of the brown and have it stain a white rag. As crazy as that may sound, I have to say that doing just that and my constant handling of the piece has created a weathering effect I don’t think I could ever reproduce.
 

Attachments

  • 8C79AB10-9389-4A39-B836-B252791C6067.jpeg
    8C79AB10-9389-4A39-B836-B252791C6067.jpeg
    1.3 MB · Views: 95
That's a huge bummer about the warping but the weathering looks fantastic! I wonder if thr creator would send you just a replacement for the warped bit. Of course you'd still have to start from scratch with it again but the rest of it looks so damn good that's what I'd try!
 
Thank you so much. That’s means a lot. Honestly, I’ve never attempted anything like this before, so I’m constantly being surprised by the outcome.

Oh, I fixed the warping, mostly! That day I should have have just let it be and walked away, but I was so disappointed and just wanted it back to normal, I hastily overheated it and just wasn’t thinking clearly. Now that I’ve had time to process it, I took the piece and heated it up again, but much more slowly now knowing how pliable it can get with such little heat applied. Now the pieces all fit together without force. That middle line is still a bit crooked, but I can deal with it.
 
Yay for repairs!

Also yay for a Star Wars prob that should look beat up, right?

As for the wash: it is possible that the oil wash is reacting to either the base plastic (not likely with all the paint you have there, but possible) or the acrylic paint itself. So there's a chance it will never fully cure. Oils are not a thing I know much about, alas, so other than raising this possibility (which can occur when mixing brands of spray paint), I don't really have any suggestions on that.
 
A week later and this piece with the heaviest wash is still technically not dry. I can still wipe away some of the brown and have it stain a white rag. As crazy as that may sound, I have to say that doing just that and my constant handling of the piece has created a weathering effect I don’t think I could ever reproduce.
Love the technique you shared. The oil wash turned out amazing. I mostly work with metal parts but this is a great idea to add to my toolbelt.
 
Thanks, guys. It’s definitely been a learning experience.

Vagabond Elf : it’s definitely a possibility that the plastic is to blame here. You can use oils on plastic, so long as it’s properly prepared. Oil is a lacquer based and so are all my spray paints and the thinner I used, though, so I’m not sure why I had so much trouble. I will say that it was pretty cold out, so oils can take more than a week to be dry to the touch under those conditions. That’s why I opted to put them outside on the sunny day when I was home and it did help. The pieces that were thick enough and had a normal wash did cure nicely. It’s just the barrel piece that had a thicker coat on it. I could probably seal it, do a final acrylic wash and spray it with flat to finish and it would be fine, but I’m in no rush to finish, so I’ll just wait a bit longer.

dkraude : it’s definitely a different result that acrylics. I really like how it turned out, especially for a blaster like this where I wanted it to look almost oily rather than dirty. The one thing I’d suggest if attempting to try this method is maybe use a thinner bought in the art store NOT the hobbie shop. I used Testors lacquer thinner. Next time (if I’m not scarred for life lol) I’d go with a better thinner like Humbrol or possibly mineral spirits or a good turpentine like Windsor and Newton. I’d maybe try a higher caliber paint as well. I just used the cheap Hobby Lobby store brand.
 
Can someone with a PC do me a really big favor and take PROPER screen caps of this belt and holster, please?! I hate taking pics of a tv screen, but my only access to a computer is at work and I can’t be installing VLC and other stuff to bypass the DRM thing. I would appreciate it.

It’s at the very end of E12 when Cass is helping Bix onto Pegla’s ship to escape Ferrix.

I’ll explain why in the next post….
 

Attachments

  • 3C6D7AE6-F506-4625-A622-2FDE7B582C10.jpeg
    3C6D7AE6-F506-4625-A622-2FDE7B582C10.jpeg
    8.1 MB · Views: 57
  • 25D35CBF-20FE-45BE-A88F-4CEC71D0F03C.jpeg
    25D35CBF-20FE-45BE-A88F-4CEC71D0F03C.jpeg
    8.4 MB · Views: 49
  • CA165E94-9EC7-446E-B531-CD3C6EE48105.jpeg
    CA165E94-9EC7-446E-B531-CD3C6EE48105.jpeg
    7.4 MB · Views: 52
  • 3AB7A791-538C-4C81-B250-E204264891CF.jpeg
    3AB7A791-538C-4C81-B250-E204264891CF.jpeg
    3.5 MB · Views: 59
  • B0D6A764-FF0F-4ECB-8498-49BFC2E55546.jpeg
    B0D6A764-FF0F-4ECB-8498-49BFC2E55546.jpeg
    7.8 MB · Views: 57
So, I was going to make (have made) Cass’ original belt with a Bryar drop added to it, but that wouldn’t be at all screen accurate as it’s really just a tool belt. Which makes sense. Cassian was living a lifestyle where he needed to carry a gun, but not an open carry. He wouldn’t want to bring any attention to himself, so he mostly carried the Bryar in a shoulder bag.

Anyway, I love the look of this belt and was paying extra to have the buckle made in solid brass, but I just couldn’t pull the trigger. I then thought about just making it AS the actual tool belt, but that’s not really as “cool”, ya know? I don’t plan on cosplaying and if I did, I wouldn’t go with his look from the first arc, anyway.

I’ve watched the series like 4 times or so, but I only really remembered him tucking the Bryar into the back of the second belt he wore on Aldhani, never actually having it holstered. Well, today I just finished my 5th watch though and sure enough, there is indeed a 3rd belt with an actual holster for the Bryar and now I DEFINITELY want to get that done.

Id be very grateful if someone could provide me some decent reference photos to work with from e12. If anyone has any others of that particular belt, that’s would be awesome. Unfortunately I can’t find a single frame from the episode where his jacket isn’t blocking where the buckle might be, so that’s gonna be an issue unless I just go with buckle-less look like the Aldhani belt.
 

Attachments

  • 8F9F070D-9C5C-4314-8968-2D6279B7437F.jpeg
    8F9F070D-9C5C-4314-8968-2D6279B7437F.jpeg
    275.1 KB · Views: 59
  • 4FF06735-1CF1-4B6C-80EF-B244FABBACC7.jpeg
    4FF06735-1CF1-4B6C-80EF-B244FABBACC7.jpeg
    580 KB · Views: 54
  • 8C38EB03-C0B4-4EAF-810B-3092C70EE410.jpeg
    8C38EB03-C0B4-4EAF-810B-3092C70EE410.jpeg
    2.1 MB · Views: 58
Last edited:
Well, I’ll be damned. Didn’t even know that existed. Thank you! I went through it, I found the one below, but they missed the money shot of the side of the holster by a frame. They got it, but when it was blurry. I really need that shot in order to get the proper shape. Unfortunately, I don’t think there’s enough to go by on this one, so I’d have to take some liberties.
 

Attachments

  • 580A8AAE-4F08-4F25-B3E9-2B041D1F2E58.jpeg
    580A8AAE-4F08-4F25-B3E9-2B041D1F2E58.jpeg
    221.6 KB · Views: 55
  • 4588AE7F-1010-4525-A042-563016E80190.jpeg
    4588AE7F-1010-4525-A042-563016E80190.jpeg
    7.8 MB · Views: 55

Your message may be considered spam for the following reasons:

If you wish to reply despite these issues, check the box below before replying.
Be aware that malicious compliance may result in more severe penalties.
Back
Top