Age of Ultron Captain America Build (Build complete! pics on page 5)

Re: Age of Ultron Captain America Build (first attempt at cap build)

This is looking better and better every time I check in on the thread! Loving all the hard work you're putting into this - it's gonna be amazing when the final product is ready!

On a side note, do you happen to remember the listing for the gloves on amazon? Trying to upgrade my gloves for my own Cap build. haha

Regards,
Aeric

Thanks man! Depending on how quickly everything moves I should be ready for a full suit up in about 2 weeks. And actually I doublechecked, I was mistaken, I got them from ebay! Specifically it was this listing http://www.ebay.com/itm/28137116726...49&var=580401428989&ssPageName=STRK:MEBIDX:IT The materials a bit thin but it's good as a base to build on :)
 
Re: Age of Ultron Captain America Build (first attempt at cap build)

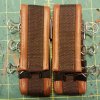
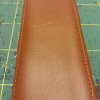
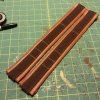
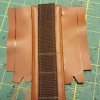
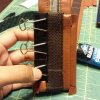
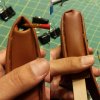
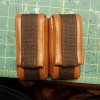
Hey all, just a quick update to keep everything moving! Spent the weekend trying to figure out a solution to my issue with sewing through the pleather and foam. After an embarrassing amount of time spent on different methods 2 different kinds of teflon presser feet, I ended up figuring a more outside the box solution. Instead of folding the pleather around the edges of the foam and sewing, I tacked the foam to the back of the pleather with spray adhesive, and did my edge topstitched with the foam side up. This let it move smoothly through the machine since the foam doesn't stick to the presser foot, and the feed dogs keep the pleather on the bottom through. Then I simply spread some barge onto the foam, and carefully folded the edge over. My test ended up turning into me making two of the pouches in one go! The webbing around it was just topstitched onto the flat length of pleather/foam, then I used more barge to glue the sides in and clamped it all with binder clips for drying. Forgot to take pictures of this method since I wasn't sure it would work at the time, but when I do the other four I'll make sure to snap more shots. For now, here's the two pouches with the clips still on (whoops!)

12047469_10153021152322234_940632367_n.jpg
 
Re: Age of Ultron Captain America Build (first attempt at cap build)

So belt is done much quicker than I thought it would be (aside from attaching the buckles and greebles)! And as promised, actual pictures showing how I put all the pouches together.

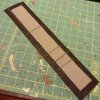
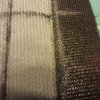
Just to quickly run through it again: (1) Cut out the pleather and headliner, tack the headliner with spray adhesive (2) create the topstitching by sewing with the foam side up (3) fold the edges over and glue down with barge cement (4) topstitch the webbing straps down the middle. The chalk lines were to make where the sides needed to be lined up as well as the foldover of the flap.

12053149_10153024532522234_633577036_n.jpg12030929_10153024532567234_353337763_n.jpg12033616_10153024532592234_1340263592_n.jpg11997464_10153024532617234_129073401_n.jpg

And for attaching the sides: (1) glue to the front with barge (2) line it up with the appropriate line on the back, fold the flaps, spread glue, and clamp it (3) push in the bottoms, spread glue on the inside, push the bottom into place with a popsicle stick (picture was taken mid-adjustment so it doesnt look flush yet) (4) Once it dries, add some velcro for the flap. I also added some sections of craft foam inside the pouch to keep the sides taut and so it appeared full. I won't be using these for storage anyway since most of them aren't bigger enough to store anything more than gum or a lighter haha

12026702_10153024532632234_493650365_n.jpg12048748_10153024532682234_199818736_n.jpg12033364_10153024532242234_897643376_n.jpg12023272_10153024532462234_1988844061_n.jpg

And lastly, pics of all 6 pouches attached on the belt and how it sits on me with the jacket and pants on!

12050409_10153024532952234_316799565_o.jpg12059733_10153024532817234_1998727345_o.jpg
 
Re: Age of Ultron Captain America Build (first attempt at cap build)

Feels like it's been forever since I updated this! After I finished up the belt I took a couple days to rest since the back harness is all that's left and will only take 3 or 4 days to make. But, I did do some work of attaching all the accessories and make the extra greebles for the suit!

12050976_10153031532852234_1813064322_o.jpg

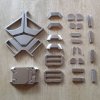
On the left are my back buckles and belt buckle made by PannausProps, next row are the arm magnets made by starlordquill and Kevin Gossett (would definitely reccomend snagging a set from their thread in the Projects Run forum!), the strap sliders are from The Bronze Armory and the two rows on the right are the assorted greebles and pouch tabs that I made. Some are a little messier than I liked since they're just craft foam coated in wood glue and spraypainted, but once they're on the accessories they look just fine :) Was a bit sad that I had to repaint all the casted pieces though. The buckles and magnets were beautifully coldcasted, but they were all different colors and I had to get everything to match.

12053278_10153031532837234_1485063190_n.jpg12062489_10153031532832234_2093497918_o.jpg

Attached the magnets to the glove and forearm using epoxy, and the craft foam greebles using barge cement. Felt REALLY satisfying to finally have these fully ready to wear!

12062843_10153031532822234_2135708625_o.jpg

And of course, the belt with everything glued down and ready for action. I spent a few minutes just looking at this on my table when it was done. Despite my issues at the beginning, I think the belt is definitely my favorite piece of this whole project!
 
Re: Age of Ultron Captain America Build (first attempt at cap build)

Feels like it's been forever since I updated this! After I finished up the belt I took a couple days to rest since the back harness is all that's left and will only take 3 or 4 days to make. But, I did do some work of attaching all the accessories and make the extra greebles for the suit!

View attachment 534315

On the left are my back buckles and belt buckle made by PannausProps, next row are the arm magnets made by starlordquill and Kevin Gossett (would definitely reccomend snagging a set from their thread in the Projects Run forum!), the strap sliders are from The Bronze Armory and the two rows on the right are the assorted greebles and pouch tabs that I made. Some are a little messier than I liked since they're just craft foam coated in wood glue and spraypainted, but once they're on the accessories they look just fine :) Was a bit sad that I had to repaint all the casted pieces though. The buckles and magnets were beautifully coldcasted, but they were all different colors and I had to get everything to match.

View attachment 534318View attachment 534317

Attached the magnets to the glove and forearm using epoxy, and the craft foam greebles using barge cement. Felt REALLY satisfying to finally have these fully ready to wear!

View attachment 534316

And of course, the belt with everything glued down and ready for action. I spent a few minutes just looking at this on my table when it was done. Despite my issues at the beginning, I think the belt is definitely my favorite piece of this whole project!
Glad you like the magnets!!

Sent from my XT1254 using Tapatalk
 
Re: Age of Ultron Captain America Build (first attempt at cap build)

Back after just 3 days! The harness ended up being an extremely quick build, partly due to how little sewing it required.

12084844_10153036056152234_1584283695_o.jpg12062477_10153036056272234_1389420543_o.jpg

I started out using SMP Designs' pattern for the harness. Instead of being 4 straps that clip together though, I wanted to make it two continuous straps. Made a pattern for that by attaching SMPs pattern to the buckle, having a friend hold the buckle against the back and pulling the paper straps together at the front, marking where they intersected. Then I just traced that shape onto paper and made all the necessary adjustments to thickness and curvature that I need to fit the straps to the buckle bars and around my shoulders. Forgot to take pictures during this, but after about 3 hours of adjusting and redrafting patterns, I finally got a shape I was happy enough with! I then traced the pattern onto craft foam (had to use multiple sheets since I didn't have a big roll lying around) and taped them together to test fit it on the buckle and on the mannequin. As you can see, I ended up with a pretty snug fit that lays just where it should! For the cordura overlay I just grabbed a piece of pattern paper, traced the straps onto it and use a seam allowance ruler to design the shape of the overlays.

12062703_10153036056412234_1517098332_o.jpg12062690_10153036056462234_1797613663_o.jpg12076408_10153036056512234_1604296465_o.jpg12082708_10153036056547234_434667307_o.jpg

Next came the four-part steps to actually make the straps!
1. trace the foam pieces onto the back of some pleather, trim the foam down a bit, make snips into the pleathers seam allowance so it can follow the foam's curve, tack the foam to the back of the pleather, use barge cement to glue the edges around it, and install some wide eyelets (okay so step one is multiple steps haha)
2. Make the cordura overlay but topstitching the edges down, slip the slider buckle on it, glue it down to pleather with more barge, lining it up with the eyelet.
3. Cut appropriate lengths of 1" webbing that matches the cordura. spread glue on one end of each section of webbing, fold it around the ends of the strap and clamp as it dries. For the straight length, I just fed it through the eyelet, made sure it was taut, and glued that down to the inside of the strap. The longer piece I slid through the buckle making sure it was centered, then spread more glue on the back of the webbing and slowly pressed it down to the match the curve of the strap. Since it's cotton webbing it has some flex to it making it not impossible to get that curve.
4. Make the second one, admire your work while standing on a chair to take pictures!

And lastly, attach the straps to the buckle with your method of choice. I epoxied the straps to eachother instead of sewing since I wasn't sure my machine could make a strong enough stitch through all the different materials. did a stress test on it once the epoxy dried and the straps didn't come off after a lot of tugging, so it'll definitely be sturdy enough to wear.

12076256_10153036056687234_1400548252_o.jpg12059566_10153036056697234_1516502427_o.jpg

Not quite done yet, but very close. All that's left is to make the shoulder As and make some brackets for the back of my Disguise shield to reinforce it. Almost at the finish line!
 
Re: Age of Ultron Captain America Build (first attempt at cap build, 95% done)

Looks fab! So, are you planning to 'shrug' into the harness since it's all connected? How does that work for you?

I'm curious as I was worried that it would be difficult. For my remote clients (that I can't fit directly), I made the harnesses with the clip under the arm. While not, technically, correct, it allows for ease of getting on and off and, if needed, a convenient place to adjust the tightness of the straps.

I had an email from someone on my site yesterday asking about the template for the harness and how much curve to add and length, etc. I sent him my file as a jumping-off point and advised him that it's not a piece that you can just 'get a template' for. It really has to be custom fit to each person's body in the suit. Especially if you're expecting to hang the shield on it.

Having experimented for this, what do you think?

Thanks man! And the way I get it on easiest is basically by putting my arms through the loops, lifting it over my head so it falls down to my shoulders, and shrugging it in place. Getting it off is kinda like shrugging off a backpack I haven't had any issues getting it on and off, and I think thats partly because there's a little space/curve under the armpits. I definitely think the clip is the safer way to go especially for clients though, and it wouldn't be too hard to adjust the pattern so that the clip is completely hidden by the armpit I think if they wanted to. It probably also adds some stability as a sturdier stress point for hanging shields! And definitely right about the custom fitting, I wish I had remembered to take a picture of my final pattern cause I ended up doing a LOT of adjustment to get the curve right, and even then there's still room for improvement!
 
Re: Age of Ultron Captain America Build (first attempt at cap build, 95% done)

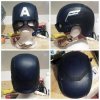
Alright guys, here we are. The last update to this thread (that is before I get some shoot photos done :p). The suit was completed with the harness, so all that was left is my helmet and shield. I bought one of Pannaus Props' rubber AoU helmets that came in last Friday and it looks great!
12077249_10153041903847234_574253722_n.jpg

The fit's a liiiittle bit tight around the eyes, just enough to make the skin around them puff a bit if I don't settle the helmet right. But no pain or discomfort at all and looks great. As for the shield, I ordered a fiberglass one from Art Funk Props with some money I was able to make from selling off some old costumes and props I don't use anymore, but it won't be in until later this month. So, in the meantime I thought I use one of the Disguise cap shields. The elastics on it were way too flimsy and weirdly place though, so I wanted to make some quick brackets and handles for it.
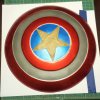
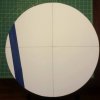
12119221_10153041903337234_1479238134_o.jpg12085029_10153041903357234_1109138004_o.jpg12085092_10153041903382234_832693172_o.jpg12124286_10153041903412234_930857082_o.jpg

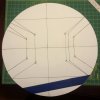
(If you're wondering why the star is gone, I actually bought two Disguise shields. One to use as my regular shield, and one to modify into a blank silver shield for a quick SSR Uniform Cap. I used the SSR one to mark the circle into the oaktag since it'll be repainted and it doesn't matter if I get sharpie on it). First step was figuring out a pattern for the brackets. I traced a circle using one of the Disguise shields, cut it out, and then more or less marked the center of it. I then used a ruler to draw the brackets where I approximately wanted them to lay while looking at how Art Funk places their brackets. Then after I figured out a size/placement that I liked, I cut out the patterns, laid them into the back of the shield, and wrote down how much I'd need to increase each bracket to compensate for the curve.
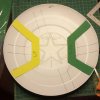
12116528_10153041903462234_1231396106_o.jpg12076591_10153041903507234_1853725477_o.jpg12112781_10153041903772234_33651885_o.jpg12116325_10153041903747234_605181199_o.jpg

I traced the patterns onto some craft foam and then doublechecked to make sure they fit correctly. I also used a sharpie to mark where I wanted to align the brackets, it took me a few tries hence the extra lines. Then I got some worbla and heated it up to wraped around the brackets as flat pieces, reheated the covered brackets and shaped them to the curve of the shield before they cooled. The wax paper is there to prevent the worbla from adhering itself to the plastic shield, and to protect the shield when I needed to reheat the worbla while it was still on it. After I got both of them shaped I made some loops for the straps to go through using some rectangular o-rings and some strips of worbla to adhere them in place. Luckily, the worbla didn't stick to the metal so they can still swing freely!

12082684_10153041903557234_356507041_o.jpg12084772_10153041903597234_975171906_o.jpg

I made some quick straps using the same method as I did for the belt and harness, foam strips wrapped in pleather. Got some buckles from a cheap trimmings store and removed the tines from them and looped the end of each belt through there, securing it with epoxy. I took measurements by putting the left gauntlets on and measuring around the hand where the magnet rests, and around the opening at the other end of the glove. That way they'd fit snugly around the gauntlets while still having some extra room to loosen if necessary. Then I just looped the belts through the rings, and bam, a much more sturdy way to hold the shield the gives it some extra reinforcement! Instead of attaching the brackets permanently, I attached them with 1" wide industrial velcro. That way I can remove them from the shield and use them with the blank silver shield as well instead of having to make a whole other set of brackets. I'll be smoothing out and sealing the brackets for painting when I paint the silver shield tomorrow, but I'll probably leave the back of the disguise shield unpainted since I'll only need it for NYCC.

And finally, the suit up!

20151004_191005.jpg20151004_191330.jpg20151004_191343.jpg

Apologies for the lighting not being the best, but my girlfriend managed to get a quick shot of the details as I was reaching to take off the helmet haha. Thanks a lot for all the encouragement as I worked on this build you guys! Once I've got some good photos of the suit in action I'll be sure to post them up here (and probably of my Art Funk shield when it comes in haha). Hope you all had as much fun watching the progress as I did doing the build! :)
 
Thanks guys! And I am definitely very proud of this, and also eager for my whenever I can start my next suit build! hahaha
 
Thanks guys! And after having a blast at NYCC wearing the suit on Saturday, I am happy to report that it's more or less still in one piece! Had a few minor repairs that I took care of today after I got my energy back, and also did some tailoring to take in the overshirt and pants at the waist (turns out I lost more weight than I expected I would at the start of this build). I've got a couple fun pictures from the con to share with you all featuring a bunch of my friends who happened to be cosplaying Marvel characters as well that day, but first I wanted to show off one last cool thing I figured out for the suit the night before I wore it. I had some spare 3/4" neodymium magnets that I ended up not using for the belt laying around, so I took a chance and attached two to the straps of the harness and two directly to the shield. Instead of putting the magnets on or behind the actual buckle, I slipped them underneath the 1" webbing straps of the harness. This kept them out of sight while not creating such a thick barrier to negate the strength of the magnets. Took a quick video to show off my last minute brain blast!

And here are a bunch of pics, some serious, but mostly silly, featuring a bunch of friends from college and conventions!

friends1.jpgfriends2.jpgfriends4.jpgfriends3.jpgfriends5.jpgfriends6.jpgfriends7.jpg

P.S. In the 2nd group picture where Matt Murdock is laughing at the camera was because Ms. Marvel, having an in-character fangirl moment over the Avengers, went "But who's that guy?" haha
 
Back
Top