28" Hasbro Falcon.

The Makerman

New Member
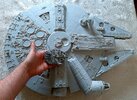
Hi guys, I'm just about to embark on the huge task of superdetailing the 28 inch Millennium Falcon.
The last article I read was by Randy Cooper when he built his with his resin and PE additions. But that was a few years ago now so have we learnt anything new in the meantime?
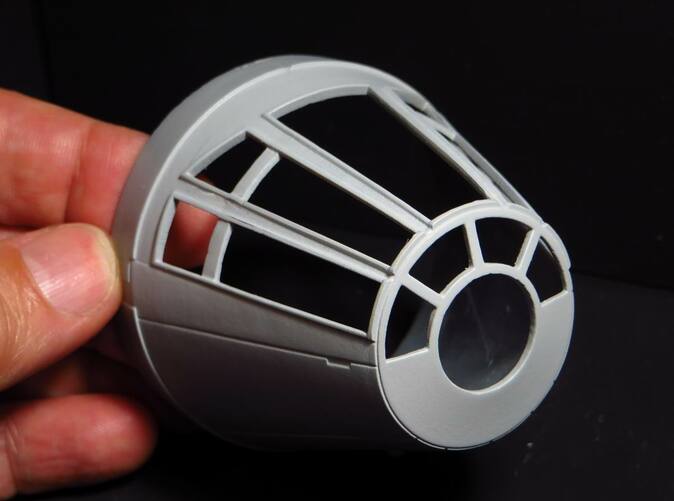
I'm probably going to make my own bits and pieces from resin and styrene but the more information I have on the initial soft plastic model the better.
Andy,
The Makerman
 

Attachments

  • Screenshot_20210510-173958_Chrome.jpg
    Screenshot_20210510-173958_Chrome.jpg
    318.4 KB · Views: 172
Truth be told Id like to hear how these builds hold up.
Polypropylene is not unpaintable... and actually most of the bumpers on late model VW, audi and porsche are all Polypropylene because its cheap. However in manufacturing they're flame treated and coated in a product called hyperprime to have a base to paint on top of.

The flame treatment isnt just waving a torch over it, it's a specific part of a flame for a specific period of time so dont go heating up your plastic.

Without this process to change the surface energy paint just can't stick to it sensibly. I spoke with a chemist and was assured the Polypropylene primers you buy at the hardware store will fail and dont really work.

You might cheat adhesion for a few years but then I suspect living through a few summer/ winter heat cycles its going to start falling off.
If you think automotive plastic adhesion promoters will work forget it, they wont.

I have one of these falcons at home and never bothered once I found was Polypropylene.

All I could come up with as a sensible adhesion suggestion though was MEK.
Polypropylene drain pipes use MEK as a primer before gluing... generally even the glue doesnt stick that well after priming and after time can sort of be chipped off. But perhaps a light coat of pipe primer or MEK through an airbrush ( wear your mask) would open the plastic up to allow primer to bite in.

Now the thicker the paint film the more prone it will be to shrinking back and pulling away. But if you can almost work with the factory colour as a ground and mist your base colour over as more of an overspray you may stand a chance.

I would just hate to see someone go to all the hours and effort of painting this only to have it crumble in their hands in a few years time.

Cheers,
Josh
This has been a learning curve to be honest. I spoke to Randy Cooper and he used car plastic primer (for plastic bumpers) on all the surfaces. I think it's a kind of etch primer. His Falcon seems to have held up well. He also recommends using hot glue to fix parts as it to is a kind of vinyl.
He said to make sure the model surface if sanded with 40 grit to give the adhesive more bit.

Unfortunately automotive plastic primer wont do much as why I suggested pipe primer.
40g is awfully coarse.
Sanding gives you 2 things, 1 is reduces surface energy and 2 all those sanding scratches actually give you more surface area for the paint to adhere. If his is holding up I think you will find its the sanding doing it. Im still weary that wont flake off though.
Im sorry if this sounds negative on your proposed build, Im excited to see you move forward with it. Im a trade qualified automotive painter for 18 years now and have really studied this trade and paint/ resins/ composites and if I can pass on some knowledge to help you hopefully succeed I would rather say something than nothing.

But nothing ventured, nothing gained so you can only give it a shot with the best knowledge you have. Are you making sidewalls and pieces or did
You buy some?

How about a cockpit? Or just leaving that blacked out?

And what else requires correction on the model?

Cheers,
Josh
 
Last edited:
Unfortunately automotive plastic primer wont do much as why I suggested pipe primer.
40g is awfully coarse.
Sanding gives you 2 things, 1 is reduces surface energy and 2 all those sanding scratches actually give you more surface area for the paint to adhere. If his is holding up I think you will find its the sanding doing it. Im still weary that wont flake off though.

But nothing ventured, nothing gained so you can only give it a shot with the best knowledge you have. Are you making sidewalls and pieces or did
You buy some?

How about a cockpit? Or just leaving that blacked out?

Cheers,
Josh
I'm used to scratchbuilding. The pod racer in my avatar was built from scratch so I'm going to build the side walls and landing gear doors. I'm having a bud make me a lighting kit for it. I had intended to build as much of the cockpit as I can. I may spring for a few bits from shapeways later in the build. I'm just planning it at the moment. So we will see.
Andy.
 
I'm used to scratchbuilding. The pod racer in my avatar was built from scratch so I'm going to build the side walls and landing gear doors.
Andy, when I read your first post I looked it up & checked prices,because yeah, it looked like a totally cool project! Prices however kept me from seriously considering it any further. But if you HAVE it already, HAVE AT IT BRO! I would! You can drill holes & physically anchor parts, sand & use flexible auto primer, then re-sand & use more... but pay attention to what Josh said though... time may not treat some of your work on it well, but hey- this is the FALCON we're talking about! What a piece of junk! A little deterioration here & there over the years might just lend a greater air of authenticity to the piece! Like Jack Burton said, you never know 'till you try.
I'm so gonna follow this!
Yeah, prices have gone up since it came out originally. My wife bought me this for Christmas several years ago and it's sat on top of a wardrobe until now. Another case of people buying four or five and then selling them on ebay for four times the price.
I've spoken to a friend who has already started on his and he's told me to use an adhesion promoter as he used the bumper primer and it peeled off. But I'm sure I'll learn what sticks as I go along.
Andy.
 
Andy, when I read your first post I looked it up & checked prices,because yeah, it looked like a totally cool project! Prices however kept me from seriously considering it any further. But if you HAVE it already, HAVE AT IT BRO! I would! You can drill holes & physically anchor parts, sand & use flexible auto primer, then re-sand & use more... but pay attention to what Josh said though... time may not treat some of your work on it well, but hey- this is the FALCON we're talking about! What a piece of junk! A little deterioration here & there over the years might just lend a greater air of authenticity to the piece! Like Jack Burton said, you never know 'till you try.
I'm so gonna follow this!

What are they worth now?. We payed $120 Australian new from memory.
Cheers,
Josh
 
Just a quick size comparison with a small 1/241 Revell Falcon I gave a better paint job (or is that worse) to a while back. With all this talk about adhesion I'll have to do some tests on the interior to see what sticks and what doesn't. Before I tackle the hull.
Andy.
 

Attachments

  • 20210513_065235.jpg
    20210513_065235.jpg
    3.1 MB · Views: 194
Not meant to discount or contradict what Starks said. but this is how ILM's Bill George finished his (again no guarantee it won't flake off 20 years down the line, but it seemed to work for him)
from Facebook Groups

"This is what was recommended online and it worked great for me. The adhesion promoter on the right is for painting flexible car bumpers. That goes first followed by the DupliColor primer. I applied the enamel base coat over that. Before painting the first coat I did a quick wipe with a cloth rag and acetone. As I had already glued a lot of styrene pieces to the polypropylene, I had to avoid those areas."

"he glue was really useful for glueing down surface plates and details."
_nc_ohc=g-dYWR8dTnUAX9oXDdy&_nc_ht=scontent-atl3-1.jpg


_nc_ohc=KREUCqtRjs0AX_wiPkk&_nc_ht=scontent-atl3-1.jpg


"And I used countersunk screws to attach the shells to my plywood armature. To fill the holes, I melted discarded poly pieces with a soldiering iron. It was the only way I could think of for filling the holes. I never got the surface perfectly smooth but with all the paint/aging it's pretty forgiving."

_nc_ohc=241r3jwUnVAAX9XUS2e&_nc_ht=scontent-atl3-1.jpg
 
Not meant to discount or contradict what Starks said. but this is how ILM's Bill George finished his

Not discounting at all. I was simply trying to advise of the difficulties in painting the substrate and to make sure all the homework is done first so you get some longevity from it. To be fair I think the acetone wash probably did more to promote adhesion than that dupli plastic primer as it will have softened the plastic, raising the surface tension.
It will be possible to paint these, it's just working out how, if Bill George's process is the answer then fantastic!. But if you think you're going to belt on some Tamiya primer and paint it like any other model its going to fail.

Cheers,
Josh
 
I used Hycote Adhesion aid for car plastics, I use it all the time now for Resin builds, there are no signs of the paint crumbling or superglued parts falling off once coated with this primer

Here's my build thread, stopped when I got a Deago Falcon, it will resume soon I hope


John
 
i have started one of these but i had to stop (for awhile on it), i have used that loctite glue and it works good.
i removed the landing gear and made doors. i then used 40 or 80 grit on the inside with epoxy glue to secure them.
for the maintenance bays i took a small poly box, lined it with plasticard to glue my detail parts to. then i used a friction weld technique to secure them in place on the inside.
https://www.youtube.com/results?search_query=plastic+friction+welding
they seem to be there really good, its been a couple years ago.
i dont know if you have searched here but at the time i was taking alot of cues from SirCharles77 build thread.
i will be following your build with great interest!!!

interesting. I will have to look into that
 
To be fair I think the acetone wash probably did more to promote adhesion than that dupli plastic primer as it will have softened the plastic, raising the surface tension.
Having done some research on the adhesion promoter products, that is exactly what they are meant to do -- soften the plastic for a period of time so they can make a good bond with paint.

And I thought the 28-inch Falcon was polyethylene, not polypropylene -- the latter is much more difficult to paint, while the former is challenging, but not to the same degree. I will say the plastic on these (as well as the big X-wings on the market around the same time) doesn't feel like polypropylene to me, for whatever that's worth. I always have the impression that polypropylene has a bit of an oily feel. I have two, with one of them still in the box. I'll have to look to see if there are any plastic identifier codes in evidence.

SSB
 
Last edited:
Having done some research on the adhesion promoter products, that is exactly what they are meant to do -- soften the plastic for a period of time so they can make a good bond with paint.

And I thought the 28-inch Falcon was polyethylene, not polypropylene -- the latter is much more difficult to paint, while the former is challenging, but not to the same degree. I will say the plastic on these (as well as the big X-wings on the market around the same time) doesn't feel like polypropylene to me, for whatever that's worth. I always have the impression that polypropylene has a bit of an oily feel. I have two, with one of them still in the box. I'll have to look to see if there are any plastic identifier codes in evidence.

SSB

I read it was Polypropylene on another forum.

Looking at my ppg cheat sheet it advises do not paint for both polypropylene and polyethylene.... in there basic form. However if its an alloy like PPF polypropylene foam or PPC adhesion wont be an issue.

I was looking at mine here last night and am going to disassemble it to look for identifier codes inside. I can find nothing externally.

To be fair considering peoples seeming success Im going to say its one of the chemical compositions and plastic primer is effective.

Cheers,
Josh
 
Last edited:
I read it was Polypropylene on another forum.
I see. I recall that back when it was originally released, many threads here on the RPF referred to it as polyethylene, and many reported good results after using the adhesion promoter spray primers. My memory of those threads is my main source for thinking it is polyethylene.

SSB
 
There is another detail kit for the side walls based on the 32" detailing that was made by FZ6 and cast by MIke Salzo. You may be interested in that. the individual parts are available on shapeways as well under 308bits. as for paint - I tried using a color recommended by a member here Beaz I think - Glick "pebble". its a really light gray that is a pretty good base color... looks just abou8t perfect after weathering., and its pretty cheap Montana Gold Acrylic Professional Spray Paint - Pebble, 400 ml can | BLICK Art Materials


Enjoy :)

Jedi Dade
 

Your message may be considered spam for the following reasons:

If you wish to reply despite these issues, check the box below before replying.
Be aware that malicious compliance may result in more severe penalties.
Back
Top