wayouteast
Sr Member
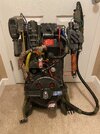
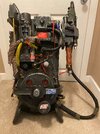
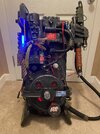
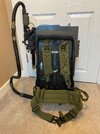
Just finished 'Savaging' my pack with some fairly easy cosmetic changes and replacements. I didn't want to slavishly reproduce the Phoebe pack in every detail, as this isn't Phoebe's pack... it's mine! But I did want to make the pack a tiny bit closer to the original (not that isn't pretty damn good already!)
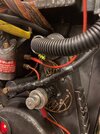
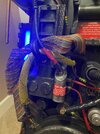
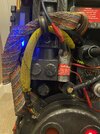
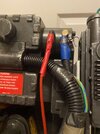
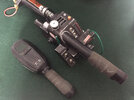
Some thoughts:
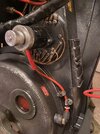
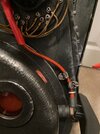
By far the hardest and most time-consuming part was getting the old ribbon cable out of the clamp, and in the end I used the 'side-cutters and brute force' technique that Adam Savage demonstrates in his video, being very careful not to damage the clamp itself. I had to extend the slot slightly with a Dremel and a narrow grinding bit. Then I fixed the new ribbon in place with lots of superglue and crossed fingers.
Getting the pack open to get to the other ends of the cables was easier than I thought but still a bit scary. Even with all the screws out it still takes a bit of leverage to come apart. Don't do what I did - forget the unscrew the inner bit of the cyclotron and then wonder what's stopping the pack coming apart!
When you're putting the pack back together and screwing back all 8 million tiny screws watch out especially for the two screws that hold the cylindrical fittings on the front of the pack to the left of the Clippard valve - you need three hands to hold those in place while you screw those in. And the Law of Ikea means that you will have at least one screw left over which seems to have no purpose. I had two!
Once the ladder is unscrewed it takes a bit of careful leverage to pop off even once both the screws are out. There's a plastic cylinder which slides tightly over a sort of peg at the bottom end.
I didn't bother fixing the two rubber cables back on the inside of the pack. It was enough of a struggle to get the wider ribbon cable and both the other cables through the small hole they all go through to make me pretty sure they're not going to go anywhere, but I did screw the inner clamp back in place on top of the ribbon cable.
Rub 'n' Buff does not like the soft plastic/rubbery stuff the 'cables' are made out of. It looks fine, but I'm pretty sure it will need renewing on a regular basis since it doesn't seem to stick very well.
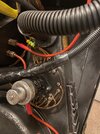
For the cyclotron cable I re-used the rubber one so I could use the original fitting still. It just seemed to easiest thing to do. So I placed around 30 or so lengths of coloured wires all around the lower part of the original cable, securing them in place with black electrical tape just above the moulded fitting and just below the moulded 'sleeve'. Then I added the real spiral wrap over them and placed the new PET sleeving over all that. The new cable is therefore slightly fatter than it should be but not enough that anyone but the hardcore rivet counter would notice! Using this method I could get the new look I was after while still being able to attach the cable back to the cyclotron just as before. I used a(n0n-accurate!) Jubilee clip at the bottom end, too, for added security.
Watch out for washes when you're weathering the PET sleeving. It goes green regardless of the colour of the wash! Weathering powders make a much nicer aging effect.
Someone has pointed out that some of the moulded 'electrical tape' might actually be intended to be heatshrink tubing, and I think they may be right.
Anyway, I think these relatively minor changes add just a little bit more to an already fantastic replica.
- Added real electrical tape (just wrapped around the moulded 'tape')
- Used 'European Gold' Rub 'n' Buff on the connectors that should be brass
- Drilled out and replaced the moulded cap head screws on the 'ladder' with real ones
- Replaced the 'P' clamp with a real one
- Replaced the Clippard valve with a 3D-printed resin one (with label from Etsy and aluminium tape for the metal bits to match the one I did on my wand.). I especially like the base with the moulded lettering.
- Replaced the ribbon cable with a GB2-accurate one (I would have gone with a GB1 cable but they're almost impossible to get hold of over here in the UK and the postage costs from the US are prohibitive, and at least with the GB2 one there's still continuity with the previous movies!)
- Added wires and spiral wrap to the other cyclotron cable, and replaced the kevlar sleeve with the proper colour PET sleeving (from a seller on Etsy)
- Added some exposed wires here and there where the hoses have 'split'
- Added some real Jubilee clips
- Re-routed one of the red cables and the copper wires to match the original Phoebe pack
- Got rid of some of the more egregious and obviously 'painted' weathering, and added some more subtle general weathering (especially of the new stuff) with silver Rub 'n' Buff, washes and weathering powders
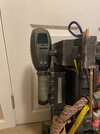
- Added lots of extra electrical and gaffer tape for an added 'wear and tear' look. The olive drab gaffer tape is to match the tape I used on the wand to replace the moulded tape, and I also used it on the handle of my PKE meter.
- Attached the pack to an (LW2) Alice frame and added padding to the top of the frame


Some thoughts:
By far the hardest and most time-consuming part was getting the old ribbon cable out of the clamp, and in the end I used the 'side-cutters and brute force' technique that Adam Savage demonstrates in his video, being very careful not to damage the clamp itself. I had to extend the slot slightly with a Dremel and a narrow grinding bit. Then I fixed the new ribbon in place with lots of superglue and crossed fingers.
Getting the pack open to get to the other ends of the cables was easier than I thought but still a bit scary. Even with all the screws out it still takes a bit of leverage to come apart. Don't do what I did - forget the unscrew the inner bit of the cyclotron and then wonder what's stopping the pack coming apart!
When you're putting the pack back together and screwing back all 8 million tiny screws watch out especially for the two screws that hold the cylindrical fittings on the front of the pack to the left of the Clippard valve - you need three hands to hold those in place while you screw those in. And the Law of Ikea means that you will have at least one screw left over which seems to have no purpose. I had two!
Once the ladder is unscrewed it takes a bit of careful leverage to pop off even once both the screws are out. There's a plastic cylinder which slides tightly over a sort of peg at the bottom end.
I didn't bother fixing the two rubber cables back on the inside of the pack. It was enough of a struggle to get the wider ribbon cable and both the other cables through the small hole they all go through to make me pretty sure they're not going to go anywhere, but I did screw the inner clamp back in place on top of the ribbon cable.
Rub 'n' Buff does not like the soft plastic/rubbery stuff the 'cables' are made out of. It looks fine, but I'm pretty sure it will need renewing on a regular basis since it doesn't seem to stick very well.
For the cyclotron cable I re-used the rubber one so I could use the original fitting still. It just seemed to easiest thing to do. So I placed around 30 or so lengths of coloured wires all around the lower part of the original cable, securing them in place with black electrical tape just above the moulded fitting and just below the moulded 'sleeve'. Then I added the real spiral wrap over them and placed the new PET sleeving over all that. The new cable is therefore slightly fatter than it should be but not enough that anyone but the hardcore rivet counter would notice! Using this method I could get the new look I was after while still being able to attach the cable back to the cyclotron just as before. I used a(n0n-accurate!) Jubilee clip at the bottom end, too, for added security.
Watch out for washes when you're weathering the PET sleeving. It goes green regardless of the colour of the wash! Weathering powders make a much nicer aging effect.
Someone has pointed out that some of the moulded 'electrical tape' might actually be intended to be heatshrink tubing, and I think they may be right.
Anyway, I think these relatively minor changes add just a little bit more to an already fantastic replica.

