Analyzer
Master Member
not with my spelling though sometimes
I left off a "c" since you weren't finished yet (at least that's the story I am sticking to)
not with my spelling though sometimes
I left off a "c" since you weren't finished yet (at least that's the story I am sticking to)
May be slow, but the results are worth it
looks good, brother!
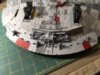
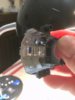
Thanks brother, though the pics are kinda dark huh...
i always forget about thatA little... You should use Photoshop Elements on your phone to adjust it... works great for quick touchups.
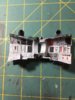
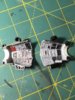
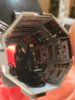
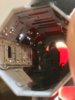
The gunbays are moulded so well. I just don't understand why Bandai chose to make the upper seam go through the middle of the wall, rather than angling them and making the join at the corner.
That same though crossed my mind when i did the ventral a few weeks back. and something different would have been nice for the ramp ceiling. I made a joint strip for that but I'm sure that not exactly what it's supposed to look like. maybe they figured no one would be looking that close? i guess they don't know us here at the RPF, do they
Hm. Now I'm tempted to make a replacement ceiling for the gunbays. Even when painted you can see the seam down the middle.
any of you guys remember that stop-motion cartoon that was on Sunday mornings after church...Gumbie and POKIE! LOL
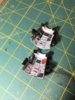
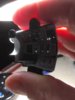
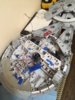
I spent a little time with 1500 grit wrapped around a pencil, polishing the locator holes for the mandibles. I want those to slide down snug and hold straight but still come back off easily in the even of needed repairs. I think I mentioned it before, but I'm doing the same with the upper hull. Snug fit at the very end of the contact but nothing more.