Nerf Gun Props? YES!

That's good advice there nomuse :thumbsup


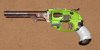
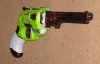
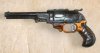
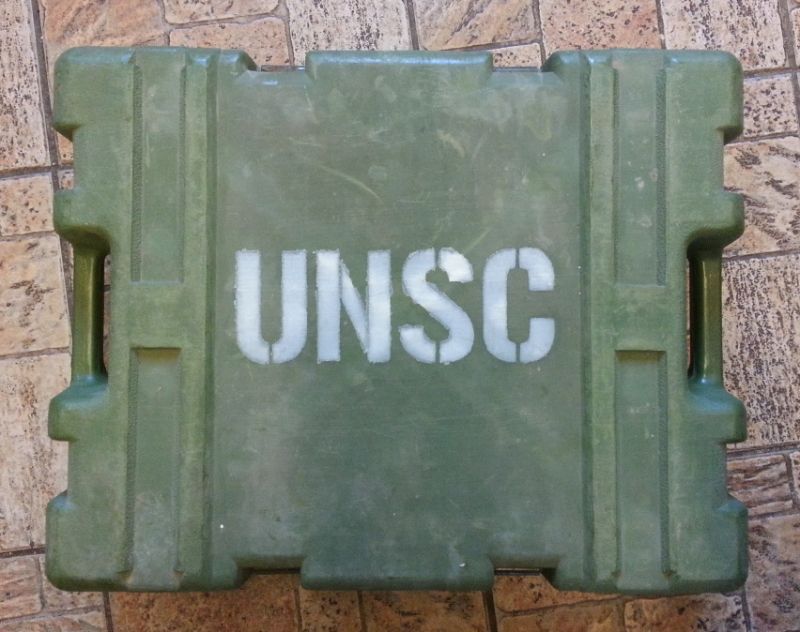
My current nerf project/commission is nearly complete, just working on the weathering. The case for it arrived on monday, so made a stencil and got spraying (couldn't find any official UNSC fonts so went with the closest I could find). I decided not to make the stencil too neat so it gives it that military "make do" look.

 
Started breaking a sweat trying to get this job all finished for Saturday, still got a couple small things left to do. I could finally cut the foam for the case today though, so prematurely assemble the parts for a quick test fitting:


I also had to simplify the paint scheme as there just wasn't time for the paint to dry properly with the weather starting to turn here, but hopefully I'll just have time to take one last shot of it fully assembled before I hand it over.
 
For a lot of gap filling jobs, I use my home made plastic goop.

Plastic goop is made by putting Acetone and styrene off cuts in a glass jar (preferably with a lid). Very handy stuff as you can make it as thick or runny as required by adjusting the amount of acetone/styrene in the mix. Once the acetone has evaporated, the styrene becomes solid plastic again and can be cut, drilled sanded and painted as normal :thumbsup
 
ImageUploadedByTapatalk1412379515.319602.jpg
First Nerf prop disassembled and sanded, now for a base paint. Any recommendations for a good gunmetal black?
We'll see how long this takes, I don't get to paint until my daughter's Elsa dress is finished...
The joys of being the only crafter in the house and two kids that want you to make the cool stuff ie hardest stuff.


I'm a leaf on the wind.
 
View attachment 384586
First Nerf prop disassembled and sanded, now for a base paint. Any recommendations for a good gunmetal black?
We'll see how long this takes, I don't get to paint until my daughter's Elsa dress is finished...
The joys of being the only crafter in the house and two kids that want you to make the cool stuff ie hardest stuff.


I'm a leaf on the wind.

I've had good results with this, though it might not be exactly what you have in mind. Looks a bit like worn-smooth cast iron.
 
I've had good luck with flat black rubbed with graphite dust. Then a little dry-brushed silver to pick out the edges.
 
Now that you say it, I would like to see someone do a mod with a longer barrel.

Here's some WIP pics of my 'Definitely Not Mal's Pistol'. The barrel is from a cowboy gun-shaped TV remote control I found at the 99p shop a while back. I had to disable the firing mechanism; but it still cocks.
 

Attachments

  • 01.jpg
    01.jpg
    115.6 KB · Views: 350
  • 02.jpg
    02.jpg
    142.6 KB · Views: 255
Here's some WIP pics of my 'Definitely Not Mal's Pistol'. The barrel is from a cowboy gun-shaped TV remote control I found at the 99p shop a while back. I had to disable the firing mechanism; but it still cocks.

Holy crap, you finally found a cheap octagonal gun barrel. I've been looking for one of those to use for a Mal gun for so long now. I'll have to see if I can find a remote like that. The gun's looking great too. If I use the same Nerf gun as the base for my Mal's pistol, I'll also probably try to mod the handle/trigger area.
 
Holy crap, you finally found a cheap octagonal gun barrel. I've been looking for one of those to use for a Mal gun for so long now. I'll have to see if I can find a remote like that. The gun's looking great too. If I use the same Nerf gun as the base for my Mal's pistol, I'll also probably try to mod the handle/trigger area.

Good luck - those zappers were all over the place a few years ago here in the UK; but now you just can't find one anywhere. I'm not going to touch the grip or trigger area on mine, I'm going for something like an earlier model Mal, or more likely a cheap and well-used local knock-off.
 
Good luck - those zappers were all over the place a few years ago here in the UK; but now you just can't find one anywhere. I'm not going to touch the grip or trigger area on mine, I'm going for something like an earlier model Mal, or more likely a cheap and well-used local knock-off.

Here it is, the 'Definitely Not Mal's Pistol'. The big finger screws are from an old printer cable. Hope you like it.
 

Attachments

  • 01.jpg
    01.jpg
    153.9 KB · Views: 245
  • 02.jpg
    02.jpg
    140.5 KB · Views: 247
  • 03.jpg
    03.jpg
    106.6 KB · Views: 206
  • 04.jpg
    04.jpg
    113.3 KB · Views: 201
  • 05.jpg
    05.jpg
    131.6 KB · Views: 242
  • 06.jpg
    06.jpg
    135.1 KB · Views: 255
Finished my base coat and reassembled. I can see why everyone says this takes patience. I can see where I did not heed those wise words. Thank goodness this was a practice round.ImageUploadedByTapatalk1412995747.305139.jpg
Next step is the rub n buff. Any tips on working with that stuff?


I'm a leaf on the wind.
 
Any chance of a referance pic? I'll see if I can get an equivalent over here in the UK.

The depth of the plastic around the hole is surprisingly thick, so it should be plenty strong enough to support a light of some kind.

I do have these that I was going to use as gunlights for the boys:
http://i1225.photobucket.com/albums/ee395/Can-obi/8a2b9a93.jpg
but if the light you suggested looks good I might go with that instead.

What brand of flashlight is this? Love the look of it.
 
Finished my base coat and reassembled. I can see why everyone says this takes patience. I can see where I did not heed those wise words. Thank goodness this was a practice round.View attachment 387978
Next step is the rub n buff. Any tips on working with that stuff?


I'm a leaf on the wind.

I dunno, I'm hands-on with the stuff. Blame coming up through theatrical scenery and make-up. Not a great habit when there's stuff like Bondo around. Anyhow, I've tended to apply Rub'n Buff with my fingers, straight from the tube. With the aid of a (previous ruined) small paintbrush to shove it into the cracks. Apply too much and wipe off the excess -- you can feel it, the excess sort of crumbles off. Then rub. You really can not over-rub. Getting it warm is part of the trick; rub until the friction melts the wax base a little. Keep rubbing; when you think it is as shiny as it's going to get, it will probably get shinier if you keep working.

But that's for a solid shiny metal look. You can also dry-brush with the stuff. I've used both fingertips and paper towel for this (not had a lot of luck with brushes or sponges). Put a little bit of Rub'n Buff on the tool, wipe off gently on a piece of scrap. Then apply the tool to the surface you are dry-brushing, working from the edges you want to define. Basically, wipe as if you were trying to scrape the last of the Rub'n Buff off your tool with the sharp edges and other projecting bits.

It is a subtler technique than using silver paint.
 
AlphaEarth

They were from B&Q IIRC. I don't think they still sell them now as I got them quite a while back. I might still have one kicking around actually, I'll have a rummage to see if I can find it in the next few days. If so , I'll drop you a PM ;)
 
Last edited by a moderator:

Your message may be considered spam for the following reasons:

If you wish to reply despite these issues, check the box below before replying.
Be aware that malicious compliance may result in more severe penalties.
Back
Top