Yoda VD lightsaber discussion

Here are a few shots of the kit wheels (click to enlarge):

[url]https://farm2.staticflickr.com/1496/26642472822_d2386700ea_c.jpg[/URL]

[url]https://farm2.staticflickr.com/1632/26710226816_71853f47bd.jpg[/URL]

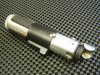
The kit has 3 sizes of wheels - 2 Front, 2 Rear, and 1 Spare (labeled F, R, S in the image). The spare is very similar to the front wheel, and has nearly identical thickness, but it's about 1 mm smaller in diameter, with a sharper/narrower outer rim. Without seeing a spare and front wheel side by side you would be hard-pressed to tell the difference :)

aaahhh this is all clear now... looks like photo R is the one we want. much taller then the rest... looks like I got the short version
 
Yup on front.

So I'm pretty sure I have the spare right now, and on my bolsey... I dunno. I mean when I hold them up to each other I can barely see a difference... The one I sent to a member was "identical" as well... meaning I held them against eachother to make sure they were the same.

So what, I had 3 spares? and 2 of those spares were sold to me by the same guy, so he had two kits and sold me two spares?

They must be really close.

Attached is a great shot of the original... which I eye ball to be pretty dame close to what I have. I dunno.

Now that I think about it though, I always felt it looked a wee small in diameter.

The one I sent away had the exact same diameter though, so ...3 spares? This is all very irritating.
 

Attachments

  • YodasLightsaber-RealProp4_zpsdd6ef8ee.jpg
    YodasLightsaber-RealProp4_zpsdd6ef8ee.jpg
    136.8 KB · Views: 125
The spare and the front wheels are extremely similar. Any difference in manufacturing variation could possibly obscure the difference between them.
 
Yup on front.

So I'm pretty sure I have the spare right now, and on my bolsey... I dunno. I mean when I hold them up to each other I can barely see a difference... The one I sent to a member was "identical" as well... meaning I held them against eachother to make sure they were the same.

So what, I had 3 spares? and 2 of those spares were sold to me by the same guy, so he had two kits and sold me two spares?

They must be really close.

Attached is a great shot of the original... which I eye ball to be pretty dame close to what I have. I dunno.

Now that I think about it though, I always felt it looked a wee small in diameter.

The one I sent away had the exact same diameter though, so ...3 spares? This is all very irritating.

That would be weird luck if all 3 were spares, but yeah, they're very close.

Judging from the shape of the sprue in your photo, and the thinner rim, it does look like you have the spare. Really the only visual distinction between the two is the thinner outer rim... here's a zoomed in view:


The flange on the spare's outer edge is sharper and narrower than the front wheel, where it is flatter and wider.

The spare also has a small locating tab in the mounting socket on the back, seemingly so that it will sit at a certain angle when attached to the model -- the front wheels don't have a tab there. But that doesn't affect the look or function of the part when building this replica :)
 
It gets pretty ridiculous... if I can't see it without holding them against each other, or trying to compensate for lighting, angle... then why do I care?

OCD and 10 years of being a clean up artist in feature animation - Where a pencil line that's a hair off would ruin your day.
 
Well appears the two I have are spares.

And I may have sent away the right one. ha.

This is why I hoard parts, bites me in the ass when I sell early! :facepalm
 
Well appears the two I have are spares.

And I may have sent away the right one. ha.

This is why I hoard parts, bites me in the ass when I sell early! :facepalm

Hey! Good news is the one you sent me must be the correct one! :D

I'm hoping I can get some good reproductions made for us all.
 
Ha Ha, wait... that means you were trying to pawn off some garbage spare wheel onto me.... ;)

I thought I had 3 of the correct... I did not know a spare even existed.

You should have a look at the wheel... you should check if you have the bump on the back... one of mine does for sure, haven't checked the one on my bolsey build.
 
I'm not home now, but I do believe mine is a spare as well. I always thought we wanted the tall one! Ha! I gotta thank you Williams, those pictures really cleared it all up
 
I figured out tonight that authentic PEM 440 nuts are not magnetic. I know its trivial but worth putting out there.
 
Yup. Both spares.

for the group, I hope I passed up the proper one. For myself, so I don't glare angrily at my yoda sabers, I hope I had three spares :D
 
Yup. Both spares.

for the group, I hope I passed up the proper one. For myself, so I don't glare angrily at my yoda sabers, I hope I had three spares :D

I would hope so, your Yoda sabers look remarkable. And the differences between these wheels are so minute. And regardless, IMO all variations of the Lambo wheel serve the saber justice, they all look good to me.
 
ok so, i got home super late today but there was still sunlight out. my praco has the black knurled cap. it has knurling all the way around, it doesn't have the holes drilled. but it is anodized black.. so its the right looking cap except its black instead of raw aluminum

i was reading all night last night that oven clean removes it, so since there was some daylight left i decided to give it a go. i usually take plenty of pictures but i was in a rush to beat sundown.

i went to the recycling bin and grabbed a tin can ( corn ) i washed it out and put it on my work area outside. then i tied a string to the spring on the end of the praco cap. so now the praco end cap is dangling by a string. i got a milk jug and cut the top off and filled it with warm soapy water, and grabbed a rag along with rubber gloves and a wire brush.

i sprayed the oven clean inside the clean corn can until there was about 1" of foam. i then dropped the cap in it holding the string so i can pull it up and check how much anodize is left. to my surprise it was like instant the second the cap touched the foam! i would dunk the cap in the oven clean foam, then dunk in the warm water. i did this roughly 10 times. in all honesty it was less then 1 minute of dunking. this i timed because i didnt want to burn the aluminum like i purposely did on the V2 to show age

during these dunkings towards the end the black anodize was still inside some of the knurling, not to much but enough to be noticeable. i just hit it with the wire brush and done. like i said no more then a minute. it looked alittle dull, but i think it was just the age of the aluminum, so i then brought it inside and filled the sink with warm soapy water and hit it with scotchbite. brought it right back to life. i will post a finished picture tomorrow

i just wanted to share with everyone if you see a praco in the future with the black knurled cap its not the end of the world, that black anodize falls right off with oven clean!

good luck
 

Your message may be considered spam for the following reasons:

If you wish to reply despite these issues, check the box below before replying.
Be aware that malicious compliance may result in more severe penalties.
Back
Top